The seedling stage is where your entire grow is won or lost before it ever really begins. I’ve watched experienced growers completely neglect these first two to three weeks, then wonder why their plants never hit their genetic potential. The truth is, everything that happens in the seedling stage — root architecture, leaf development, environmental conditioning — sets the foundation for every gram you’ll eventually harvest. Whether you’re popping your first-ever bean or you’re a seasoned grower dialing in a new pheno of Blue Dream or Northern Lights, understanding exactly what your cannabis seedling needs on each specific day is the difference between a thriving canopy and a stunted mess. This is the deep-dive day-by-day guide I wish I’d had when I started growing twelve years ago.
Our cannabis blog covers the full seed-to-harvest journey, but this article zeroes in on the seedling stage specifically — because it deserves its own spotlight. For the broader picture, the complete home growing guide is your best companion piece to this one.
- What the Cannabis Seedling Stage Actually Is (And When It Starts)
- The Real-World Growth Gap: What Reddit Growers Actually See
- Cannabis Seedling Stage: Day-by-Day Breakdown (Days 1–14)
- Environment Specs: The Numbers That Actually Matter for Seedlings
- Common Seedling Problems: Identification and Fixes
- Lighting for Seedlings: What to Use and How to Set It Up
- Soil, Medium, and Container Selection for Seedlings
- When Does the Seedling Stage End? Visual Markers for Transition
- Indoor vs. Outdoor Seedling Stage: Key Differences
- Strain-Specific Seedling Considerations
What the Cannabis Seedling Stage Actually Is (And When It Starts)
Before we go day by day, let’s get the timeline straight. Germination — the process of your seed cracking open and sending out a taproot — takes anywhere from 3 to 10 days depending on your method, seed age, and environment. The seedling stage doesn’t begin until that sprout breaks the soil surface and opens its first leaves. From that moment, you’re looking at roughly 2 to 3 weeks of seedling development before your plant transitions into the vegetative stage. The total cannabis grow from seed to harvest runs 10 to 32 weeks depending on strain and method, and the seedling window is a small but disproportionately critical slice of that timeline.
The seedling stage is officially complete when your plant has developed 4 to 8 true leaves (not counting the initial cotyledons) and is showing vigorous, consistent new growth. At that point, the root system has established enough to support the demands of the vegetative phase, and you can start thinking about training techniques like those covered in the Sea of Green method.
The Real-World Growth Gap: What Reddit Growers Actually See
Here’s something that confuses first-time growers constantly, and I want to address it head-on before we get into the day-by-day breakdown. Most guides — including some well-known ones — will tell you a 2-week-old seedling should be around 2 to 3 inches tall. That’s a textbook average. In reality, Reddit growers regularly report 2-week-old seedlings reaching 7 to 9.5 inches tall, especially in warm, humid environments with strong lighting. I’ve personally seen the same thing in my Denver grow room when conditions are dialed in perfectly.
The difference comes down to a few key variables: genetics, light intensity and distance, temperature, humidity, and growing medium. An outdoor seedling in a ceramic pot in a warm climate (think California or Florida) will behave completely differently than an indoor seedling in a fabric pot under an LED in a Colorado basement. Neither is wrong — they’re just different expressions of the same genetics under different conditions. The goal isn’t to hit a specific height number; it’s to see healthy, proportional development with good internode spacing and strong green coloration.
Stretchy, tall seedlings aren’t always a win, either. If your seedling is reaching 8 inches in two weeks but the stem is thin and pale, that’s etiolation — the plant is stretching toward insufficient light. Healthy fast growth means a sturdy stem, deep green cotyledons, and tight internode spacing. Keep that visual picture in mind as we walk through each day.
Cannabis Seedling Stage: Day-by-Day Breakdown (Days 1–14)
This is the section I built from my own grow journal combined with everything I’ve learned running dozens of seedling batches over the years. I’m breaking this into the most useful daily checkpoints so you know exactly what to look for and what to do.
Days 1–2: Emergence and the First Light
Your seed has germinated and the sprout is either just breaking the soil surface or has just emerged. You’ll see the seed shell sometimes still attached to the closed cotyledons — those first two rounded leaves. Don’t panic and don’t try to remove the shell manually unless it’s been stuck for more than 12 hours and is clearly preventing the leaves from opening. Usually, a light misting of water on the shell softens it enough for the plant to push free on its own.
At this point, the seedling is tiny and fragile. Your light should be positioned at roughly 24 to 30 inches above the canopy if you’re running a standard LED panel. The seedling doesn’t need intense light yet — it’s running on the energy stored in the seed. Keep your humidity dome on if you’re using one, and resist the urge to water heavily. The medium should be lightly moist, not soaked.
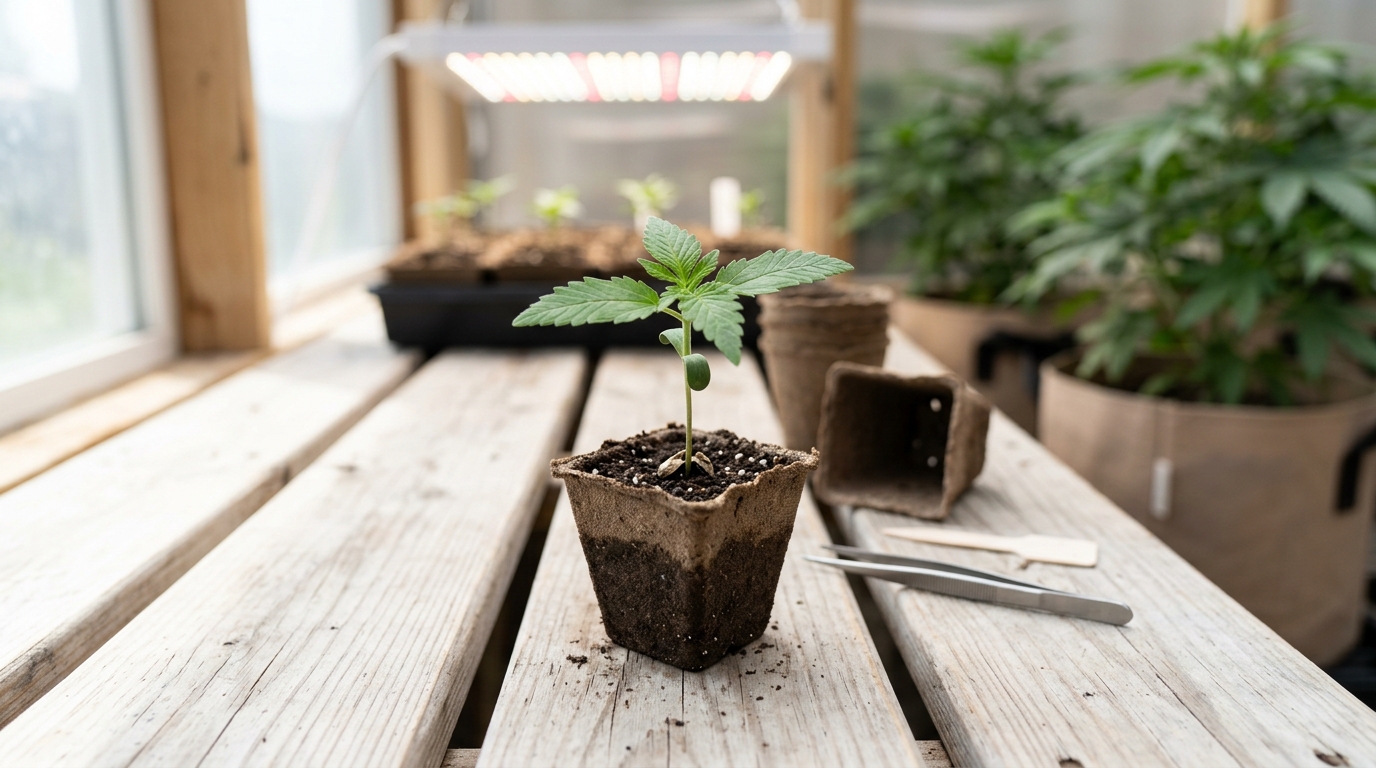
Days 3–4: Cotyledons Open, First True Leaves Emerge
By day 3 or 4, the cotyledons should be fully open and facing the light. These aren’t “real” cannabis leaves — they’re embryonic leaves packed with stored nutrients that fuel the seedling’s first days of life. They’re round, smooth, and usually a bright, almost yellow-green color that deepens as chlorophyll production ramps up.
You should also start to see the very first set of true cannabis leaves emerging from the center — these will have the classic single-finger leaf shape typical of the earliest true leaves. This is a great sign. Your seedling is officially photosynthesizing and starting to build its own food supply. Keep the humidity between 65% and 70% relative humidity and temperature around 70–77°F (21–25°C). These are the conditions where I’ve consistently seen the fastest, healthiest early development in my grow room.
Days 5–7: First True Leaf Set Fully Develops
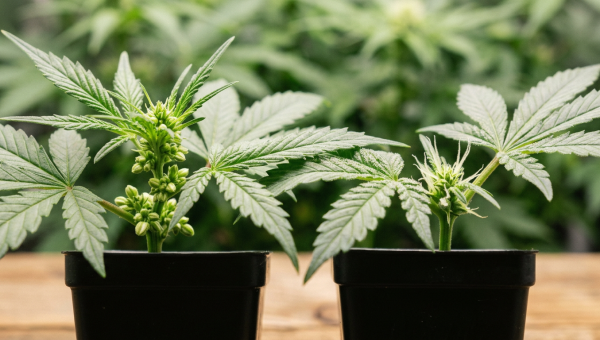
By the end of the first week, your seedling should have a fully developed first set of true leaves. These typically show one to three fingers (leaflets) per leaf, which is normal — early true leaves don’t show the full 5- or 7-finger structure yet. The stem should be standing upright and have some rigidity to it. If it’s flopping over, you may need to add a gentle breeze from a small fan to encourage stem strengthening, or your light may be too far away causing stretch.
This is also when I do my first real watering assessment. The seedling’s root system is still tiny at this point. In a 3- to 5-gallon pot, you’re looking at approximately 2 cups (500ml) of water per plant, and you should only be watering once every 4 to 7 days depending on your climate and setup. The key indicator: water when the top inch of soil is dry and the pot feels light when lifted. Overwatering at this stage is the number one killer of cannabis seedlings — it suffocates roots and invites damping off.
Days 8–10: Second True Leaf Set Appears
Week two kicks off with your second set of true leaves emerging. These will typically show 3 fingers and start to look more recognizably like cannabis. The plant is now in full photosynthetic mode, and you’ll notice the growth rate starting to accelerate noticeably. Internode spacing — the distance between leaf sets along the stem — is your key health indicator here. Tight internodes mean your light is at the right distance. Wide spacing means the plant is stretching for more light.
I typically start moving my LED panels slightly closer around day 8 or 9, dropping from 28 inches to about 20 to 24 inches above the canopy. You want your seedlings receiving somewhere in the range of 200 to 400 PPFD (micromoles per square meter per second) at this stage — enough to drive solid photosynthesis without stressing the plant. Maya Chen has done some excellent deep-dives on the science of light spectra and PPFD for young plants that are worth reading if you want to go deep on the photobiology side of this.
Days 11–13: Third Leaf Set and Rapid Development
By days 11 through 13, you should be seeing your third set of true leaves developing, and those leaves will start showing 5 fingers. The plant is visibly changing day to day now. Root development below the soil is accelerating in parallel, and this is when the plant starts to become noticeably more resilient. The stem should be noticeably thicker than it was on day 1, and the overall structure should feel sturdy.
This is the window where I start watching VPD more closely. The VPD guide is essential reading for this transition period — getting your vapor pressure deficit right in the 0.4 to 0.8 kPa range for seedlings keeps transpiration healthy without stressing the plant. I’ve seen more seedling problems traced back to poor VPD management than almost any other single factor.
Day 14: The Two-Week Assessment
Day 14 is your first real checkpoint. A healthy 2-week-old cannabis seedling should have 2 to 3 sets of true leaves fully developed, with a fourth set emerging. The cotyledons may still be present and green, or they may be starting to yellow slightly — both are normal. The plant should be standing upright with a visibly thickening stem and deep green coloration throughout.
If your seedling still looks minimal at day 15 — just barely showing its first true leaves with almost no vertical growth — don’t panic immediately. Growth rate variability is real. Some phenos are slower starters. Some setups run slightly cooler or have lower light intensity that slows things down. As long as the plant is green, the leaves aren’t drooping or showing deficiency symptoms, and the medium isn’t waterlogged, give it another few days before troubleshooting aggressively.
Environment Specs: The Numbers That Actually Matter for Seedlings
Environmental and nutritional requirements differ across each growth stage, and the seedling stage has some of the tightest tolerances of the entire grow. Young plants are most vulnerable during the first 2 to 3 weeks, and environmental swings that a mature plant would shrug off can set a seedling back significantly or kill it outright. Here’s what I keep dialed in during seedling stage in my grow room.
70-80°F
60-70%
400-600 μmol/m²/s
16-18 hours daily
6.0-7.0
Moist, not waterlogged
Gentle, consistent airflow
None or very dilute
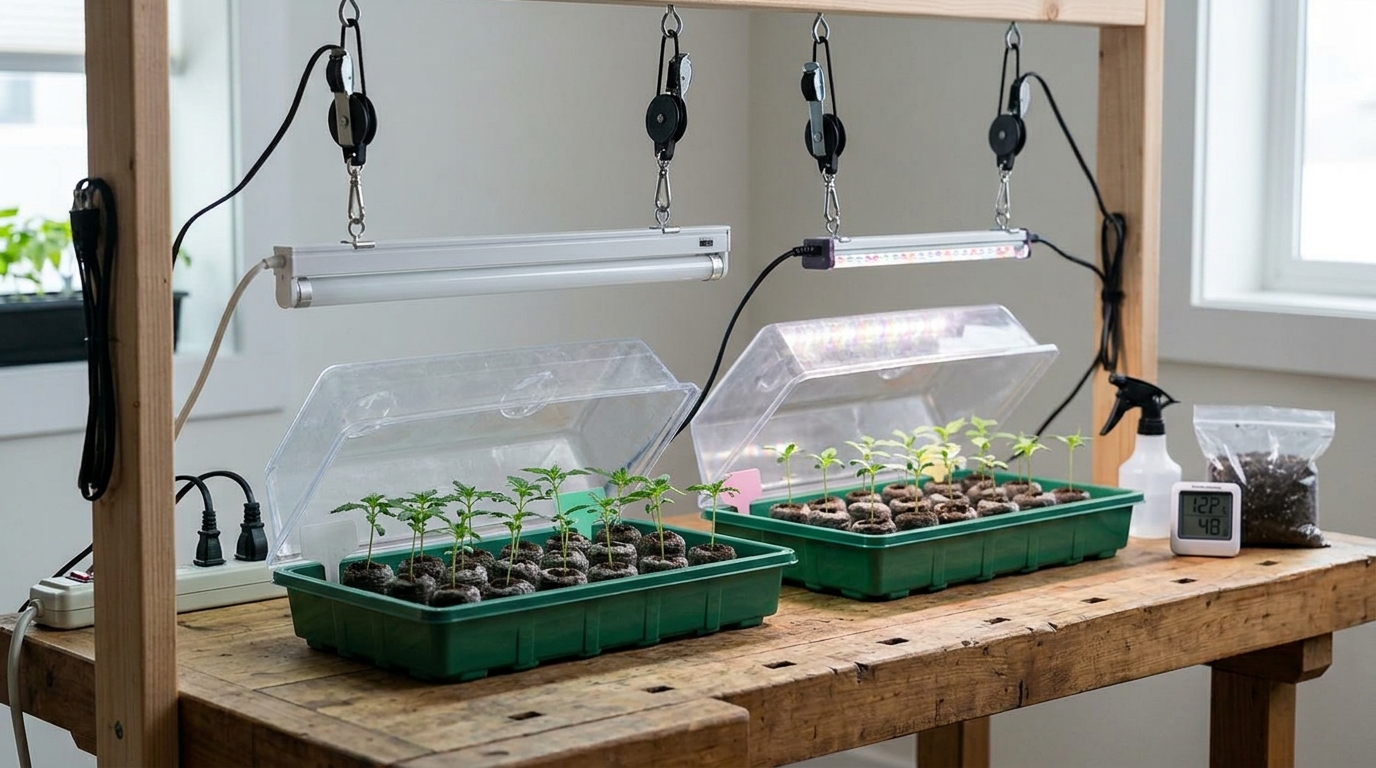
One thing I always stress to new growers: the humidity dome is your friend in the first week, but it becomes a liability if you leave it on too long. I typically start venting the dome for a few hours a day around day 7 or 8, then remove it entirely by day 10 to 12. This gradual acclimatization prevents the humidity shock that can stress seedlings when you yank the dome off all at once.
Soil pH is something I see new growers completely ignore, then wonder why their seedlings look pale or spotted. Cannabis seedlings in soil need a pH between 6.0 and 7.0 at the root zone. Outside that range, nutrient lockout happens even if the nutrients are present in the medium. I always pH my water before every watering — it’s a 30-second step that saves hours of troubleshooting.
Common Seedling Problems: Identification and Fixes
This is the section that separates growers who thrive from growers who constantly troubleshoot. I’ve dealt with every one of these issues personally, and I’ve helped dozens of newer growers diagnose them. The leaf diagnosis guide covers the full plant lifecycle, but here I’m focusing specifically on the seedling-stage versions of these problems.
Stretching (Etiolation)
Stretching is the most common seedling problem I see, and it’s almost always a light issue. When your seedling is reaching upward with a thin, pale stem and wide internode spacing, it’s telling you the light is too far away or too weak. The fix is simple: move your light closer. If you’re running a quality LED at 28 inches and your seedling is still stretching, drop to 22 inches and reassess after 24 hours. You can also bury the stretched stem slightly deeper when you transplant — the buried portion will develop roots and give the plant a stronger base.
Damping Off
Damping off is the nightmare scenario for seedling growers. It’s a fungal condition — usually caused by Pythium, Fusarium, or Botrytis — that causes the stem to thin, pinch, and collapse at the soil line. The seedling essentially falls over and dies rapidly. Prevention is everything here because there’s no saving a seedling once damping off takes hold. The causes are almost always overwatering, poor airflow, or contaminated growing medium. I always use fresh, sterile medium for seedlings, never reused soil. I keep a small fan running at low speed to maintain airflow without direct wind stress on the plants. And I never let the surface of the medium stay wet for extended periods.
If you’re dealing with recurring damping off in your grow space, hydrogen peroxide (H₂O₂) diluted in water (3% H₂O₂ at a ratio of roughly 1 part H₂O₂ to 10 parts water) can be used as a soil drench to kill fungal pathogens. It’s a short-term intervention, not a long-term solution — address the root cause of overwatering and poor airflow first.
Yellowing Cotyledons vs. True Leaf Yellowing
Yellowing cotyledons after the first week or two are completely normal. The cotyledons are a one-time energy source — once the plant has used their stored nutrients to fuel early growth, they yellow and drop off. Don’t add nutrients in response to yellowing cotyledons. Nutrient supplementation should be held off when cannabis plants are still seedlings — the starter nutrients in quality seedling mix are sufficient for the entire seedling stage, and adding more will cause nutrient burn.
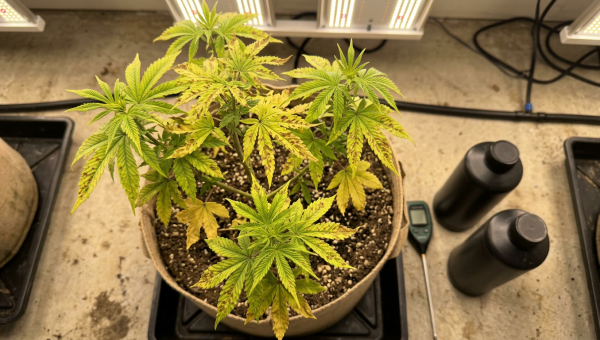
Yellowing in the true leaves is a different story. If your first or second set of true leaves is yellowing, that’s a potential sign of pH lockout, overwatering, or (less commonly) a genuine deficiency. Check your pH first — it’s the cause 80% of the time in my experience. If pH is correct and you’re watering properly, then consider whether the medium might be depleted or whether a light magnesium deficiency might be developing. Magnesium is a critical component of chlorophyll for photosynthesis, and Epsom salt (magnesium sulfate) is a common, affordable fix — more on that in the FAQ section.
Slow or Stunted Growth
If your seedling seems stuck — barely growing for days at a time — the most common culprits in my experience are: temperatures below 65°F (18°C) chilling the root zone, overwatered medium suffocating roots, pH imbalance causing nutrient lockout, or a weak or failing seed. Root-bound seedlings in too-small a starter container can also stall growth, which is why I always start in a container large enough to give roots room to develop without needing an early transplant.
Travis Cole has some great insights on outdoor seedling growth timing that are worth checking out if you’re starting seeds outdoors — outdoor environments in states like Oregon, California, or Colorado have very different temperature and humidity dynamics than a controlled indoor setup, and those variables affect seedling growth rates significantly.
Lighting for Seedlings: What to Use and How to Set It Up
Lighting during the seedling stage is a balance between giving the plant enough photosynthetic energy to grow vigorously and not overwhelming delicate, undeveloped tissue. In my grow room, I run LED panels for seedlings — they run cooler than HID lights, which reduces the risk of heat stress at close distances, and modern full-spectrum LEDs provide the blue-dominant spectrum that seedlings thrive under.
For photoperiod strains (the ones that require a light schedule change to trigger flowering), I run an 18/6 light cycle from day one of the seedling stage — 18 hours of light, 6 hours of darkness. This is the standard for indoor vegetative and seedling growth. The photoperiod light cycle guide covers this in much more detail if you’re working with light-sensitive genetics.
Autoflowering seedlings follow the same environmental requirements but don’t depend on light schedule changes to flower. Many auto growers run 20/4 or even 24/0 light cycles from seedling stage through harvest. I personally prefer 20/4 for autos — the 4 hours of darkness seem to support slightly better terpene development in my experience, though the science on this is still debated.
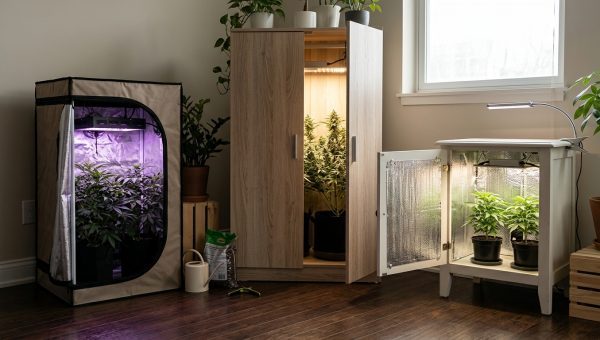
For growers setting up their first dedicated seedling space, a small T5 or quantum board LED running at reduced power is ideal. If you’re building out a full indoor setup, the indoor growing setup guide walks through equipment selection in detail, including what makes sense for the seedling stage specifically.
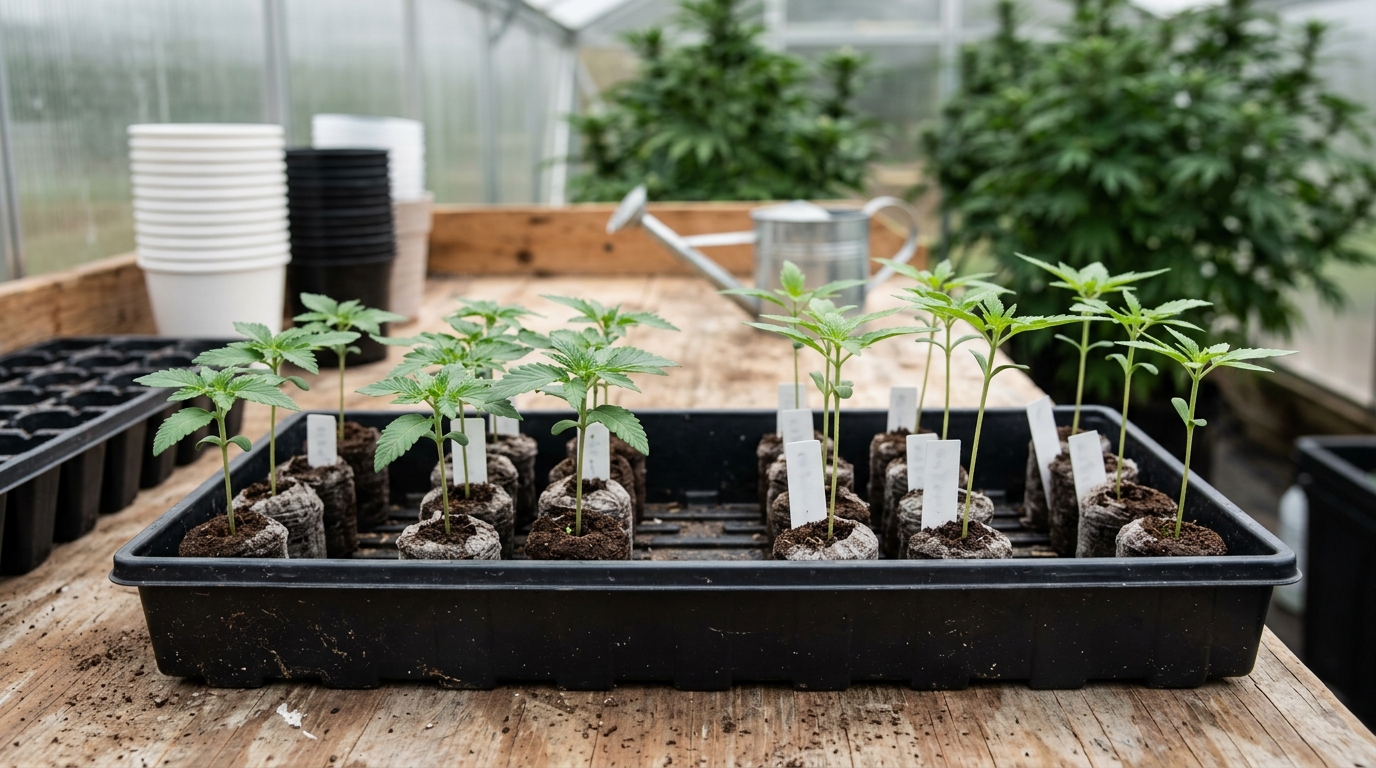
Soil, Medium, and Container Selection for Seedlings
The growing medium you choose for your seedlings has an outsized impact on how smoothly the seedling stage goes. I’ve grown seedlings in everything from premium commercial seedling mixes to straight coco coir to hydroponic systems, and each has its trade-offs.
For soil growers, a light, airy seedling mix with low initial nutrient content is ideal. Avoid heavy, nutrient-dense “super soils” for seedlings — the high nutrient concentration will burn tender root tips. I look for mixes with good perlite content (20–30%) to ensure drainage and aeration. Waterlogged, compacted soil is the enemy of healthy seedling roots.
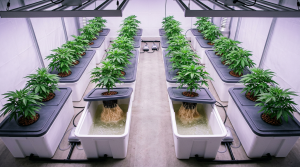
Coco coir is a fantastic medium for seedlings if you’re comfortable managing pH and nutrients more actively. It’s inert, which means you have complete control over the nutrient profile, but it also means you’ll need to start light nutrient supplementation earlier than in soil — typically around day 10 to 14 when the first true leaves are established. The hydroponic growing guide covers coco and DWC setups in depth for growers who want to explore soil-free options.
Container choice matters too. I prefer small seedling containers — 4-inch pots or Solo cups — for the first week or two, then transplant into 1-gallon containers before the final transplant to the flowering container. Smaller containers dry out more evenly and predictably, which makes watering management much easier during the vulnerable seedling stage. Fabric pots are excellent for the later stages but can dry out too quickly for tiny seedlings.
When Does the Seedling Stage End? Visual Markers for Transition
Knowing when to transition from seedling to vegetative stage is one of those things that becomes intuitive with experience, but there are clear visual markers to look for. The seedling stage is complete when your plant has 4 to 8 true leaves (beyond the cotyledons), the stem is visibly thickening and showing some rigidity, new growth is appearing consistently and quickly, and the root system has established enough that you can see roots beginning to emerge from drainage holes (if you’re in a small container).
At this point, you can start thinking about transplanting if you haven’t already, beginning a light vegetative nutrient regimen, and implementing any training techniques you plan to use. The plant is no longer fragile in the same way it was during the seedling stage, and it can handle more aggressive management.
One thing I always remind growers: don’t rush this transition. A few extra days in the seedling stage with a plant that’s still establishing roots is far better than pushing into veg with an underdeveloped root system. The roots you build during the seedling stage are the foundation for every gram of yield you’ll eventually pull. Patience here pays dividends at harvest — something the harvesting guide will make very clear when you get there.
Indoor vs. Outdoor Seedling Stage: Key Differences
The seedling stage plays out differently depending on whether you’re growing indoors or outdoors, and it’s worth addressing directly because the variables are genuinely different. Indoor growers have full environmental control — you set the temperature, humidity, light intensity, and light cycle. Outdoor growers are working with natural conditions that can vary dramatically by region and season.
In states like California, Oregon, and Colorado, outdoor seedling season typically runs from late March through May, when nighttime temperatures are warm enough to support germination and early growth without cold stress. In northern states like Michigan or Maine, outdoor seedling starts often happen indoors in March or April before transplanting outside in late May or early June after the last frost risk passes.
Outdoor seedlings in warm, humid climates can grow significantly faster than indoor seedlings under modest lighting — which explains some of those 7 to 9.5 inch two-week measurements reported by growers. Natural sunlight delivers far more PPFD than most home grow lights, especially in the middle of the day in summer. The flip side is that outdoor seedlings are exposed to pests, pathogens, and weather events that indoor growers never have to think about. Hardening off — gradually acclimating indoor-started seedlings to outdoor conditions over 7 to 10 days — is essential before leaving seedlings outside full-time.
Strain-Specific Seedling Considerations
Different genetics behave differently during the seedling stage, and it’s worth knowing what to expect from the strains you’re growing. Indica-dominant strains like Northern Lights and Granddaddy Purple tend to be stockier and slower-growing during the seedling stage, with tighter internode spacing and broader early leaves. Sativa-dominant strains like Sour Diesel and Jack Herer often show faster vertical growth and narrower leaf structure from the very beginning.
Autoflowering genetics — derived from Cannabis ruderalis — typically move through the seedling stage on a compressed timeline because they’re on an internal clock regardless of light schedule. With autos, there’s no time to recover from seedling stage mistakes — a week lost to overwatering or heat stress is a week you never get back in an 8 to 10 week total lifecycle. I’m always extra attentive with auto seedlings for this reason.
High-THC, complex hybrid genetics like Animal Mints or Kush Mints can sometimes show slightly slower, more sensitive seedling development compared to more stable, landrace-adjacent genetics. This is worth keeping in mind if you’re popping premium genetics for the first time — give them a little extra care and don’t stress them early.
Frequently Asked Questions
What should a cannabis seedling look like after 2 weeks?
At 2 weeks from emergence, a healthy cannabis seedling should have 2 to 3 sets of true leaves fully developed with a fourth set beginning to emerge. The stem should be upright and showing some thickness and rigidity. Coloration should be a consistent medium to deep green throughout. The cotyledons (the first two round leaves) may still be present and green, or they may be starting to yellow slightly — both are normal at this stage. Height can vary widely based on environment and genetics, from around 2 to 3 inches in cooler or lower-light setups to 7 to 9.5 inches in warm, well-lit conditions.
At what point is a plant no longer a seedling?
A cannabis plant transitions out of the seedling stage and into the vegetative stage when it has developed 4 to 8 true leaves beyond the cotyledons, the stem has thickened noticeably, and new growth is appearing consistently and rapidly. This typically happens 2 to 3 weeks after emergence from the soil. The visual shift is clear: the plant looks like a miniature cannabis plant rather than a fragile sprout, and the root system has established enough to support more aggressive growth and feeding.
How long does the seedling stage take for cannabis?
The cannabis seedling stage typically lasts 2 to 3 weeks after germination, which itself takes 3 to 10 days. So from the moment you plant a seed, you’re looking at roughly 3 to 5 weeks before the plant enters the vegetative stage. Autoflowering genetics may move through the seedling stage slightly faster due to their time-based growth cycle, while some slower-developing photoperiod phenos may take the full 3 weeks or slightly longer.
What does Epsom salt do for cannabis plants?
Epsom salt is magnesium sulfate, and it provides two important nutrients for cannabis: magnesium and sulfur. Magnesium is a critical component of chlorophyll, making it essential for photosynthesis — a deficiency shows up as interveinal yellowing (the leaf veins stay green while the tissue between them yellows). Sulfur is important for enzyme production and protein synthesis in cannabis plants. For seedlings specifically, Epsom salt is rarely needed since quality seedling mix usually contains adequate magnesium. It becomes more relevant in later vegetative and flowering stages, particularly in coco or hydroponic grows where you have more control over the nutrient profile.
How often should seedlings be watered?
Cannabis seedlings in 3 to 5 gallon pots should be watered approximately once every 4 to 7 days, using roughly 2 cups (500ml) per plant. The exact frequency depends on your climate, the size of your container, and your growing medium. The most reliable indicator is the “lift test” — pick up the pot and feel its weight. A dry pot feels noticeably lighter than a freshly watered one. You can also check by pressing a finger about an inch into the soil surface — water when that inch is dry. Overwatering is far more common and more damaging than underwatering during the seedling stage.
When should nutrients be introduced to seedlings?
For seedlings in quality potting soil or seedling mix, you should hold off on nutrient supplementation entirely during the seedling stage. The starter nutrients already present in the medium are sufficient for the first 2 to 3 weeks of growth. Introducing additional nutrients too early is one of the most common mistakes new growers make — it causes nutrient burn that manifests as brown leaf tips and can significantly set back development. In inert media like coco coir or hydro systems, you can begin very light nutrient supplementation (at roughly 25% of the recommended dose) once the first true leaves are fully established, around day 10 to 14.
What are the visual indicators of healthy seedling development?
A healthy cannabis seedling shows consistent medium to deep green coloration throughout, an upright stem with increasing thickness as days progress, tight internode spacing (short distances between leaf sets), new leaf sets appearing on a regular schedule, and leaves that are turgid and pointing upward or outward rather than drooping. The cotyledons should remain green and firm for at least the first week to ten days. Any yellowing, drooping, spotting, or brown edges in the true leaves during the seedling stage is a signal to investigate your pH, watering schedule, temperature, or light distance before the problem progresses.