Setting up your first indoor cannabis grow is one of the most rewarding things you can do as a cultivator, but it can also feel overwhelming fast. I remember standing in my garage in Denver staring at a pile of equipment I’d just ordered, wondering where the hell to start. Twelve years later, I’ve built setups ranging from a single 2×4 tent on a shoestring budget to multi-light commercial-scale rooms, and I can tell you this: the fundamentals never change. Get your environment dialed in, lights, ventilation, climate control, and nutrients, and your plants will do the rest. Mess those up, and it doesn’t matter how good your genetics are. This guide covers everything you need to build a successful indoor cannabis growing setup from scratch, whether you’re spending $500 or $2,000+. I’ll walk you through every component, explain the tradeoffs honestly, and give you the real-world context that most setup guides skip right over. If you’re newer to the whole process, I’d also recommend our complete growing guide alongside this article, it gives you the full seed-to-harvest picture while this guide goes deep on the physical setup itself.
- Why Your Space Choice Sets the Ceiling for Everything Else
- Lighting: The Engine of Your Entire Grow
- Ventilation and Climate Control: Where Most Beginners Struggle
- Growing Medium: Soil vs Coco vs Hydro
- Nutrients: Feeding Your Plants Through Every Stage
- Plant Training: Maximizing Your Canopy and Yield
- Building Your Setup by Budget: Three Complete Configurations
- Common Mistakes and How to Avoid Them
- Electrical Safety and Legal Considerations
- Choosing the Right Strains for Your Indoor Setup
Why Your Space Choice Sets the Ceiling for Everything Else
Before you buy a single light or fan, the space you choose determines your budget, your yield potential, and your environmental challenges. This is the foundational decision that most beginners rush past, and it costs them later. The good news is that indoor growing is incredibly flexible, closets, spare bedrooms, basements, garages, and dedicated grow tents all work. The key is understanding what each space demands from you.

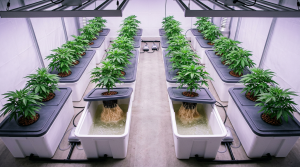
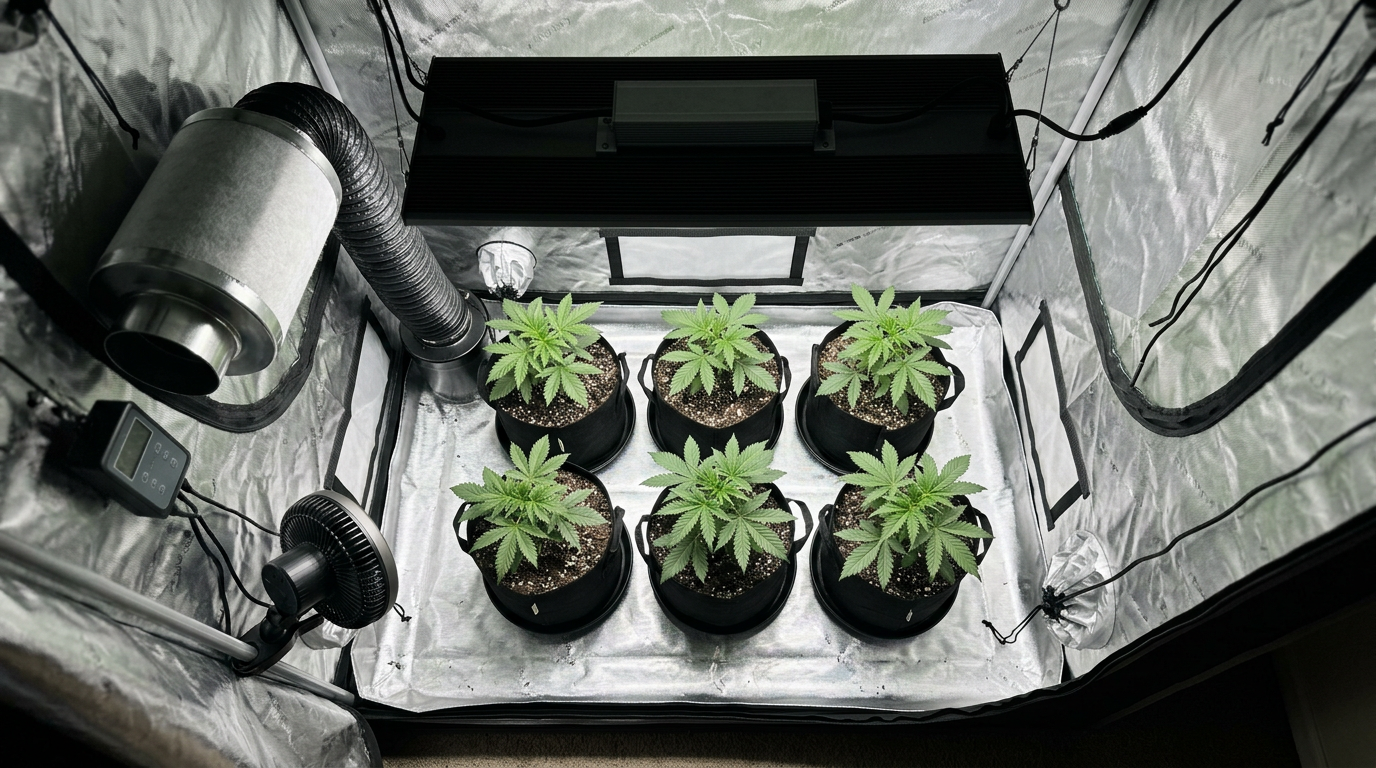
In my experience, a dedicated grow tent is the single best starting point for most home growers in the US, especially in states like Colorado, California, Michigan, and Oregon where home cultivation is legal. Tents create a controlled, reflective environment that maximizes light efficiency, and they contain odors when paired with proper filtration. According to multiple industry sources, all-in-one grow tent kits create the perfect environment for home gardening and indoor cultivation, and I’d agree. The reflective mylar interior alone can dramatically improve your light distribution compared to painting a closet white.
Common tent sizes and what they realistically support: a 2×2 is great for a single plant or a perpetual mother/clone setup. A 2×4 fits 2-4 plants comfortably and is the sweet spot for most first-time growers. A 4×4 is where you start seeing serious yields with 4-6 plants, and a 4×8 or 5×5 is getting into the semi-pro territory. I ran a 4×4 tent setup for years before moving into a dedicated room, and honestly, some of my best harvests came out of that tent.
Basement grows in northern states like Minnesota or Michigan have a natural advantage, ambient temps stay cool, which helps with heat management. Attic grows in Southern states like Texas or Florida face the opposite problem: heat becomes a constant battle in summer. Know your environment before you commit to a space.
Lighting: The Engine of Your Entire Grow
Lighting is where most of your budget goes, and for good reason, it’s the single most important variable in your indoor grow. Your lights determine yield potential, heat load, electricity cost, and how your plants develop from seedling through harvest. Let me break down the three main categories you’ll encounter.
HID Lighting: The Proven Workhorse
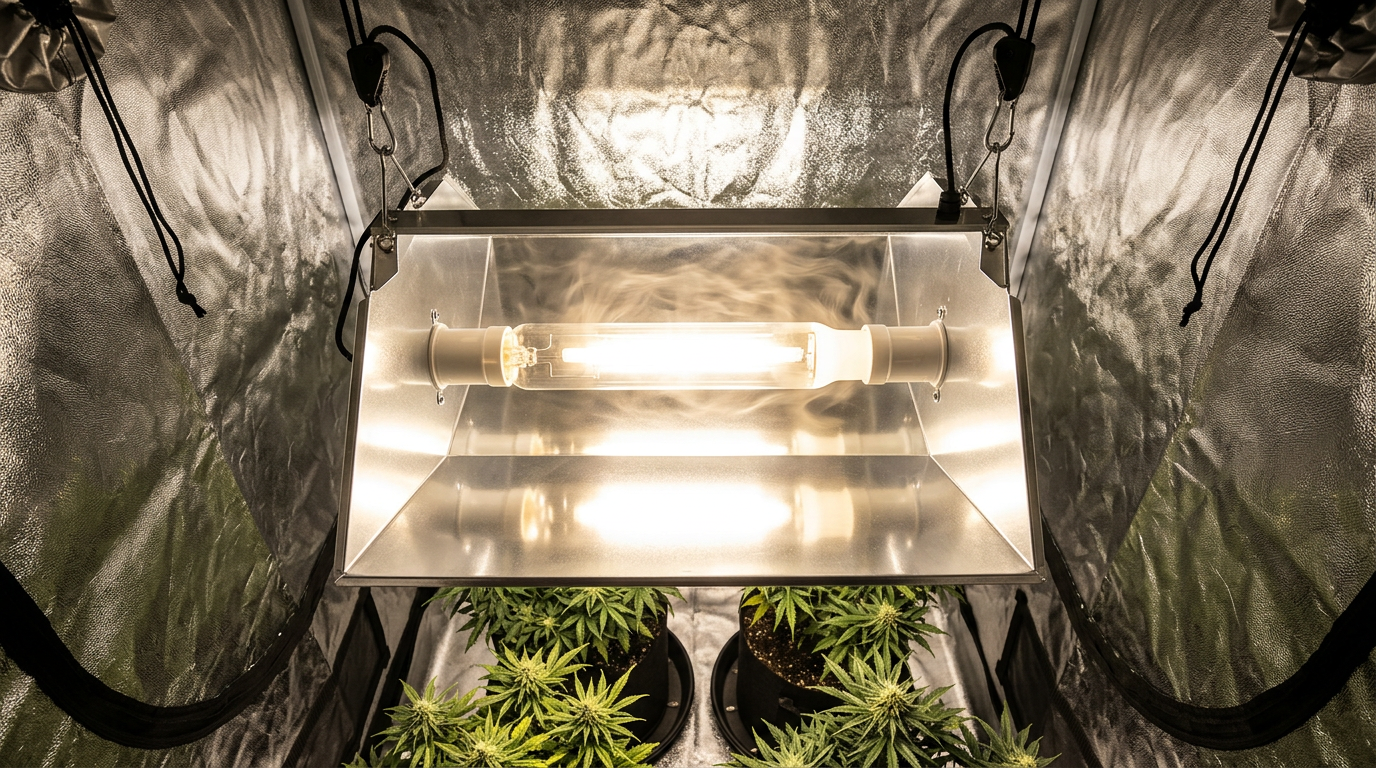
High-Intensity Discharge lights, specifically HPS (High Pressure Sodium) and MH (Metal Halide), have been the backbone of indoor cannabis cultivation for decades. HID lamps are widely considered among the most effective options for growing cannabis, and the yield-to-watt ratio they deliver is genuinely hard to argue with. A 1000W HPS in a dialed-in 4×4 tent can produce impressive harvests when environmental conditions are right.
The tradeoff is heat. HID lights run hot, we’re talking surface temperatures that can easily push your canopy temps above 85°F if your ventilation isn’t keeping up. I learned this the hard way on an early grow where I was running a 600W HPS in a 3×3 tent with inadequate airflow. The plants looked stressed, trichome development stalled, and my terps suffered. Heat management is consistently one of the biggest challenges beginners report with HID setups, and the Reddit growing communities echo this constantly.
LED Lighting: The Modern Standard
Full-spectrum LED grow lights have matured enormously over the past several years. Modern quantum board LEDs and bar-style fixtures deliver excellent PPFD (photosynthetic photon flux density) coverage, run significantly cooler than HID, and consume less electricity for comparable output. Dimmable LED lights are particularly valued by growers for seedling stages, community consensus consistently recommends keeping dimmable LEDs at reduced power during early seedling development to prevent light burn, with many growers positioning lights around 18 inches above seedlings as a starting point.
The upfront cost of quality LEDs is higher than HID, but the long-term electricity savings and reduced heat load often make them the better investment, especially for home growers in states with high electricity rates. I made the full switch to LEDs in my personal setup about four years ago and haven’t looked back.
T5 Fluorescent: The Seedling and Clone Specialist
T5 fluorescent fixtures don’t compete with HID or LED for flowering performance, but they’re excellent for seedlings, clones, and early vegetative growth. They run cool, produce a gentle, even light spectrum, and are inexpensive. Many serious growers keep a T5 fixture in their propagation area even if they run LEDs or HID for the main canopy. HID lights provide a better yield-to-watt ratio compared to fluorescent lighting, so T5s are best kept in a support role rather than as your primary flowering light.
| Feature | HPS/HID | Full-Spectrum LED | T5 Fluorescent |
|---|---|---|---|
| Upfront Cost | Low–Medium | Medium–High | Low |
| Heat Output | High | Low–Medium | Low |
| Electricity Efficiency | Moderate | High | Moderate |
| Yield Potential | Very High | High–Very High | Low (veg/clone only) |
| Lifespan | 1–2 years (bulb) | 50,000+ hours | 10,000–20,000 hours |
| Best For | Experienced growers with good ventilation | All skill levels, especially beginners | Seedlings, clones, propagation |
| Light Cycle Control | Required (timer) | Required (timer) | Less critical |
Light Cycles and Timers: Non-Negotiable
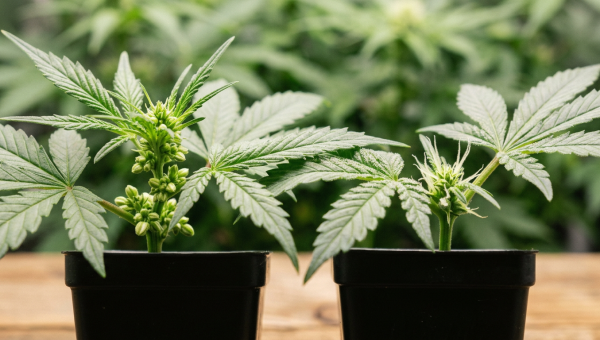
I want to emphasize this because I see beginners skip it: timers are not optional equipment. They’re non-negotiable. Photoperiod strains need consistent light cycles, 18/6 for veg, 12/12 for flower, and any interruption to the dark period during flowering can cause stress, hermaphroditism, or revegging. Invest in a quality digital timer. I’ve seen growers lose entire crops because a cheap mechanical timer failed and lights stayed on through the dark period. If you’re growing autoflowers, the light cycle is less critical since they flower on age rather than photoperiod, but consistent schedules still produce better results. For a deeper look at how seed type affects your setup decisions, our seed type comparison covers the key differences.
Ventilation and Climate Control: Where Most Beginners Struggle
If lighting is the engine of your grow, ventilation is the cooling system. Get it wrong and everything else suffers. Proper airflow serves multiple functions simultaneously: it removes heat generated by your lights, replenishes CO2 that your plants consume, controls humidity to prevent mold and mildew, and strengthens stems through gentle mechanical stimulation. According to H2G Supply, humidity control alongside ventilation are fundamental basics before you begin constructing any indoor grow setup, and from my experience, this is where most beginners run into their first serious problems.
Inline Fans and Carbon Filters
Your inline duct fan is the heart of your ventilation system. The general rule of thumb is to size your fan to exchange the entire air volume of your tent every 1-3 minutes. For a 4×4×7 tent (roughly 112 cubic feet), you’d want a fan rated for at least 200 CFM, though most growers size up slightly to account for the resistance added by carbon filters and ducting. Variable speed controllers are worth every penny, they let you dial back fan speed during lights-off when heat load drops, reducing noise and extending fan life.
Carbon filters are essential for odor control. A quality activated carbon filter paired with your inline fan will scrub virtually all odor from your exhaust air. This matters a lot in states where home cultivation is legal but neighbors or building management might still take issue with cannabis smells, California, Colorado, and Washington growers in apartment situations know exactly what I mean. Size your carbon filter to match or slightly exceed your fan’s CFM rating.
Oscillating Fans: The Underrated Essential
Beyond your inline fan, you need at least one clip-on or oscillating fan circulating air within the tent itself. This does two things: it prevents hot spots from developing under your light, and it creates the gentle stem movement that triggers thigmomorphogenesis, the process by which plants build stronger, thicker stems in response to physical stimulus. I always run at least two clip fans in a 4×4, one at canopy level and one lower in the canopy. Complete grow tent kits typically include a clip-on fan along with the inline fan, which is one reason they represent good value for beginners.
VPD: The Professional’s Climate Tool
Vapor Pressure Deficit (VPD) is the relationship between temperature and humidity that determines how efficiently your plants can transpire. When VPD is dialed in, plants uptake water and nutrients efficiently, growth accelerates, and trichome production improves. When it’s off, either too high or too low, you see symptoms ranging from nutrient lockout to mold. The optimal vegetative temperature sits between 75-80°F with 60-70% relative humidity. During flowering, you want to bring temps down slightly to 72-78°F and drop humidity to 50-55% to encourage resin production and prevent bud rot. In late flower, dropping humidity further toward 40-45% dramatically reduces mold risk, especially with dense-budding strains.
Maya Chen has written extensively about the science behind VPD and transpiration in cannabis, her breakdown of how temperature-humidity relationships affect cannabinoid and terpene synthesis is worth reading if you want to understand the deeper science behind these numbers.
75-80°F
70-75°F
60-70%
18-24 hours daily
700-900 ppm
72-78°F
68-72°F
50-55%
12 hours on / 12 hours off
1,200-1,500 ppm
6.0-7.0
5.5-6.5
Growing Medium: Soil vs Coco vs Hydro
Your growing medium affects nutrient delivery, watering frequency, root development, and overall plant health. Each major system has genuine advantages and specific challenges, there’s no universally “best” choice, only the best choice for your skill level, goals, and setup.
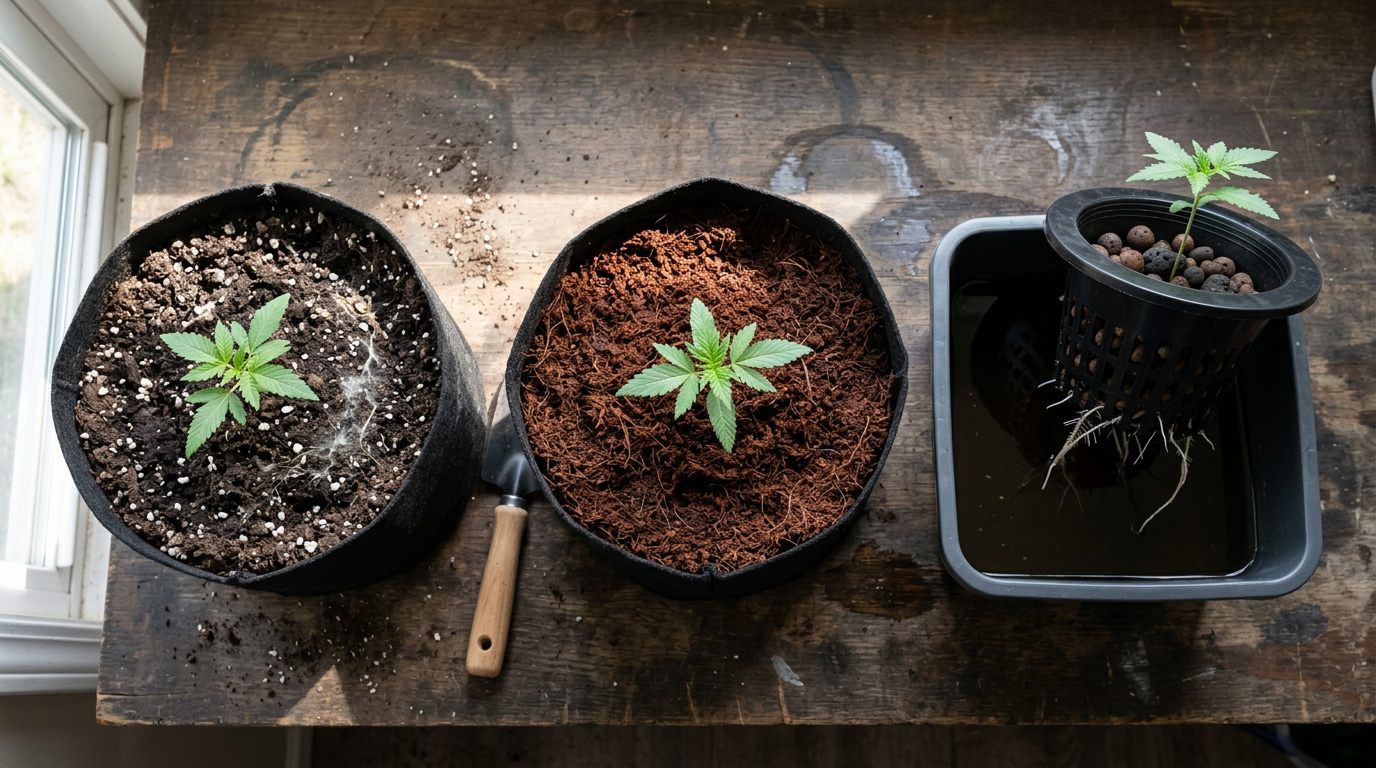
Soil: Forgiving, Familiar, and Still Excellent
Quality cannabis potting soil with proper drainage is still my recommendation for most first-time growers. A good living soil with mycorrhizal fungi, perlite for drainage, and a balanced nutrient profile gives you a buffer against mistakes that hydro systems simply don’t offer. When you overfeed slightly in soil, the medium buffers some of that excess. Do the same thing in a recirculating hydro system and you can see deficiency or toxicity symptoms within 24 hours.
I typically run a 70/30 mix of quality cannabis-specific potting soil and perlite. The perlite opens up the soil structure, improves drainage and oxygen penetration to the root zone, and helps prevent overwatering, which is the single most common mistake I see from new growers. For pot sizing, I start seedlings in solo cups or small 1-gallon containers, transplant to 3-gallon pots for mid-veg, and finish in 5-7 gallon containers depending on the strain and how long I veg.
Coco Coir: The Best of Both Worlds
Coco coir is my personal medium of choice for most grows now. It’s technically inert, it holds no nutrients of its own, which means you have complete control over what your plants receive. It drains and dries faster than soil, allowing for more frequent watering and faster growth rates. It also buffers pH reasonably well and is much more forgiving than full hydro. The main adjustment is that you need to feed nutrients from day one since there’s nothing in the medium itself. I’ve run Gorilla Glue‘s Sticky Symphony: Genetics & Terpene Architecture and Lemon Cherry Gelato – That Sweet & Punchy Hybrid I’m Growing Again in coco and the growth rates are noticeably faster than in soil.
Hydroponics: Maximum Potential, Maximum Attention
Deep Water Culture (DWC), nutrient film technique (NFT), and other hydroponic systems deliver nutrients directly to roots suspended in or regularly bathed by nutrient solution. The result is explosive growth rates and impressive yields when everything is dialed in. The downside is that problems escalate fast, a pH swing, a pump failure, or a nutrient imbalance can damage plants within hours. I’d recommend getting at least one successful soil or coco grow under your belt before diving into full hydro.
Nutrients: Feeding Your Plants Through Every Stage
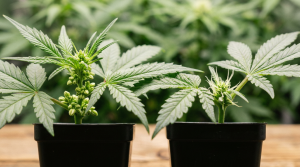
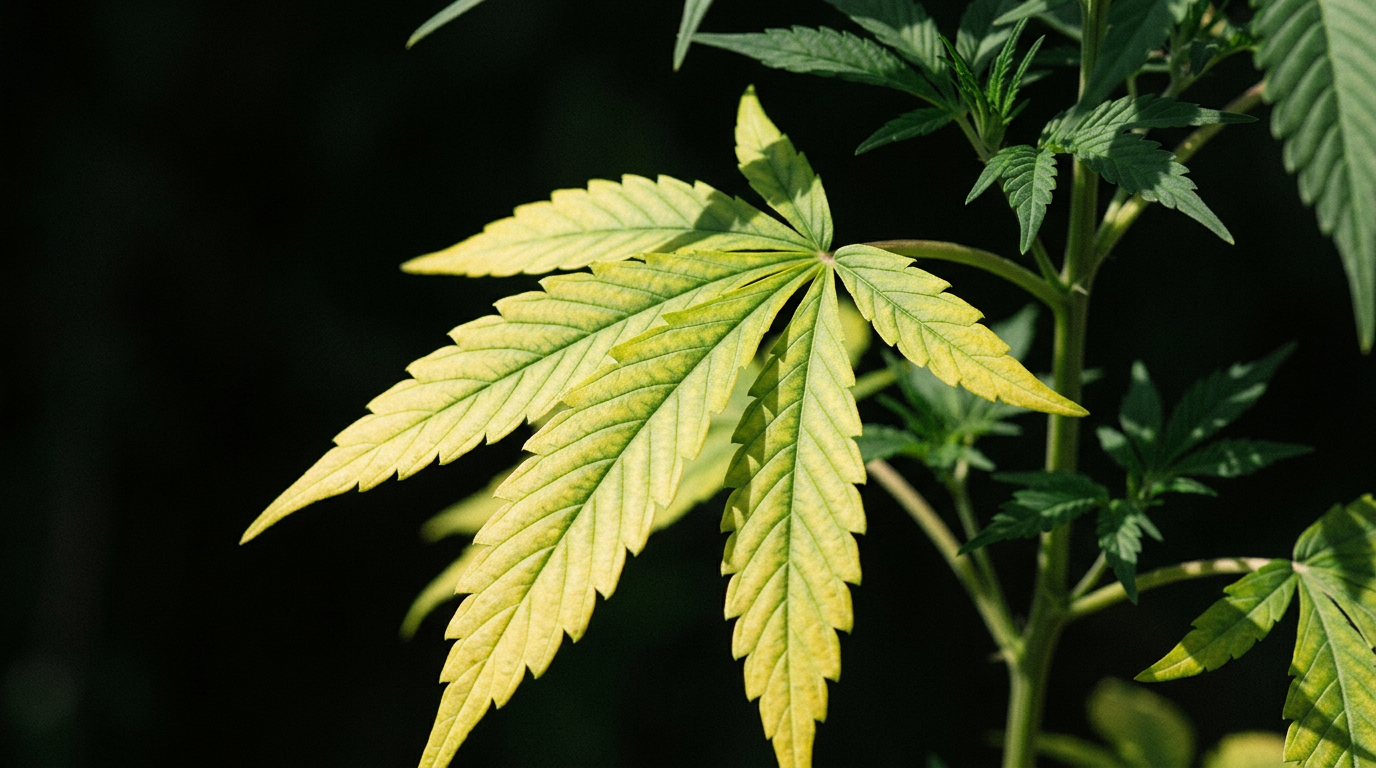
Cannabis has distinct nutritional needs at each growth stage, and understanding the basics of macronutrients (NPK) and micronutrients will help you avoid the most common feeding mistakes. Nitrogen (N), Phosphorus (P), and Potassium (K) are your primary macronutrients. During vegetative growth, plants are building structure and want higher nitrogen. During flowering, phosphorus and potassium become more important while nitrogen needs drop, overfeeding nitrogen in flower is one of the most common mistakes I see, and it directly impacts bud quality and flavor.
Organic vs Synthetic Nutrients
Organic nutrients work through microbial activity in your soil, they’re slower to act but gentler, and many growers (including me) believe they produce superior terpene expression and flavor. Synthetic nutrients are immediately available to plants and allow for precise control, making them popular in coco and hydro systems. I’ve run both extensively and my honest take is that organics in living soil produce the most flavorful, aromatic buds, while synthetics in coco or hydro produce the fastest, heaviest yields. For a strain like Biscotti: The Caryophyllene-Rich Hybrid with a Creeper High and Dessert Flavors, where the terp profile is the whole point, I lean organic. For a heavy yielder where I want maximum weight, I’ll go synthetic in coco.
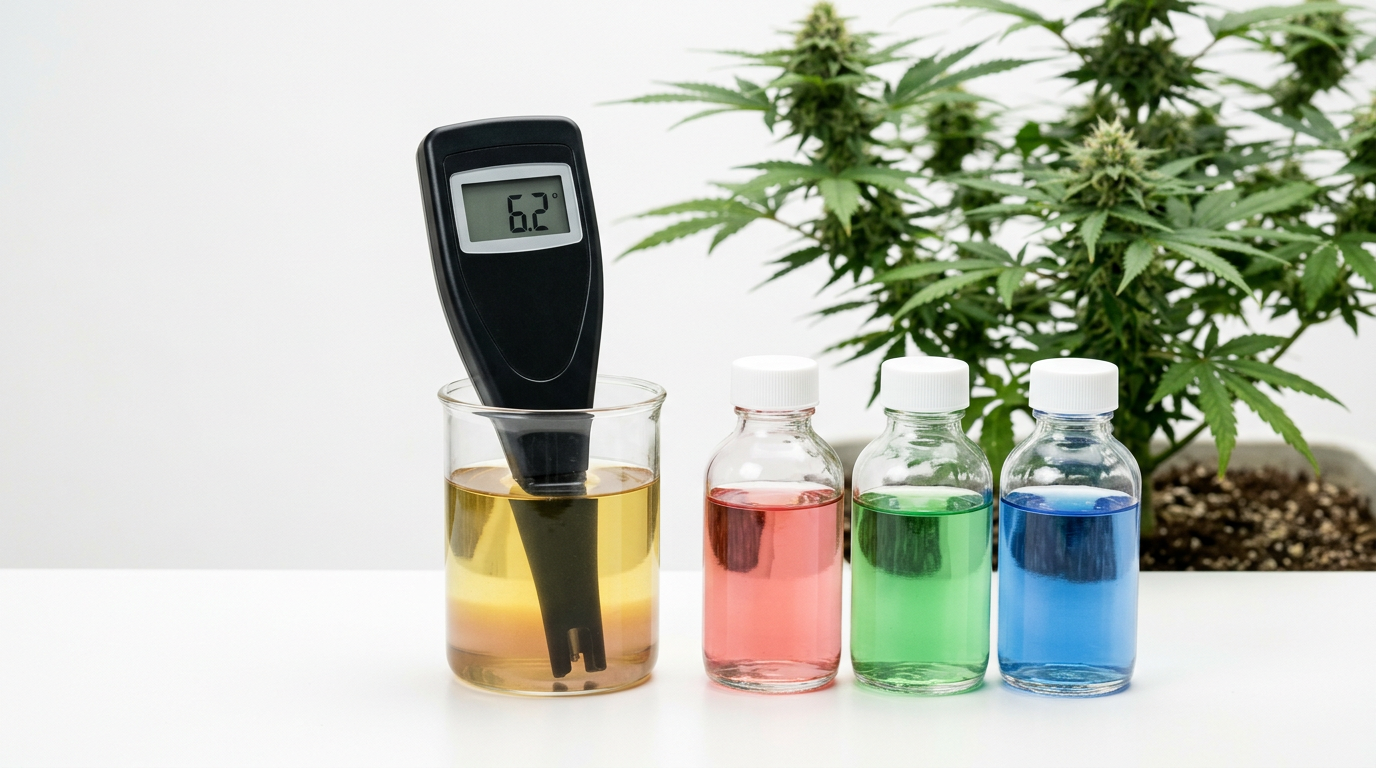
pH: The Master Variable
You can feed your plants the best nutrients money can buy and still see deficiency symptoms if your pH is off. At incorrect pH levels, nutrient uptake is blocked at the root level regardless of what’s in your solution or soil. For soil grows, maintain a pH of 6.0-7.0 in your feeding water and runoff. For coco and hydro, the target range is tighter: 5.5-6.5. I pH every single feeding, no exceptions. A quality pH pen is not optional equipment. Cheap pH strips are inaccurate enough to cause real problems. Invest $30-50 in a decent digital pH meter and calibrate it regularly.
Feeding Schedules by Stage
Seedlings need almost nothing for the first two weeks, the seed contains enough energy to establish itself, and overfeeding seedlings causes more problems than underfeeding. Once you see the first true leaves, you can begin introducing nutrients at 25% of the manufacturer’s recommended dose and scale up as the plant develops. During heavy vegetative growth, you’ll work up to full doses. At the flip to flower, begin transitioning your nutrient profile, reducing nitrogen, increasing phosphorus and potassium. Most experienced growers also run a flush with plain pH’d water for the final 1-2 weeks before harvest to clear residual nutrients from the medium and improve the final smoke quality.
Plant Training: Maximizing Your Canopy and Yield
Training techniques are how you take a single light source and make it work as efficiently as possible across your entire canopy. Without training, a cannabis plant grows in a natural Christmas tree shape, one dominant main cola at the top and smaller, underdeveloped bud sites below. Most of your light hits the top while lower sites receive diminished intensity. Training disrupts this apical dominance and encourages the plant to develop multiple main colas at the same canopy height, maximizing the productive use of your light footprint.
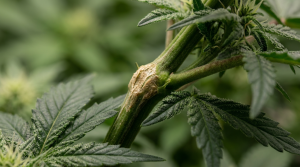
Low Stress Training (LST) involves gently bending and tying down branches to keep the canopy flat and even. It’s the most beginner-friendly technique and can be started as early as week 3-4 of veg. Topping, cutting the main growing tip to create two main branches, is the next step up in complexity and is one of the most effective yield-increasing techniques when done correctly. ScrOGging (Screen of Green) involves weaving branches through a horizontal net to create a completely flat, even canopy, it’s the technique I use most often in my own 4×4 setup and the one that consistently produces my best results.
For a comprehensive deep-dive into all the training techniques and how they interact with your light setup to maximize output, our yield optimization guide covers every method in detail.
Building Your Setup by Budget: Three Complete Configurations
One of the most practical questions I get from new growers is “how much do I actually need to spend?” The honest answer is that you can build a functional, productive setup for under $500. Here’s how I’d approach three different budget tiers in 2026.

Budget Tier: Under $500, The First-Timer Setup
At this budget, a 2×4 grow tent kit is your best starting point. Complete grow tent kits typically include the tent itself, an LED grow light, inline duct fan, carbon filter, ducting, timer, clip-on fan, and hanging ropes, essentially everything you need to get started except your medium, nutrients, and seeds. Budget setups can genuinely be built for under $500 when you go the kit route, and the value proposition is hard to beat for a first grow. You won’t have the most powerful light or the quietest fan, but you have everything you need to learn the fundamentals and produce a real harvest.
At this tier, I’d recommend starting with a forgiving, vigorous strain. Northern Lights is a classic recommendation for beginners, it’s resilient, doesn’t stretch excessively, and produces well under modest lighting. White Widow‘s Hybrid Power: A Terpene and Genetic Deep Dive is another excellent choice that handles environmental variation without punishing you too hard for rookie mistakes.
Mid-Range Tier: $500–$1,000, The Serious Hobbyist Setup
With $500-1,000 to work with, you can step up to a 4×4 tent with a quality 400-600W full-spectrum LED, a properly sized inline fan with speed controller, a quality carbon filter, and enough left over for a decent pH meter, VPD gauge, and a basic nutrient line. This is the tier where your results start looking genuinely impressive. You have enough light intensity for dense, trichome-covered buds, enough environmental control to dial in VPD, and enough space to run 4-6 plants through a proper ScrOG setup.
At this budget tier, you can start exploring more demanding genetics. Slurricane is a strain that rewards the extra environmental control you have at this tier, the trichome coverage is extraordinary when conditions are right. MAC is another mid-tier favorite that really expresses its genetics when you have proper climate control.
Premium Tier: $1,000–$2,000+, The Optimized Home Grow
At $1,000-2,000+, you’re building a setup that approaches professional quality. A 4×8 or 5×5 tent with a top-tier quantum board LED system, a smart inline fan with automated speed control and humidity integration, a dehumidifier, a CO2 controller and supplementation system, and a complete digital monitoring setup. At this level, you’re dialing in CO2 levels to the 1,200-1,500 ppm range during flowering, running VPD within tight tolerances, and tracking every environmental variable with data logging. The yields and quality at this tier are genuinely comparable to licensed commercial operations.
Premium genetics shine in premium environments. Permanent Marker – That Ink-Strong Hybrid I’m Planting Again and Ice Cream Cake‘s Creamy Myrcene-Limonene Elixir are examples of strains that have complex terpene profiles that only fully express themselves when environmental conditions are optimized throughout the grow.
| Component | Budget ($500) | Mid-Range ($500–$1,000) | Premium ($1,000–$2,000+) |
|---|---|---|---|
| Tent Size | 2×4 ft | 4×4 ft | 4×8 or 5×5 ft |
| Lighting | Budget LED kit (~200W) | Quality 400W LED quantum board | Top-tier 600–800W LED bar system |
| Ventilation | Basic inline fan + carbon filter | Variable speed inline + carbon filter | Smart inline fan with auto humidity control |
| Climate Monitoring | Basic thermometer/hygrometer | Digital VPD meter + data logger | Smart environmental controller + data logging |
| Growing Medium | Pre-amended potting soil | Coco coir + perlite blend | Coco or DWC hydro system |
| Nutrients | Basic 3-part nutrient line | Quality 3-part + cal-mag + enzymes | Full premium nutrient program + additives |
| Extras | Timer, basic pH strips | Digital pH meter, speed controller | CO2 system, dehumidifier, SCROG net, loupe |
| Realistic Yield (per harvest) | 1–2 oz per plant | 2–4 oz per plant | 4–8+ oz per plant |
Common Mistakes and How to Avoid Them
After twelve years of growing and talking to hundreds of other cultivators, I’ve seen the same mistakes come up over and over. Here are the ones that cost beginners the most yield and quality.

Overwatering: The Number One Killer
Overwatering is the single most common mistake new growers make, and it’s counterintuitive, most beginners assume more water equals more growth. What actually happens is that waterlogged soil suffocates roots, creates anaerobic conditions that promote root rot, and prevents the wet/dry cycles that encourage deep root development. The fix is simple: water thoroughly, then wait until the top inch or two of soil is dry and the pot feels noticeably lighter before watering again. Lift your pots, you’ll quickly develop a feel for when they need water.
Heat Stress: The Silent Yield Killer
Heat management is consistently identified as one of the biggest challenges beginners face, particularly with HID setups in small tents. Canopy temperatures above 85°F slow growth, reduce terpene production (terpenes are volatile and literally evaporate at high temps), and stress plants in ways that can take weeks to recover from. Invest in a quality thermometer, monitor your canopy temperature (not just the ambient room temp), and ensure your ventilation is properly sized for your heat load. If you’re running HID in summer in a warm climate, you may need supplemental air conditioning.
Ignoring pH: The Invisible Problem
I’ve seen growers spend weeks troubleshooting what they think are nutrient deficiencies, trying different products, adjusting feeding schedules, when the entire problem was pH. At incorrect pH, nutrient uptake is locked out at the root level. The plants show deficiency symptoms not because nutrients aren’t present, but because they can’t access them. Check and adjust your pH on every single feeding. This is not optional.
Light Burn and Improper Light Height
Too much light intensity at canopy level causes bleaching, nutrient-lockout-like symptoms, and reduced trichome production. The community consensus is clear: keep dimmable LED lights at reduced power during seedling stages, and maintain appropriate distance from the canopy throughout the grow. A good starting point for most LEDs is 18 inches above seedlings, adjusting as plants develop and as your specific fixture’s intensity requires. Always consult your light manufacturer’s guidelines for your specific fixture and adjust based on how your plants respond.
Skipping IPM Until There’s a Problem
Integrated Pest Management (IPM) should be proactive, not reactive. Spider mites, fungus gnats, thrips, and powdery mildew can devastate a crop quickly, especially in the warm, humid conditions of a flowering tent. I run weekly preventive sprays of diluted neem oil or insecticidal soap during veg, introduce beneficial insects like predatory mites in my environment, and use yellow sticky traps to monitor for pest pressure. By the time you can see a spider mite infestation with the naked eye, you already have a serious problem. Prevention is infinitely easier than treatment.
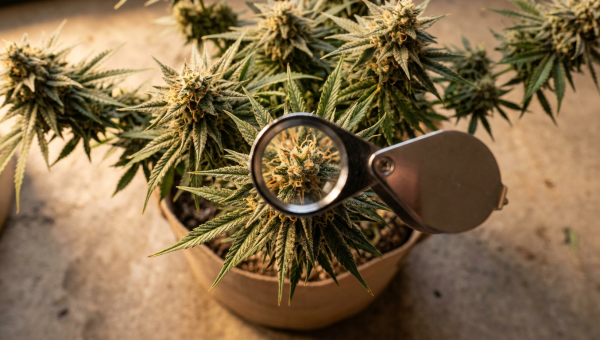
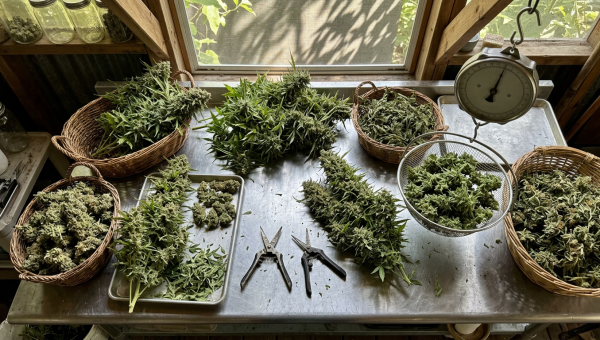
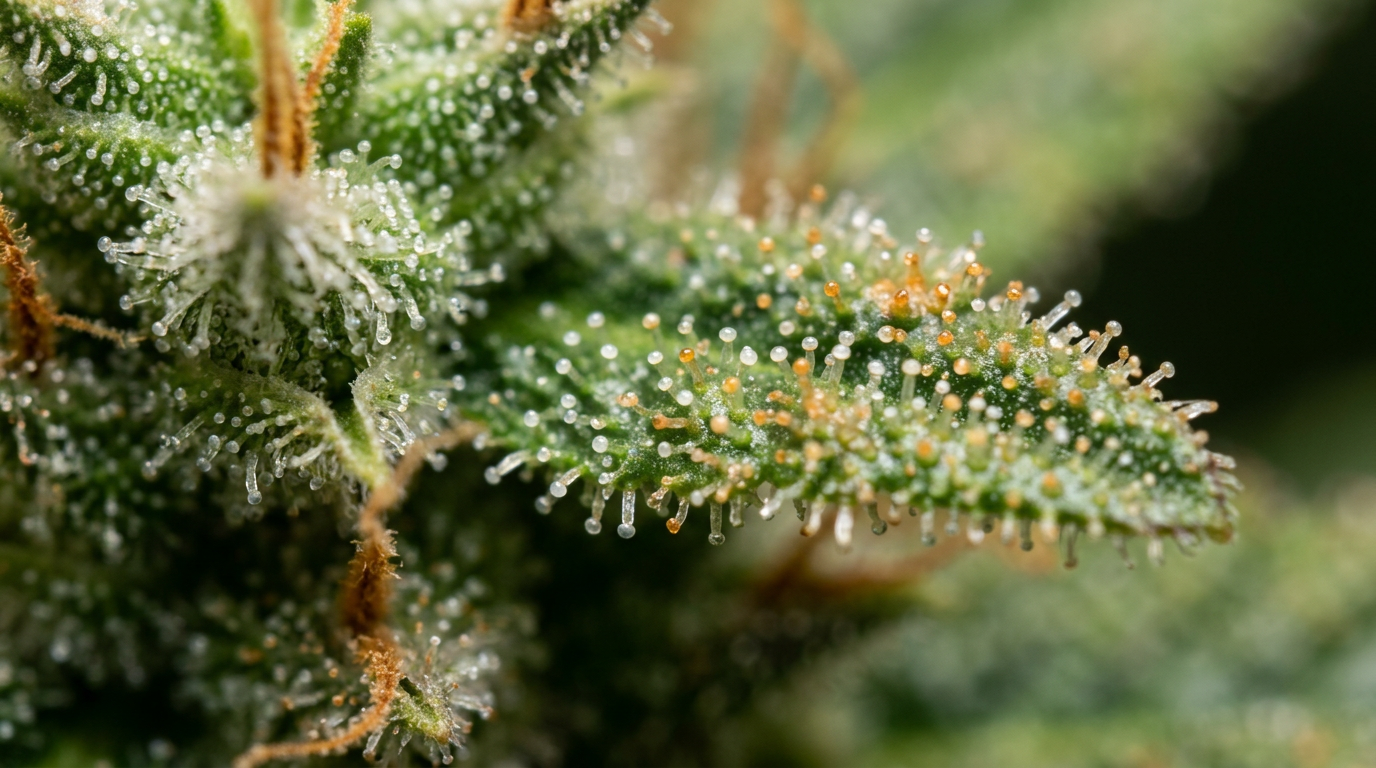
Rushing the Harvest
Harvesting too early is one of the most heartbreaking mistakes because you’ve done everything right for weeks or months and then short-circuit the finish line. Trichome examination under magnification is the only reliable way to determine harvest readiness. Milky white trichomes indicate peak THC; as they shift to amber, THC is converting to CBN, producing a more sedating effect. Most growers target a mix of mostly cloudy with some amber for a balanced effect profile. Get a jeweler’s loupe or a digital microscope, it’s a small investment that pays off every harvest.
Jessica Reed has a great perspective on harvest timing from the consumer side, understanding what different harvest windows actually produce in terms of effect and experience is valuable context for making that call.
Electrical Safety and Legal Considerations
This section matters more than most setup guides acknowledge. Indoor cannabis grows draw significant electrical load, a 600W LED, inline fan, clip fans, and environmental controls can easily pull 800-1,000W continuously. In older homes with outdated wiring, this can be a genuine fire hazard. Always use properly rated extension cords and power strips with surge protection, never daisy-chain power strips, and consider having an electrician assess your circuit capacity if you’re running a large setup.
On the legal side: as of 2026, home cultivation is legal for adults in many US states including California, Colorado, Oregon, Washington, Michigan, Illinois, New Mexico, Vermont, Maine, and others, but limits on plant counts vary by state. California allows 6 plants per adult, Colorado allows 3 mature and 3 immature plants per adult. Some states like Texas and Florida still prohibit home cultivation entirely. Always know your state’s specific regulations before setting up. Even in legal states, federal law still classifies cannabis as a Schedule I substance, so be aware of the legal landscape in your jurisdiction.
Choosing the Right Strains for Your Indoor Setup
Your setup and your strain choice need to work together. A strain that stretches 300% during flower is going to be a nightmare in a 4-foot-tall tent. A strain known for dense, moisture-trapping buds needs exceptional humidity management in late flower. Matching your genetics to your environment is part of what separates good growers from great ones.
For beginners in smaller setups, I consistently recommend indica-dominant or indica-leaning hybrids that stay compact and manageable. Granddaddy Purple‘s cozy hug – pure bliss is a classic choice, it stays relatively compact, the bud structure is beautiful, and it’s forgiving of minor environmental swings. OG Kush is another indoor classic that performs well in controlled environments and rewards good technique with exceptional terp expression.
For growers who want a more active, energetic effect profile, Blue Dream‘s Terpene Signature – A Genetic Symphony is one of the most popular indoor strains for a reason, it grows vigorously, produces well, and delivers consistent results across different setups. Pineapple Express – My go-to for a sunny grow day is another sativa-leaning option that does well indoors with proper training to manage its stretch.
If you’re still deciding on genetics and want a comprehensive overview of what’s performing best in 2026, our best strains guide covers the full spectrum. And when you’re ready to source seeds, our seed buying guide will help you navigate the seed bank landscape. We also have detailed reviews of specific banks like Homegrown Cannabis CO, Seeds Here Now, and Crop King Seeds: 21 Years in the Game, 700+ Strains, and a Reputation That’s More Complicated Than the Marketing Suggests if you want to compare options.
For more growing tips, techniques, and strain-specific cultivation notes, browse our cannabis blog, we publish new content regularly from growers who actually run these setups.
Frequently Asked Questions
What is the best method of growing cannabis indoors?
There’s no single “best” method, the right approach depends on your experience level, budget, and goals. For most beginners, a grow tent with quality LED lighting, soil or coco growing medium, and a complete ventilation setup is the most reliable path to success. It’s forgiving, controllable, and scalable. More experienced growers often migrate toward hydroponic systems for faster growth and higher yields, but these require more attention and experience to manage effectively. The fundamentals, proper lighting, dialed-in environment, correct pH and nutrient management, apply regardless of which specific method you choose.
What equipment is needed for indoor cannabis growing?
At minimum, you need a grow space (tent or dedicated room), a light source, a ventilation system (inline fan, carbon filter, circulation fans), a growing medium and containers, nutrients, pH management tools, and a timer. Complete grow tent kits typically bundle the tent, LED light, inline duct fan, carbon filter, ducting, timer, clip-on fan, and hanging ropes, making them an excellent starting point that covers all the essentials. Beyond the basics, a quality pH meter, thermometer/hygrometer, and a jeweler’s loupe for trichome inspection are essential additions that most kits don’t include.
How much light do you need to grow cannabis indoors?
Cannabis is a light-hungry plant. During vegetative growth, plants need 18-24 hours of light daily. During flowering, photoperiod strains require exactly 12 hours of light and at least 12 hours of complete darkness to trigger and maintain bud development. In terms of intensity, the generally accepted target for flowering is 600-900 PPFD (micromoles per square meter per second) at canopy level, though this varies by strain and growth stage. More light isn’t always better, exceeding your plants’ light saturation point without elevated CO2 produces diminishing returns and can cause light stress.
What lighting should I use for indoor cannabis plants?
For most home growers in 2026, modern full-spectrum LED grow lights represent the best overall value, they run cooler than HID, consume less electricity, and quality options produce results comparable to HPS. HID lighting (specifically HPS for flowering) remains a proven, effective option and is still preferred by some experienced growers for its yield-to-watt performance, but the heat management requirements make it more challenging in smaller setups. T5 fluorescent lights are excellent for seedlings and clones but lack the intensity needed for productive flowering. Whatever light you choose, a digital timer for controlling your light schedule is absolutely non-negotiable.
Are pre-made grow tent kits easy to manage for beginners?
Yes, all-in-one grow tent kits are consistently recommended as the easiest starting point for first-time indoor growers, and the community consensus backs this up strongly. Everything is designed to work together, the components are pre-matched for the tent size, and setup typically takes a few hours rather than days of research and sourcing individual components. The main limitation is that kit components are often entry-level quality, so as you gain experience and want to optimize your grow, you’ll likely upgrade individual components. But for learning the fundamentals and getting through your first few harvests, kits are genuinely excellent value.
How do I monitor and control temperature and humidity in a grow tent?
Start with a quality digital thermometer/hygrometer that shows current readings, minimum/maximum history, and ideally VPD calculations. Place sensors at canopy level, ambient readings at tent height don’t reflect what your plants are actually experiencing. Control temperature primarily through your ventilation system (more airflow = lower temps) and supplemental air conditioning or heating as needed. Control humidity with a humidifier during seedling/veg stages when you want higher humidity, and a dehumidifier during late flower when you need to bring humidity down to prevent bud rot. Smart environmental controllers that automate fan speed, humidifier, and dehumidifier based on real-time readings are available at the mid-range and premium budget tiers and make climate management significantly easier.
What do I really need to start growing indoors as a first-time grower?
Honestly? Less than you think, but more than the bare minimum most “starter lists” suggest. You need a proper grow space (a 2×4 tent is ideal), a quality light with a timer, a ventilation system with a carbon filter, a growing medium, a basic nutrient line, a pH meter, a thermometer/hygrometer, and good genetics. The items most beginners skip that cause the most problems: a quality pH meter (cheap strips aren’t accurate enough), a proper carbon filter (odor control matters even in legal states), and a clip fan for internal circulation. Everything else can be added as you grow and learn. Start simple, master the fundamentals, and expand from there.