Whether you just pulled your first disappointing harvest or you’re a seasoned grower chasing that next personal best, the question of how to increase cannabis yield is one that never really goes away. I’ve been growing in Colorado for over 12 years, and I still find myself tweaking, experimenting, and learning every single cycle. The truth is, there’s no single magic trick, but there absolutely is a hierarchy of impact. Some moves will transform your harvest overnight. Others are fine-tuning for growers who’ve already nailed the basics. This guide lays out the full picture, from the easiest wins to the advanced techniques, so you can figure out exactly where your limiting factor is and attack it with precision. Check out our cannabis blog for even more cultivation deep dives alongside this one.
- Start Here: Identify Your Limiting Factor First
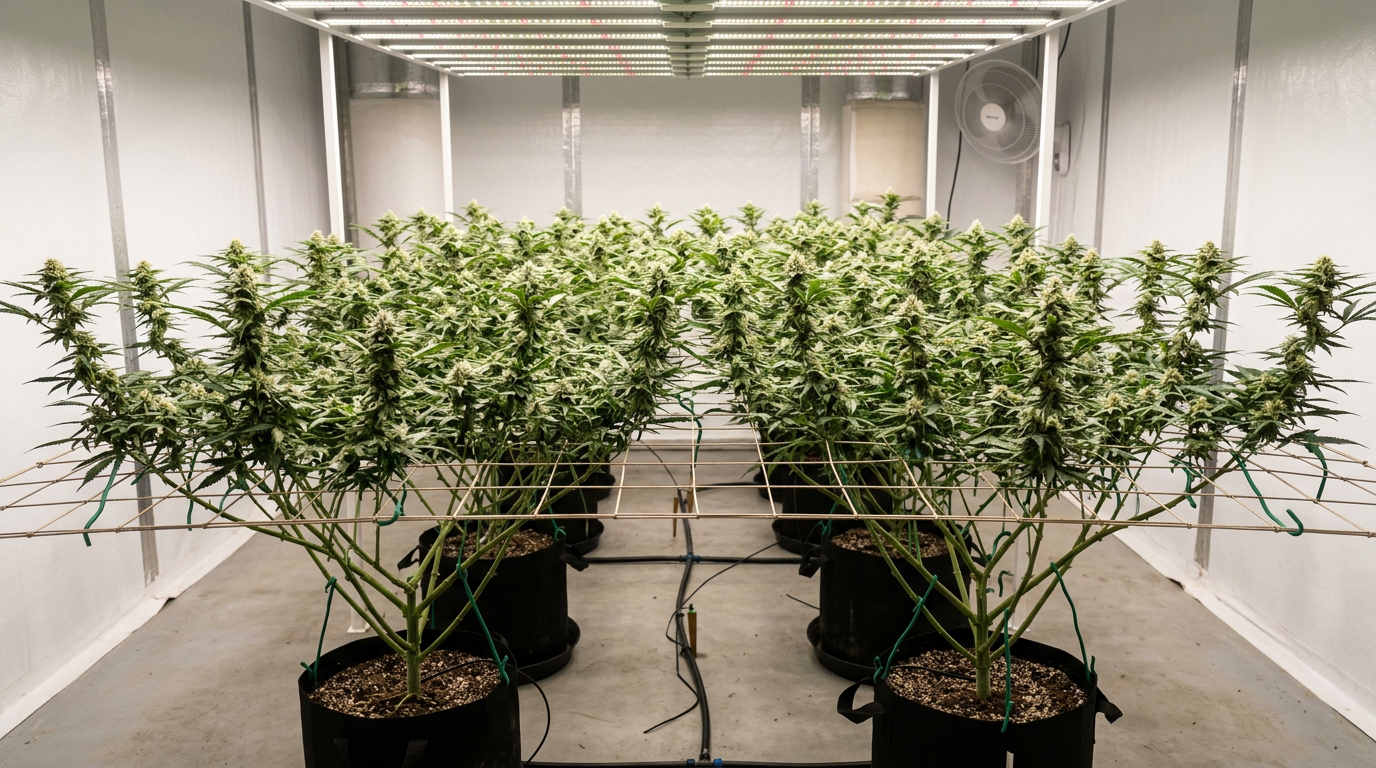
- Light Intensity: The Highest-Impact Variable in Your Grow Room
- Container Size and Root Zone: Give the Roots Room to Run
- Plant Training Techniques: Low-Stress vs. High-Stress Methods
- Pruning and Defoliation: Directing Energy Where It Counts
- Environment Specs: Temperature, Humidity, VPD, and CO₂
- Nutrients and Feeding: Feeding for Yield, Not Just Health
- Strain Selection: Your Genetic Ceiling Matters
- Growing Schedule and Timeline: Timing Your Stages for Maximum Production
- Troubleshooting a Weak First Harvest: Where Things Go Wrong
- Outdoor-Specific Yield Maximization Strategies
- FAQ: Your Yield Questions Answered
Start Here: Identify Your Limiting Factor First
The single most important thing I tell newer growers is this, before you add anything, change anything, or buy anything, figure out what’s actually holding you back. According to growers on Reddit and backed up by what I’ve seen in my own rooms, the trick to larger yields is growing happier plants and identifying your limiting factor. That might be light intensity, root space, canopy management, or even just genetics. Every technique in this guide is more effective once you know where the bottleneck is.
The key to repeatedly achieving high yields is a strategy that includes irrigation, pest management, and regulating the environment, and that’s not just something I believe from experience, that’s the consensus from plant science researchers at Medicinal Genomics. You can’t out-train a bad environment, and you can’t out-feed a light-starved plant. So let’s build from the ground up.
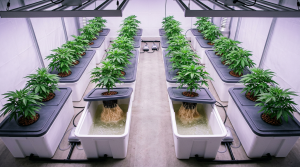
Light Intensity: The Highest-Impact Variable in Your Grow Room
For most indoor growers, the most effective way to increase bud size in the flowering stage is to increase light intensity. I’ve seen this play out over and over in my own Denver grow rooms, when I upgraded from a mid-range HID setup to a properly dialed LED array, my per-plant weights jumped noticeably without changing a single other variable. Light is the engine that drives photosynthesis, and photosynthesis is what builds those buds.
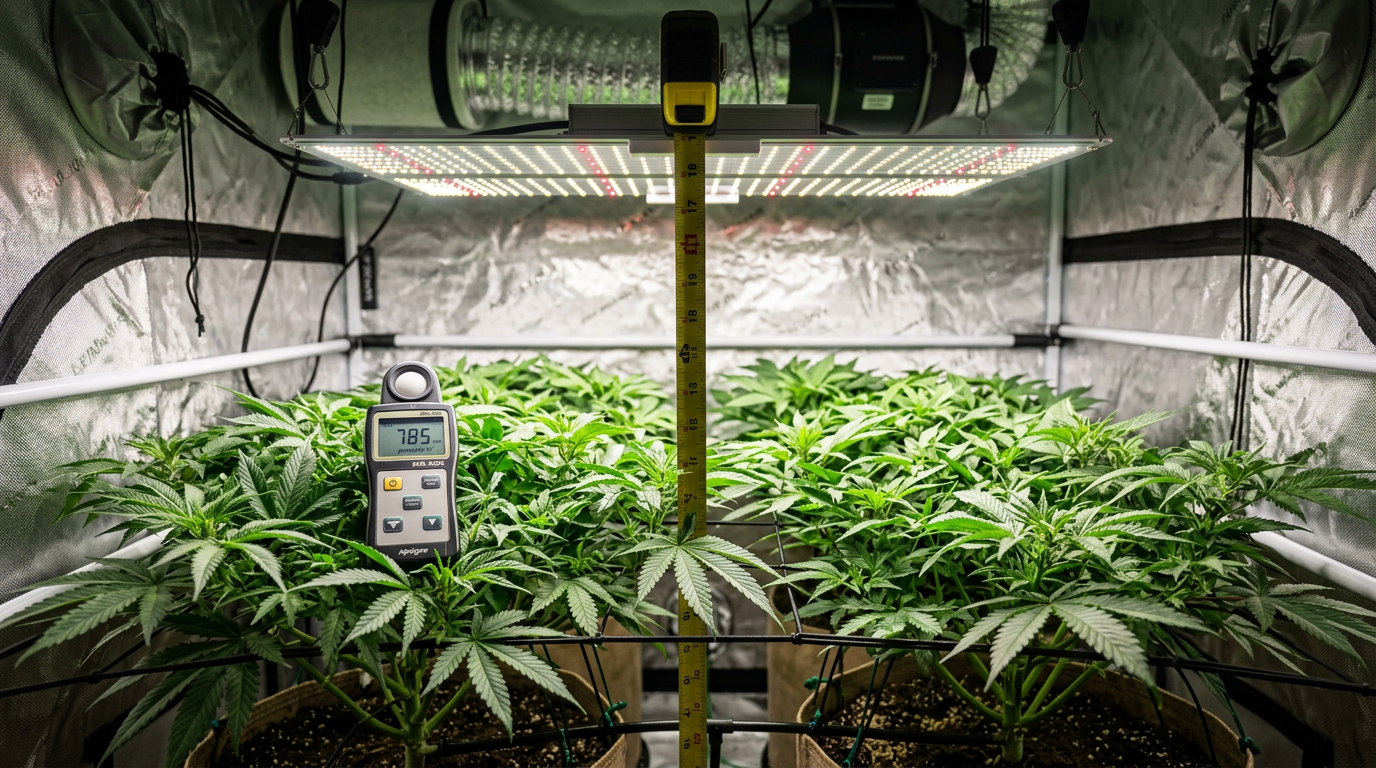
During veg, your plants need solid light coverage to build the branching structure that will eventually hold your flowers. In flower, cranking intensity (while keeping heat in check) is where you really see bud sites swell. If you’re running LEDs, make sure you’re actually hitting your canopy with adequate PPFD, a lot of budget lights look bright but don’t deliver the photon density your plants need during peak flower. I’ve done side-by-side comparisons in my own space, and the difference is stark. For a deeper look at quality LED options, check out A Review of Gavita LED Grow Lights, Gavita makes some of the most consistent fixtures I’ve used.
One thing to keep in mind: more light means more heat and more transpiration, which means your VPD management becomes even more critical. You can’t just crank the dial without adjusting your environment to match. More on that in the environment section below.
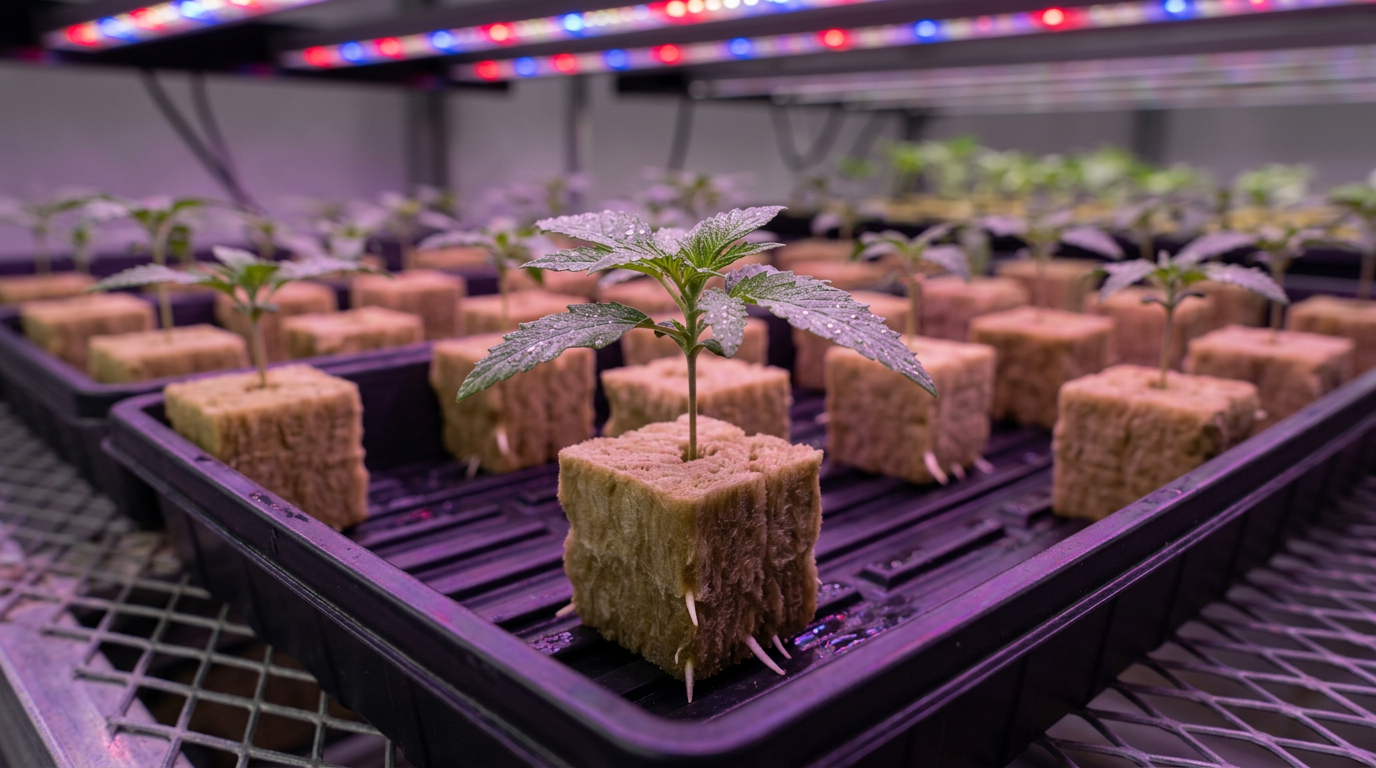
Container Size and Root Zone: Give the Roots Room to Run
Larger container sizes allow roots more space before blooming, resulting in healthier flowers and better yield. This is one of those “easy win” adjustments that newer growers often overlook. I’ve run the same strain in a 3-gallon and a 7-gallon pot side by side, and the difference in final bud weight is genuinely surprising. Roots are the foundation, if they’re cramped, the whole plant is stressed, and stressed plants don’t yield like happy plants.
The type of container matters too. Fabric pots have become my go-to because they air-prune roots naturally, which encourages a denser, more fibrous root ball rather than circling roots. Smart pots and air-pruning containers also improve oxygen delivery to the root zone, which directly supports nutrient uptake. If you’re growing in a 5×5 tent under a solid light, I’d recommend going at least 5-gallon, ideally 7-gallon for photoperiod plants with a longer veg time.
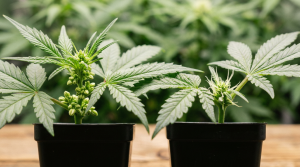
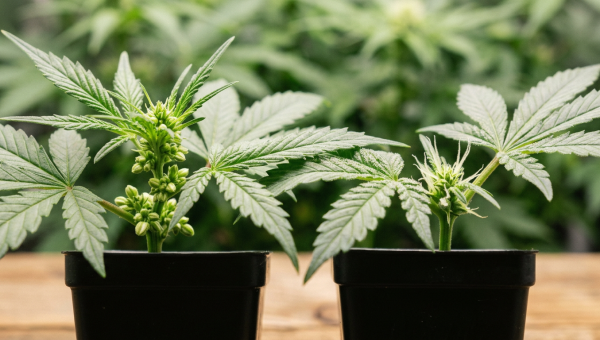
Plant Training Techniques: Low-Stress vs. High-Stress Methods
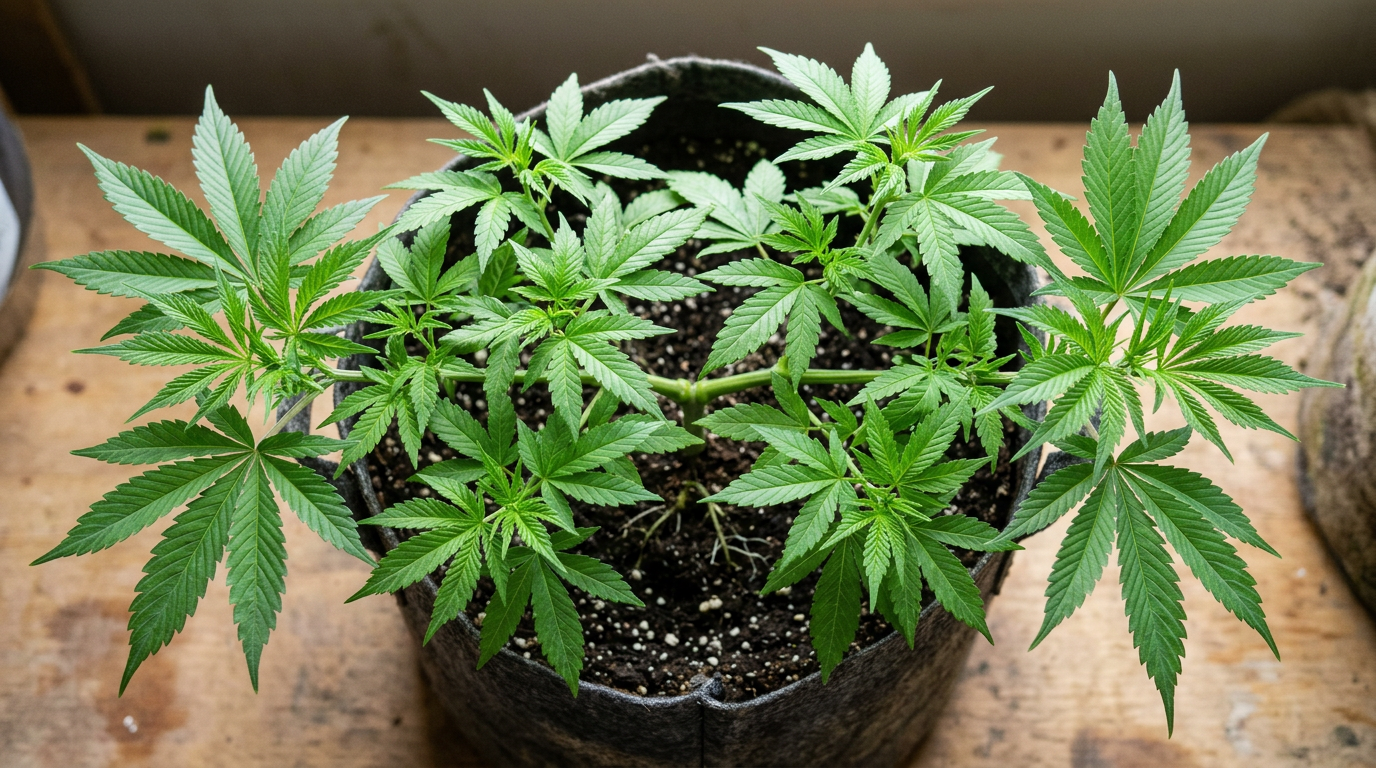
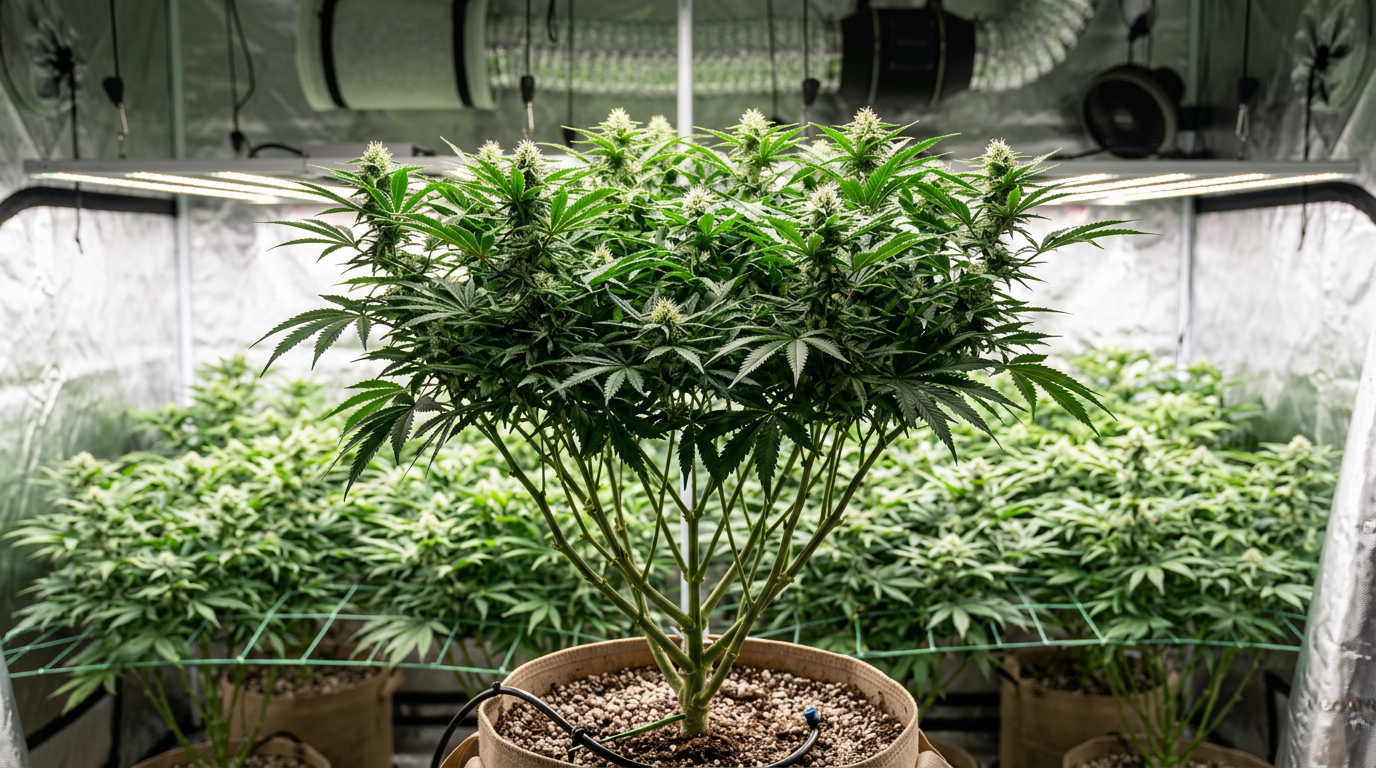
Plant training techniques can produce considerable increases in yield, and this is one area where understanding the spectrum from low-stress to high-stress really pays off. The goal of any training method is the same: create an even canopy where every bud site gets direct light exposure, rather than letting one dominant cola shade everything below it.
Low-stress training (LST) is exactly what it sounds like, you’re bending and tying branches without damaging plant tissue. I usually start LST in early veg, gently pulling branches outward and securing them to the rim of the pot or a trellis. Over a few days, the plant responds by growing upward again, and you repeat the process. The result is a wide, flat canopy with multiple bud sites at the same height. This is my top recommendation for first-time growers who want a meaningful yield bump without the risk of stunting their plant.
Topping is a high-stress technique where you cut off the main growing tip, which encourages the plant to develop two main colas instead of one. If you top your cannabis plant correctly, it should increase yield by encouraging lateral branches to grow, according to Weedmaps. I typically top during veg when the plant has 4-6 nodes established, and I’ll sometimes top multiple times to create an even more branchy structure. Combined with LST afterward, topping is one of the most powerful yield-boosting combos in the home grower’s toolkit.
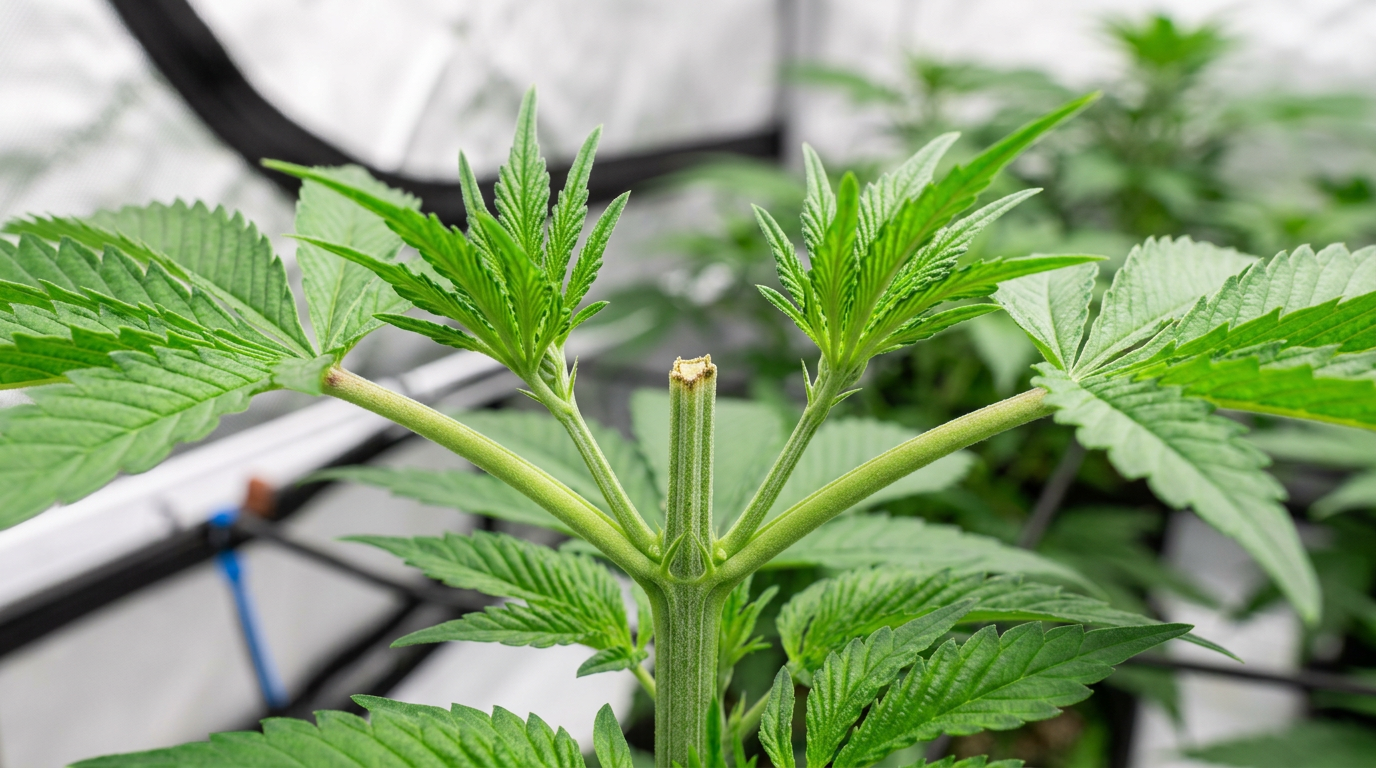
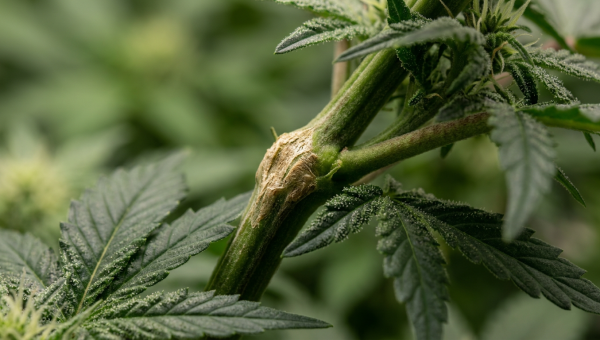
FIMing (a variation of topping that removes only part of the growing tip) can produce 4 or more new growth tips instead of 2, though it’s less predictable. Super cropping is another high-stress method worth understanding, it involves intentionally stressing the stem to create a knuckle that improves nutrient flow to the upper canopy.
The Sea of Green (SOG) method takes a completely different approach, instead of training one plant to fill a space, you pack multiple smaller plants into the same footprint and flip them to flower early. This is particularly effective for growers running feminized seeds who want fast turnaround and consistent production. SOG works best with shorter, more uniform strains and is popular in states like California and Oregon where licensed home grows allow multiple plants.
Pruning and Defoliation: Directing Energy Where It Counts
Pruning is one of the easiest and most basic ways to increase yields, and it’s something I do on every single grow. The logic is straightforward: lower bud sites that never receive direct light will never develop into meaningful flowers. They just drain energy that could be going to your top colas. Removing those lower branches and “lollipop” pruning the bottom third of the plant redirects that energy upward.
Beyond basic lollipopping, strategic defoliation, removing fan leaves that are blocking light from reaching bud sites, can make a real difference when timed correctly. Diligent lollipopping and fan leaf defoliation at correct timings have positive effects on yield, and I’ve found this to be absolutely true in my experience. I do a major defoliation right before flipping to flower and another around day 21 of flower, when the stretch is winding down and the bud sites are setting.
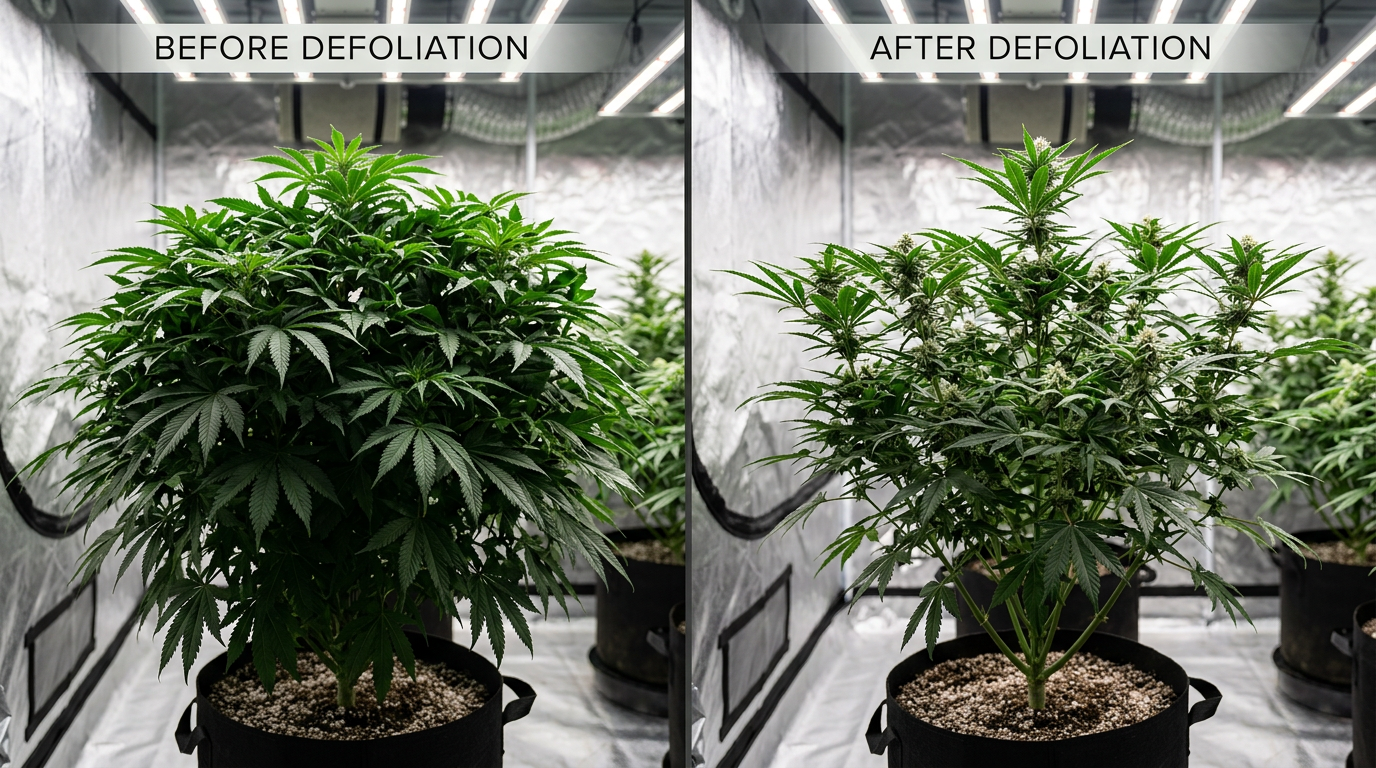
Extreme defoliation methods like schwazzing (removing nearly all fan leaves at day 1 and day 21 of flower) are more controversial and higher-risk. According to Leafly, these extreme defoliation techniques are high-risk methods that can boost yields and bag appeal, but they can also backfire badly if your plant isn’t healthy enough to handle the stress. I’d recommend mastering standard defoliation before going to extremes. If you do try it, make sure your plants are vigorous and your environment is dialed in perfectly.
Environment Specs: Temperature, Humidity, VPD, and CO₂
To maximize yield and quality, growers must master their environment by fine-tuning temperature, humidity, CO₂ levels, and air circulation throughout the plant’s lifecycle. This isn’t just good advice, it’s the foundation everything else is built on. I’ve seen beautifully trained plants underperform simply because the environment was off.
| Parameter | Seedling | Veg | Early Flower | Late Flower |
|---|---|---|---|---|
| Temperature (°F) | 68-77 | 82-85 | 75-80 | 70-78 |
| Humidity (RH%) | 65-70 | 50-70 | 50-60 | 40-50 |
| VPD (kPa) | 0.4-0.8 | 0.8-1.0 | 1.0-1.2 | 1.2-1.5 |
| CO2 (ppm) | 400 | 400-700 | 700-1000 | 700-1000 |
| Light Hours | 18-24 | 18 | 12 | 12 |
During veg, the optimal temperature range is 82-85°F (27.8-29.4°C) for strong root and branch development. I run my veg room on the warmer end of that range and have consistently seen better internodal development and faster growth compared to cooler setups. In flower, I dial back to the mid-to-upper 70s during lights-on and drop another 5-10 degrees during lights-off to simulate natural day/night temperature swings, which can encourage resin production and terpene development.
VPD, vapor pressure deficit, is the metric that ties temperature and humidity together. Running proper VPD for each stage ensures your plants are transpiring efficiently, which drives nutrient uptake and overall plant vigor. In early veg I target around 0.8-1.0 kPa, and I push closer to 1.2-1.5 kPa in late flower. Get a decent digital hygrometer and a VPD chart on the wall, it’s one of the upgrades that genuinely changed how I grow.
CO₂ supplementation is worth discussing because it’s often misunderstood. Plants can only utilize elevated CO₂ if light intensity is high enough to support the increased photosynthesis rate. If you’re running a modest light setup, adding a CO₂ burner won’t do much. But if you’re running high-intensity LEDs or HID lighting and your other variables are dialed, supplementing CO₂ above ambient levels (around 400 ppm) can meaningfully increase growth rate and yield. This is more of an advanced move for growers who have already maxed out their other variables.
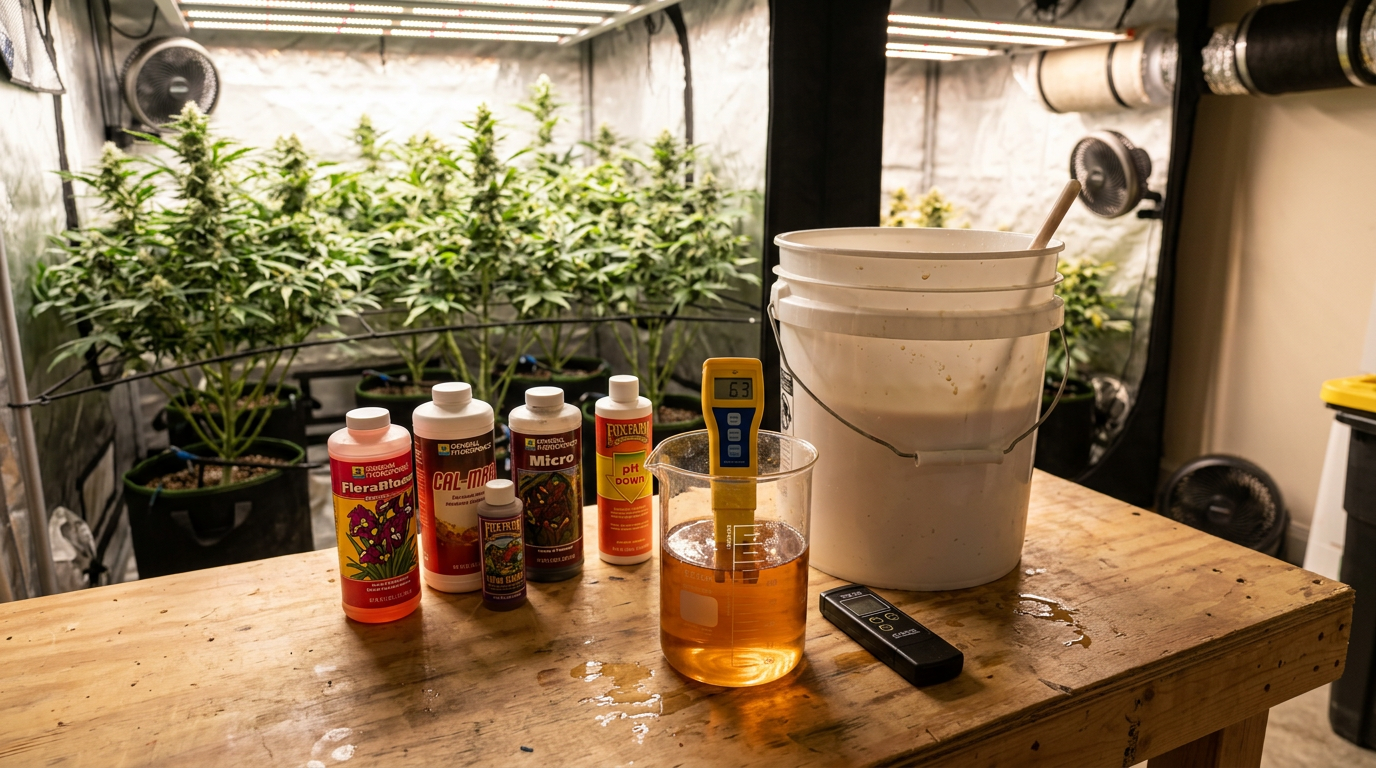
Nutrients and Feeding: Feeding for Yield, Not Just Health
Pruning, training, feeding, and lighting are the most common ways to dictate bud size, according to Leafly, and the feeding piece is one where I see a lot of growers make avoidable mistakes. The biggest one is pushing too much phosphorus in flower thinking it’ll build bigger buds. In reality, excess phosphorus can actually result in less dense, leafy buds. Focus on calcium and other supporting nutrients during the flowering stage rather than just hammering P.
Epsom salt is a simple, cheap supplement that provides magnesium and sulfur, two essential nutrients for cannabis plants. Magnesium is central to chlorophyll production, and sulfur plays a role in terpene synthesis. I add a light Epsom salt solution to my watering routine during flower, especially if I see any interveinal chlorosis (yellowing between leaf veins) that suggests a mag deficiency. It’s one of those old-school grower tricks that actually holds up.
For a structured feeding approach, the Fox Farm Trio system (Grow Big, Big Bloom, Tiger Bloom) is a solid starting point for soil growers, their feeding schedule is straightforward and well-documented for each growth stage. For organic growers, Gaia Green dry amendments and Alaska fish fertilizer are both excellent options, I’ve run organic inputs successfully in soil and found the terpene profiles to be exceptional.
The general principle I follow: nitrogen-heavy in veg to build structure, transition to a balanced formula in early flower, then shift toward a bloom-focused formula with elevated potassium and moderate phosphorus in mid-to-late flower. Always watch your plant, not just your feed chart. The plant will tell you what it needs if you pay attention.
Strain Selection: Your Genetic Ceiling Matters
Selecting high-performing strains known for high yields is an important factor in upping your yields, and this is something I feel strongly about after running dozens of different genetics over the years. You can do everything right and still be limited by what your genetics are capable of producing. Choosing high-yielding strains isn’t about chasing numbers on a seed bank page; it’s about matching genetics to your setup and skill level.
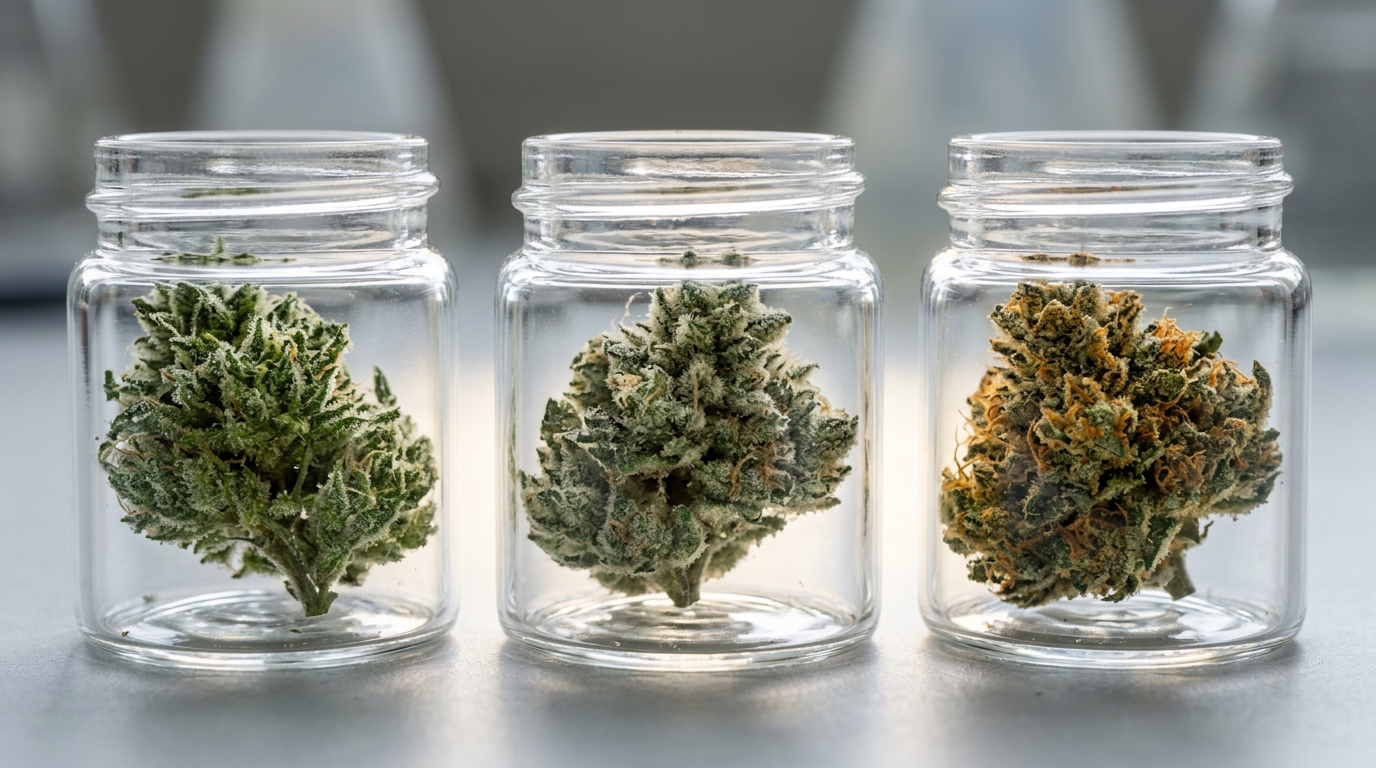
For indoor growers with a controlled environment, I’ve had great results with strains that have strong lateral branching and respond well to training. Gorilla Glue is a classic example, it produces heavy, resinous buds and responds beautifully to topping and LST. Blue Dream is another reliable high-yielder that’s forgiving for intermediate growers and fills out a canopy efficiently. White Widow has been a staple for decades precisely because it’s consistent and productive across a wide range of environments.
If you want something with more exotic terps and still solid production, Lemon Cherry Gelato has been one of my favorites recently, great trichome coverage and the pheno I found last cycle genuinely surprised me on the scale. Wedding Cake and Gelato are both strong producers with exceptional bag appeal. For outdoor growers in warmer climates like Southern California or the Southeast, Sour Diesel and Jack Herer both stretch well and reward longer veg periods with huge outdoor yields. My colleague Travis Cole has a ton of experience maximizing outdoor genetics in different climate zones, his insights on outdoor-specific strain selection are worth checking out.
One thing to keep in mind: always start with quality seeds from reputable sources. Stressed or low-quality seeds will underperform regardless of how well you grow them. Check out Seeds Here Now or Humboldt Seeds if you’re looking for proven genetics with strong yield potential.
Growing Schedule and Timeline: Timing Your Stages for Maximum Production
One of the most underrated yield factors is simply giving your plant enough time in veg. Longer vegetative time helps build the structure that supports heavier flower production, more nodes, more branching, more bud sites. That said, training plants to stack flowers tighter increases yield more effectively than just extending veg indefinitely. The sweet spot depends on your setup, but for most indoor photoperiod grows I recommend at least 4-6 weeks of veg, often longer for plants that will be heavily trained.
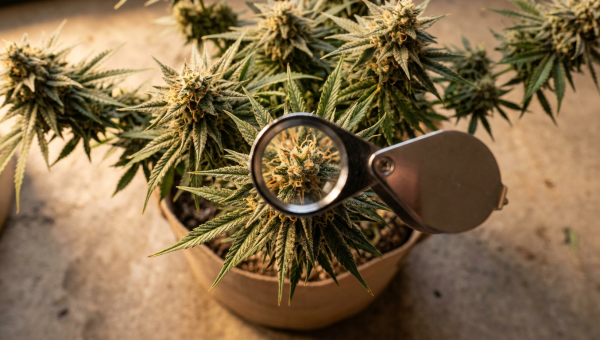
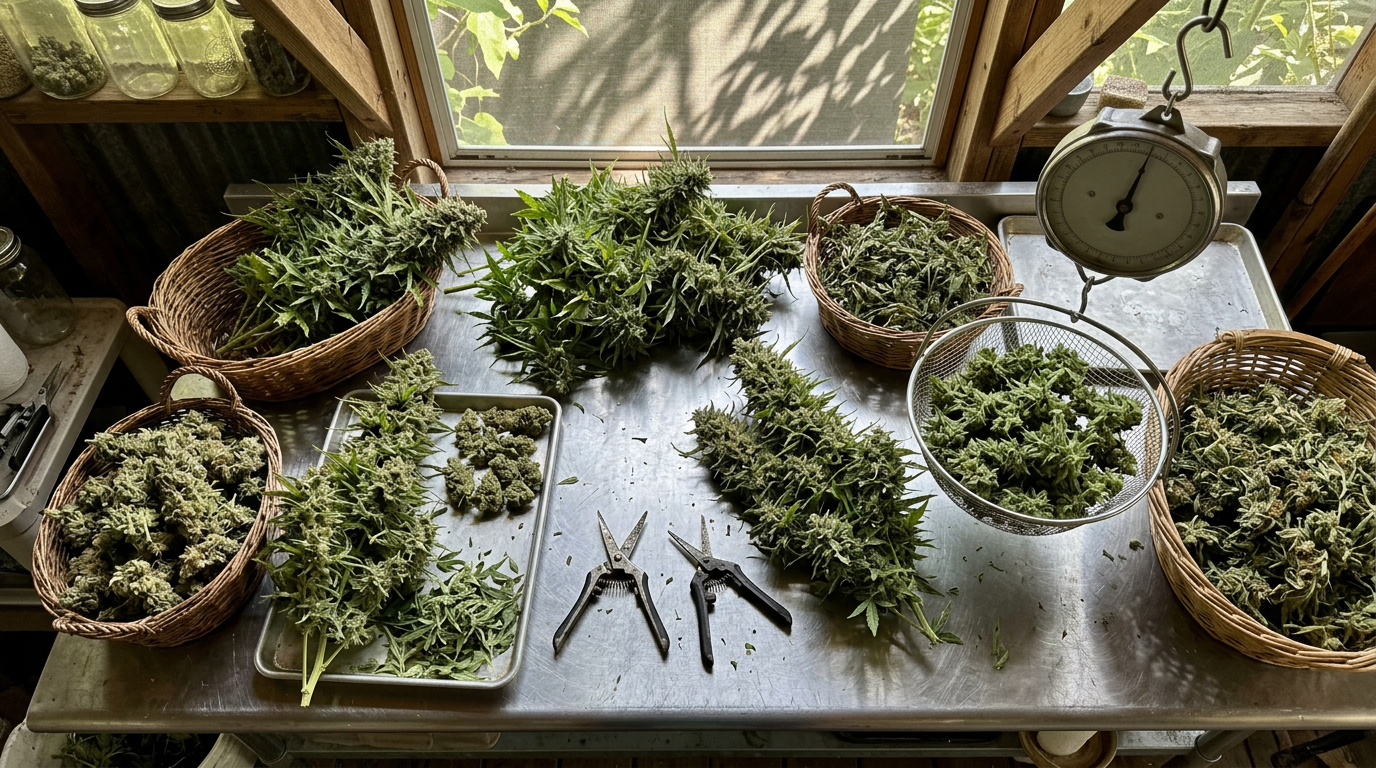
Harvest timing is another often-overlooked yield factor, not in terms of weight, but in terms of potency and effect. Harvesting too early leaves cannabinoids underdeveloped; too late and THC degrades to CBN. I use a jeweler’s loupe or digital microscope to check trichomes, looking for the milky-to-amber ratio that matches my target effect profile. Proper harvest timing is one of the most practical skills you can develop as a grower. The science behind trichome development and what it means for your final product is something Maya Chen has covered in depth, her breakdown of cannabinoid synthesis timing is genuinely eye-opening for growers who want to understand the “why” behind harvest windows.

Troubleshooting a Weak First Harvest: Where Things Go Wrong
If your first harvest came in light, don’t get discouraged, every experienced grower has had a cycle that humbled them. The key is diagnosing what went wrong rather than just trying everything at once next time. Here’s how I approach troubleshooting a weak harvest systematically.
First, look at your light setup. Was your canopy actually getting adequate intensity, or were your plants stretching toward the light? Excessive stretch during flower is a classic sign of light deficiency. Second, check your root zone, were your plants rootbound? Circling roots in a too-small container will limit everything above ground. Third, review your environment logs if you kept them. Temperature spikes, humidity crashes, and VPD swings all stress plants and reduce yield.
Fourth, and this one catches a lot of new growers, check whether you had any male plants or hermaphrodites in your grow. Seeded buds weigh more but have significantly less usable flower, and the stress of pollination diverts plant energy away from bud development. Learning How to identify a male cannabis plant? early in your grow is critical for protecting your harvest. Fifth, consider your genetics. If you started with bag seed or unknown genetics, you may simply have been working with a low-yielding pheno. Investing in quality, stable genetics is one of the highest-ROI moves you can make for your next cycle.
Finally, look at your pest and disease management. Even a minor pest pressure that you managed to control can significantly impact final yield. How To Control Russet Mites on Cannabis Plants is a good resource if you noticed any unusual leaf damage or stunted growth during your cycle.
Outdoor-Specific Yield Maximization Strategies
Growing outdoors in states like California, Oregon, Colorado, and Michigan gives you access to the most powerful light source available, the sun, and that can translate to massive yields per plant if you manage the grow correctly. The fundamentals are the same: training, pruning, genetics, and environment. But the scale and the variables shift considerably.

For outdoor grows, container size becomes even more important. I’ve seen outdoor plants in 25-30 gallon fabric pots absolutely explode in size with proper training. Start plants indoors under artificial light in late winter or early spring, harden them off gradually, and transplant outside after your last frost date. This gives you a significant head start on veg time compared to direct outdoor starts.
Training outdoors means working with the sun’s arc. Position your plants so the canopy is maximally exposed throughout the day, and use stakes, bamboo poles, and soft ties to open up the structure as the plant grows. Topping and LST work just as well outdoors, I’ll typically top 2-3 times on outdoor plants and let them develop a massive multi-cola structure before the natural light cycle triggers flower. Strain selection is especially critical outdoors; you want genetics that finish before your local frost, handle humidity swings, and have some natural resistance to mold and pests. Pineapple Express is a classic outdoor performer in warmer climates, and Northern Lights is famously resilient in cooler northern climates.
FAQ: Your Yield Questions Answered
How do you maximize cannabis yield?
Maximizing yield requires addressing multiple factors simultaneously: light intensity, root space, canopy management through training and pruning, dialed-in environmental controls (temperature, humidity, VPD), proper nutrition, and quality genetics. The most effective approach is to identify your current limiting factor and address that first, rather than trying to optimize everything at once. Most growers see the biggest gains from improving light intensity and adding basic training techniques like topping and LST.
What does Epsom salt do for cannabis plants?
Epsom salt provides magnesium and sulfur, two essential nutrients for cannabis plants. Magnesium is a core component of chlorophyll and is critical for photosynthesis, while sulfur supports enzyme function and terpene synthesis. A light Epsom salt solution added during the flowering stage can correct or prevent magnesium deficiencies, which often show up as interveinal chlorosis (yellowing between the leaf veins while the veins themselves stay green). It’s a cheap, accessible supplement that I use regularly in my own grows.
Does a bigger pot mean a bigger yield?
Generally, yes, larger container sizes allow roots more space before blooming, resulting in healthier flowers and better yield. A rootbound plant is a stressed plant, and stress directly limits yield. That said, there’s a practical limit: an enormous pot in a small tent with a modest light won’t magically produce massive yields. The container size should be matched to your light footprint, veg time, and expected plant size. For most indoor photoperiod grows, 5-7 gallon fabric pots are a solid sweet spot.
How do you get buds to fatten up in late flower?
Getting buds to fatten up in late flower comes down to a few key factors: maximizing light intensity so photosynthesis is running at full capacity, maintaining proper VPD so the plant is transpiring efficiently, ensuring your bloom nutrients are delivering adequate potassium and the right phosphorus levels (avoid over-applying phosphorus, which can actually reduce bud density), and keeping your environment stable. Dropping nighttime temperatures slightly in late flower can also stimulate resin production and help buds swell. Avoid heavy defoliation in the final weeks, the remaining fan leaves are still doing photosynthetic work.
What is the trick to getting larger yields?
There’s no single trick, but if I had to pick one principle, it’s this: grow happier plants by identifying and removing your limiting factor. The growers who consistently pull heavy harvests aren’t doing one secret thing; they’re doing many things consistently well. That means stable environment, quality genetics, proper training, appropriate nutrition, and diligent pest management. Start with the basics, nail them cycle after cycle, and then layer in advanced techniques like CO₂ supplementation or extreme defoliation once your foundation is solid.
How do you improve yield after a weak first harvest?
Start by diagnosing what went wrong: Was light intensity adequate? Were plants rootbound? Did you have pest pressure, hermaphrodites, or environmental swings? Once you’ve identified the likely culprits, fix those specific issues before adding new techniques. Invest in better genetics, upgrade your light if needed, move up a pot size, and implement basic training like topping and LST. Keep a grow journal so you can track what changes and measure the impact. Most growers see dramatic improvements in their second cycle simply by fixing the most obvious limiting factors from their first.
How does topping increase cannabis yield?
Topping removes the apical (main) growing tip of the plant, which breaks the plant’s apical dominance, the tendency to put most of its energy into one dominant central cola. When you top correctly, the plant redirects that energy into the two lateral branches just below the cut, which then become the new main colas. You can top multiple times to create 4, 8, or even more main colas. Combined with LST to keep the canopy even, topping is one of the most effective and reliable yield-boosting techniques available to home growers at any skill level.