I still remember the first time I made cannabutter in my tiny Los Angeles apartment kitchen. I had a block of butter, a bag of flower I’d picked up from my local dispensary, and approximately zero idea what I was doing. The result was a greenish, slightly burnt, suspiciously weak batch that barely did anything, and I was determined to figure out why. That was several years ago, and since then I’ve made cannabutter dozens of times, dialed in my ratios, experimented with temperatures, and hosted more than a few gatherings where my infused baked goods were the undeniable star of the show. If you’re starting from scratch or you’ve had a few disappointing batches yourself, this guide is everything I wish I’d had on day one. We’re talking decarboxylation, infusion methods, strain selection, storage tips, and the troubleshooting knowledge that separates a genuinely potent, beautiful cannabutter from a sad, grassy mess.
- Why Decarboxylation Is the Most Important Step Nobody Talks About Enough
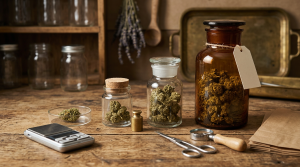
- Choosing Your Cannabis: Strain, Potency, and Flavor Profile
- The Ratios: How Much Cannabis Goes Into Cannabutter?
- Step-by-Step: The Stovetop Cannabutter Method
- The Slow Cooker Method: Set It, Forget It, and Wake Up to Cannabutter
- Troubleshooting: Common Cannabutter Mistakes and How to Fix Them
- Storage, Shelf Life, and Keeping Your Cannabutter Fresh
- How to Use Cannabutter: Recipes, Pairings, and Dosing Ideas
Why Decarboxylation Is the Most Important Step Nobody Talks About Enough
Before you melt a single stick of butter, you need to understand decarboxylation, and I mean really understand it, not just skim past it. Decarboxylation is the process of applying heat to raw cannabis to activate its cannabinoids, converting THCA into the psychoactive THC your body can actually use. Without this step, your cannabutter will be essentially non-psychoactive, no matter how much flower you use or how long you simmer it. I’ve seen so many beginners skip or rush the decarb step and then wonder why their brownies did nothing. Don’t be that person.
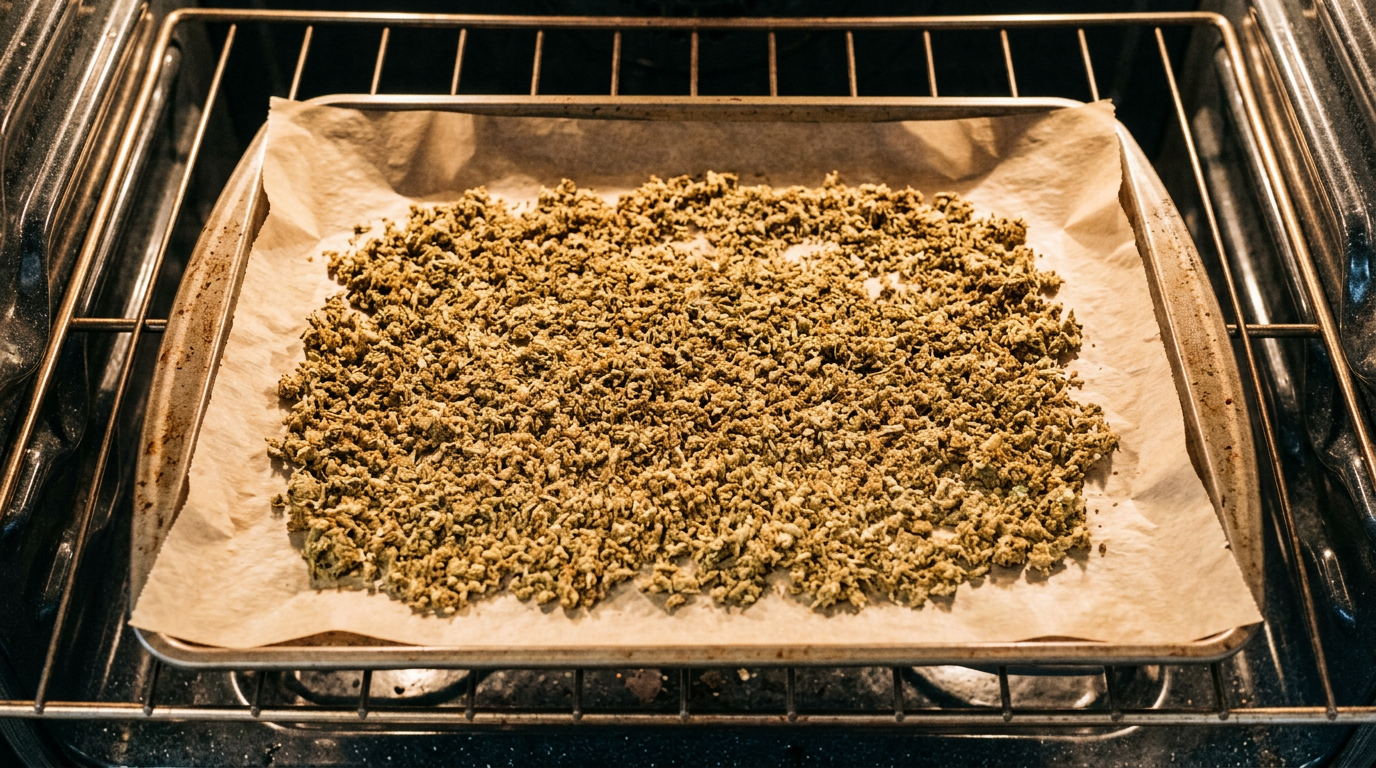
The good news is that decarbing is simple. You’ll want to preheat your oven and spread your ground cannabis in a single, even layer on a parchment-lined baking sheet. The two most commonly cited and community-validated temperature-time combinations are 245°F for 50 minutes or 270°F for 60 minutes, both are reported to produce excellent results. The lower-and-slower approach at 245°F is my personal preference because it feels gentler on the more delicate terpenes that contribute to your cannabutter’s final flavor profile. You can read a much deeper dive into the science of this process in our guide on What is decarboxylation and how to do it?, which I highly recommend bookmarking alongside this recipe.
When you grind your cannabis for decarbing, aim for a consistency similar to dried oregano, coarse enough to have texture, but not a fine powder. A powder will pass right through your cheesecloth later and leave you with a gritty, plant-heavy final product. One clever technique I’ve seen circulate in home-infusion communities is the mason jar decarb method, where you seal your ground cannabis in a mason jar before placing it in the oven. This contains the aroma during the process, which is a genuine quality-of-life improvement if you live in an apartment or share a space with people who aren’t fans of the smell. Once your cannabis comes out of the oven looking lightly toasted and golden-brown (not dark brown or burnt), you’re ready to infuse.
It’s also worth noting that Maya Chen has written extensively about the science behind cannabinoid activation, and if you want to understand the chemistry of why decarboxylation works at a molecular level, her work is an excellent companion to this practical guide.
Choosing Your Cannabis: Strain, Potency, and Flavor Profile
The strain you choose matters more than most cannabutter recipes let on, and as someone who came from the food world, I think about this the way a chef thinks about ingredient quality, your output is only as good as your input. Different strains bring different terpene profiles to your infusion, which means your finished butter will carry subtle (and sometimes not-so-subtle) flavor and aroma notes from whatever flower you started with.
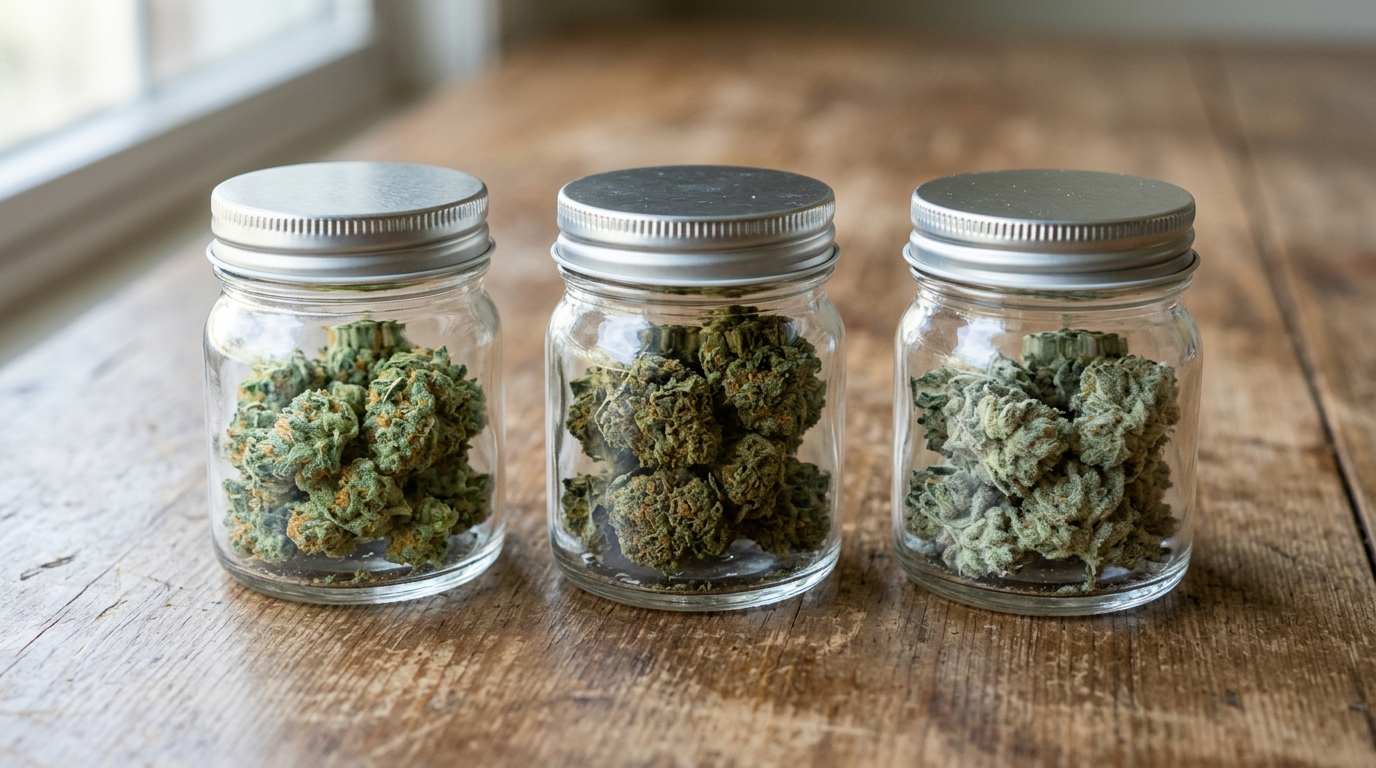
For edibles where you want a mellow, social-friendly experience, I love reaching for something like Blue Dream or Pineapple Express, both have bright, fruit-forward terpene profiles that translate beautifully into baked goods without overwhelming the palate with that heavy, dank earthiness. If you’re making cannabutter for something like a rich chocolate brownie or a savory compound butter, the deeper, more complex flavor profile of OG Kush or Gorilla Glue can actually complement the recipe rather than fight it. For a dessert-forward infusion that practically begs to go into shortbread cookies or a cream sauce, Ice Cream Cake and Gelato are two of my absolute favorites, their creamy, sweet terpene signatures are practically made for butter.
From a potency perspective, the key is knowing (roughly) the THC percentage of your flower so you can make informed dosing decisions later. Higher-THC strains like Girl Scout Cookies or Wedding Cake will produce a more potent cannabutter at the same ratio, while a lower-THC strain or trim will yield something milder and more appropriate for microdosing. If you’re growing your own and want to understand how to maximize your harvest quality before it ever reaches your infusion pot, Darrel Henderson’s growing guides are an invaluable resource.
The Ratios: How Much Cannabis Goes Into Cannabutter?
Getting your cannabis-to-butter ratio right is the single most important variable in controlling the potency of your finished product. There is no universal “correct” ratio, it depends entirely on your tolerance, your intended use, and the THC percentage of your starting material, but there are a few well-established benchmarks to work from.
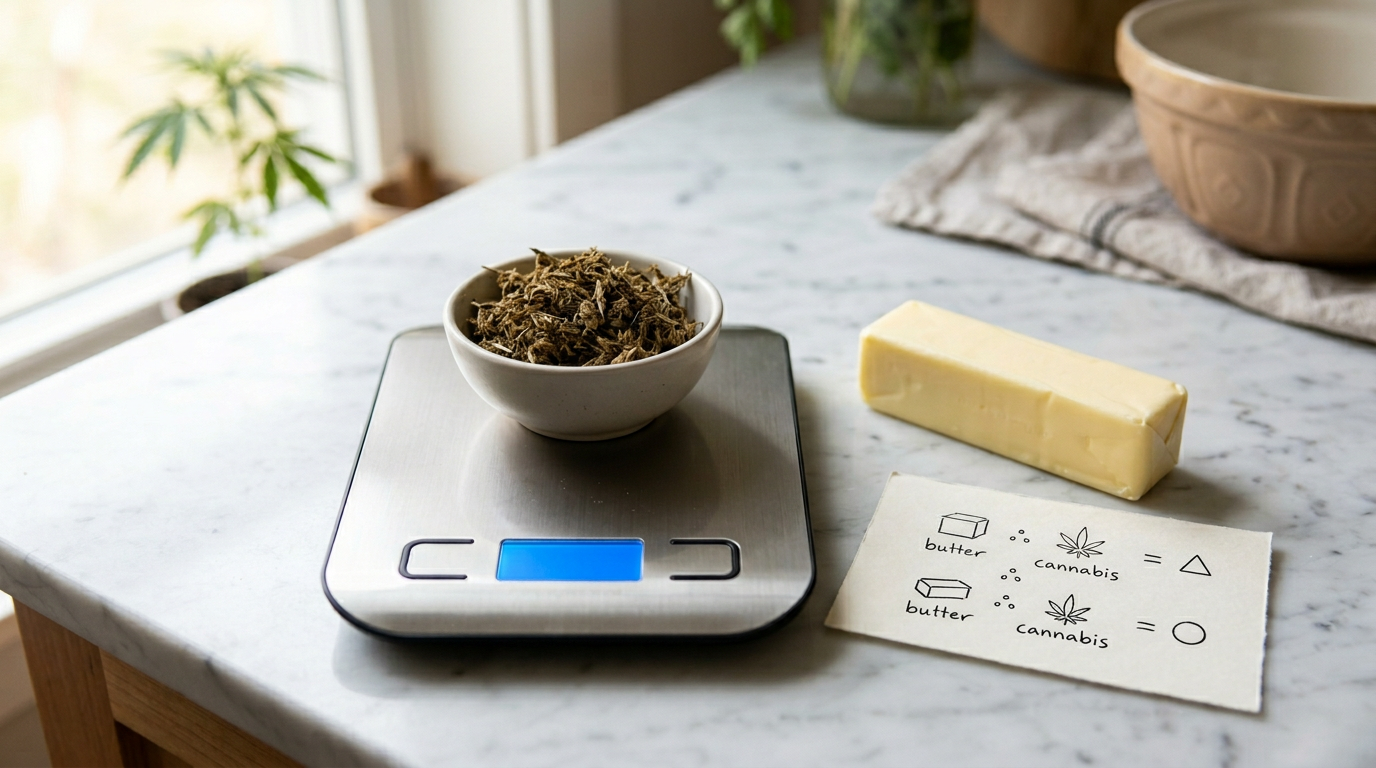
According to guidance from sources including Leafly, a common starting point is a 1:1 ratio of cannabis to butter, one cup of ground, decarbed cannabis to one cup of melted butter. This is a solid middle-ground ratio for most home cooks. On the other end of the spectrum, a more traditional high-yield approach uses approximately one ounce of flower to six sticks of butter (three cups), yielding roughly four sticks of finished cannabutter. If you’re working with smaller quantities, a practical everyday ratio is one pound of unsalted butter to every seven grams of decarboxylated cannabis, which produces a milder, more manageable potency that’s great for beginners or for recipes where you’re eating a full serving of something rich.
My personal approach for social gatherings, where I want everyone to have a pleasant experience without anyone getting overwhelmed, is to err on the side of the lower-potency ratio and remind guests to start with a small amount and wait. The golden rule of edibles always applies: start low, go slow. Understanding how edibles work in your body is essential reading before you serve anything to guests.
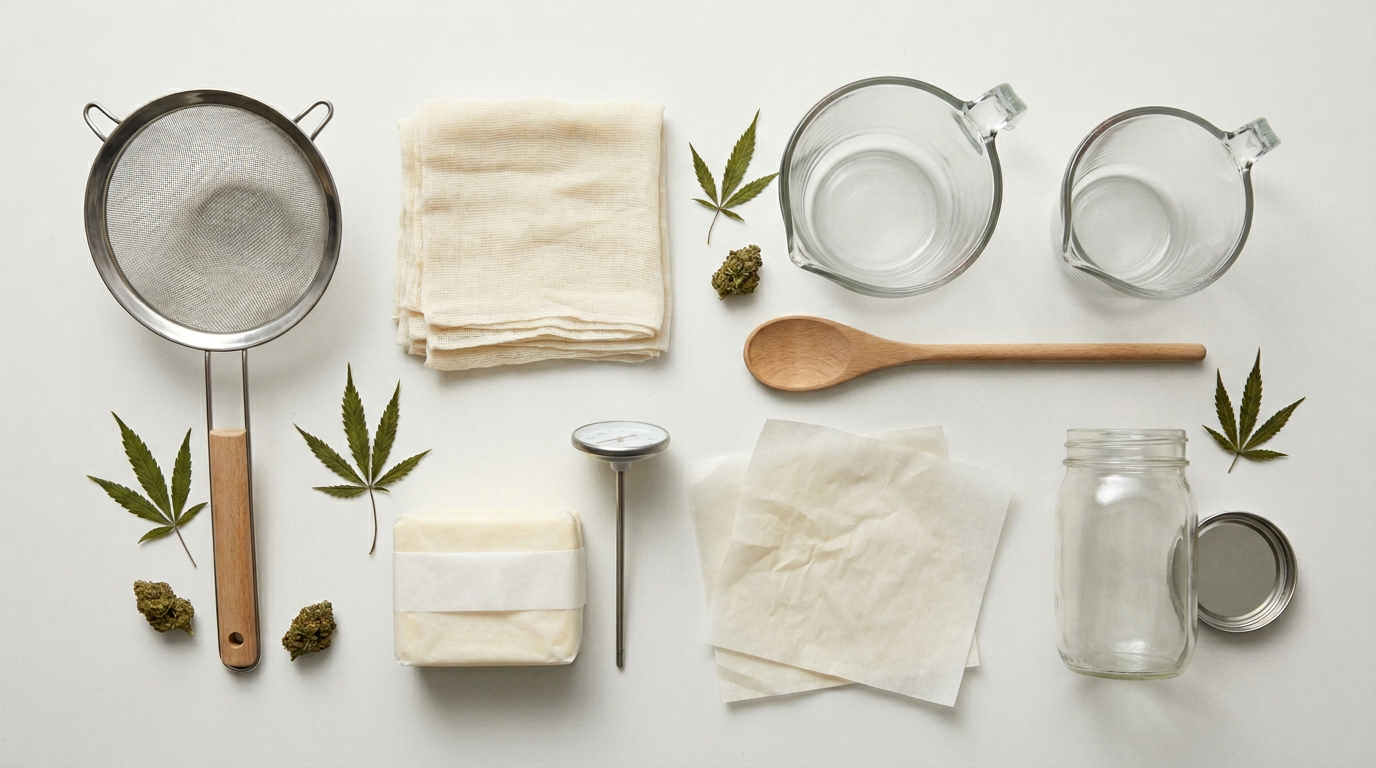
Classic Cannabutter
Ingredients
- 1 cup (2 sticks) unsalted butter
- 1 cup ground decarboxylated cannabis (approx. 7–14g)
- 1 cup water
- Cheesecloth and fine mesh strainer
- Mason jar or airtight container for storage
Instructions
- Preheat oven to 245°F. Spread ground cannabis on parchment-lined baking sheet and bake 50 minutes. Remove and let cool.
- Melt butter and water together in a saucepan over medium heat.
- Reduce to lowest heat setting. Add decarbed cannabis. Stir to combine.
- Simmer on lowest heat for approximately 3 hours, stirring occasionally. Do not boil.
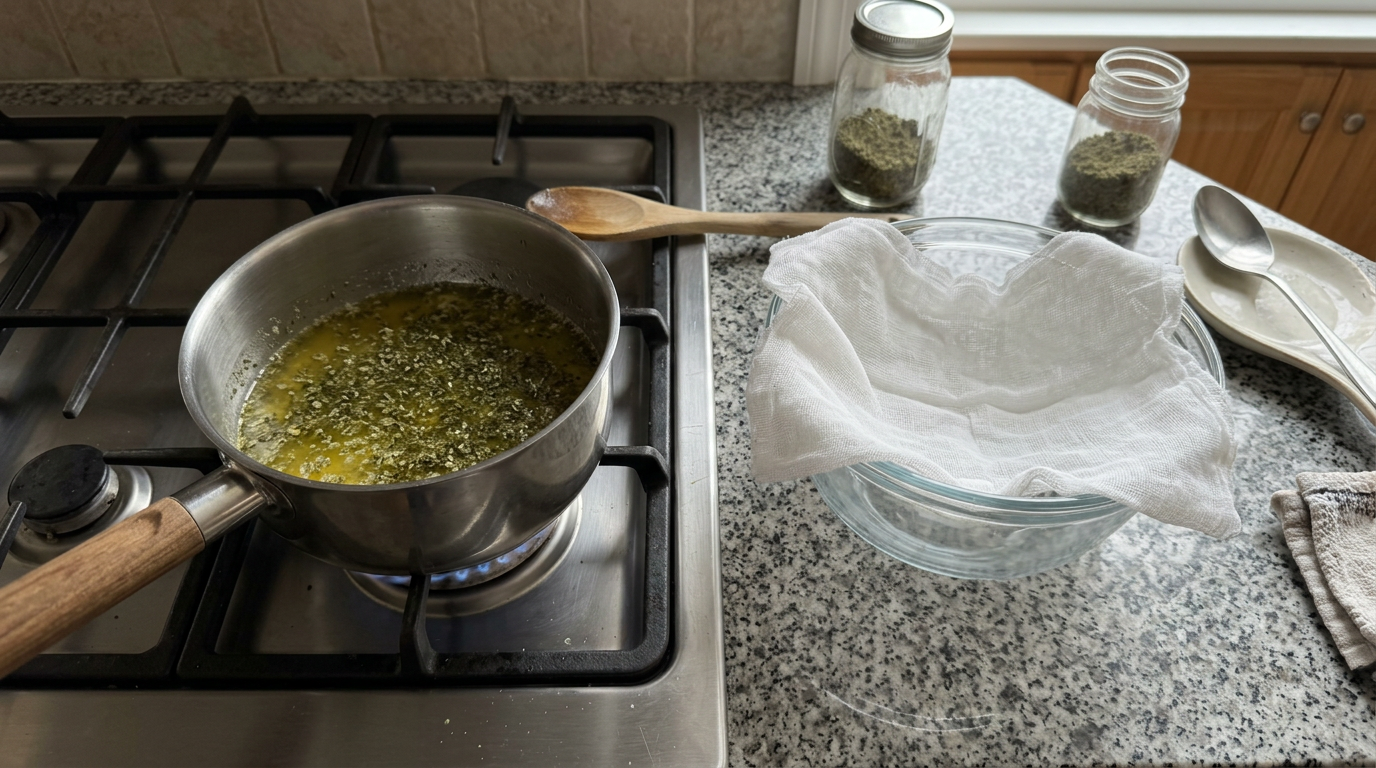
- Set up straining station: fine mesh strainer lined with cheesecloth over a bowl or jar.
- Pour butter mixture through cheesecloth. Gently squeeze to extract remaining butter.
- Cover and refrigerate until solid. Remove butter block from separated water. Pat dry.
- Transfer to airtight container. Label clearly. Store in refrigerator or freezer.
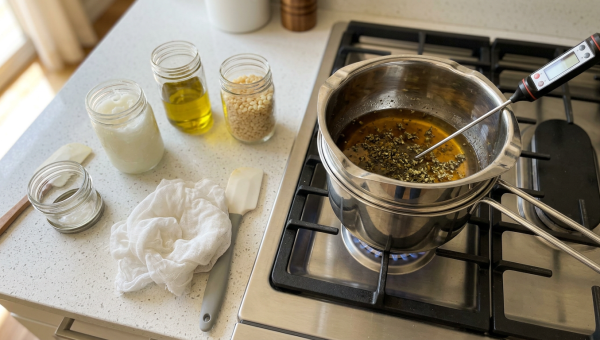
Step-by-Step: The Stovetop Cannabutter Method
The stovetop method is my go-to for a weeknight batch because it takes about three hours total and gives me a lot of hands-on control over the process. The key throughout every single step is low, consistent heat, this is non-negotiable. High heat will degrade your cannabinoids and burn your butter, and you’ll end up with a dark, bitter, weak final product that smells like a campfire. Low and slow is the entire philosophy here.
Start by combining your butter and water in a medium saucepan over medium heat. Yes, water, adding water to the butter during infusion is a widely recommended technique that helps regulate temperature and prevent the butter from scorching. As noted by sources like Food52 and Bon Appétit, the water separates out during refrigeration and can simply be discarded, taking with it some of the more bitter chlorophyll compounds. Once your butter is fully melted, reduce the heat to your absolute lowest setting and add your ground, decarbed cannabis. You’re looking for a gentle simmer, a few lazy bubbles here and there, never a rolling boil. Stir occasionally and let the mixture infuse for approximately three hours.
When your infusion time is up, set up your straining station: a fine mesh strainer lined with cheesecloth over a bowl or large mason jar. Pour your butter mixture through slowly, then gather the cheesecloth and gently squeeze out any remaining butter. Don’t aggressively wring it, you’ll push through more plant material and make your final product more bitter and grassy-tasting. Once strained, cover your container and refrigerate. The butter will solidify into a block on top of any remaining water, which you can simply lift off, pat dry, and transfer to an airtight storage container. That’s your cannabutter, beautiful, golden, and ready to use.
| Item | Purpose | Notes |
|---|---|---|
| Unsalted butter | Infusion base | Unsalted preferred for flavor control |
| Decarbed cannabis | Active ingredient | Grind to oregano consistency before decarbing |
| Water | Temperature buffer | Prevents burning; separates out when chilled |
| Cheesecloth | Straining plant material | Double-layer for cleaner result |
| Fine mesh strainer | Secondary filtration | Use alongside cheesecloth for best clarity |
| Parchment paper | Decarb surface | Prevents sticking during oven step |
| Mason jar or airtight container | Storage | Refrigerate or freeze finished butter |
| Candy/kitchen thermometer | Temperature monitoring | Keep infusion below 200°F ideally |
| Wooden spoon | Stirring | Non-reactive; good for low-heat stirring |
The Slow Cooker Method: Set It, Forget It, and Wake Up to Cannabutter
If the stovetop method requires you to be present and attentive, the slow cooker method is the complete opposite, it’s the lazy Sunday approach to cannabutter, and honestly, it’s just as effective. The slow cooker runs at a low, consistent temperature that’s ideal for gentle infusion, and many experienced home infusers swear by it for producing a consistently potent and clean-tasting result. The community-favorite approach is to run your slow cooker on the low setting for anywhere from six to twenty hours, with the longer end of that range being popular among experienced users who want maximum extraction.
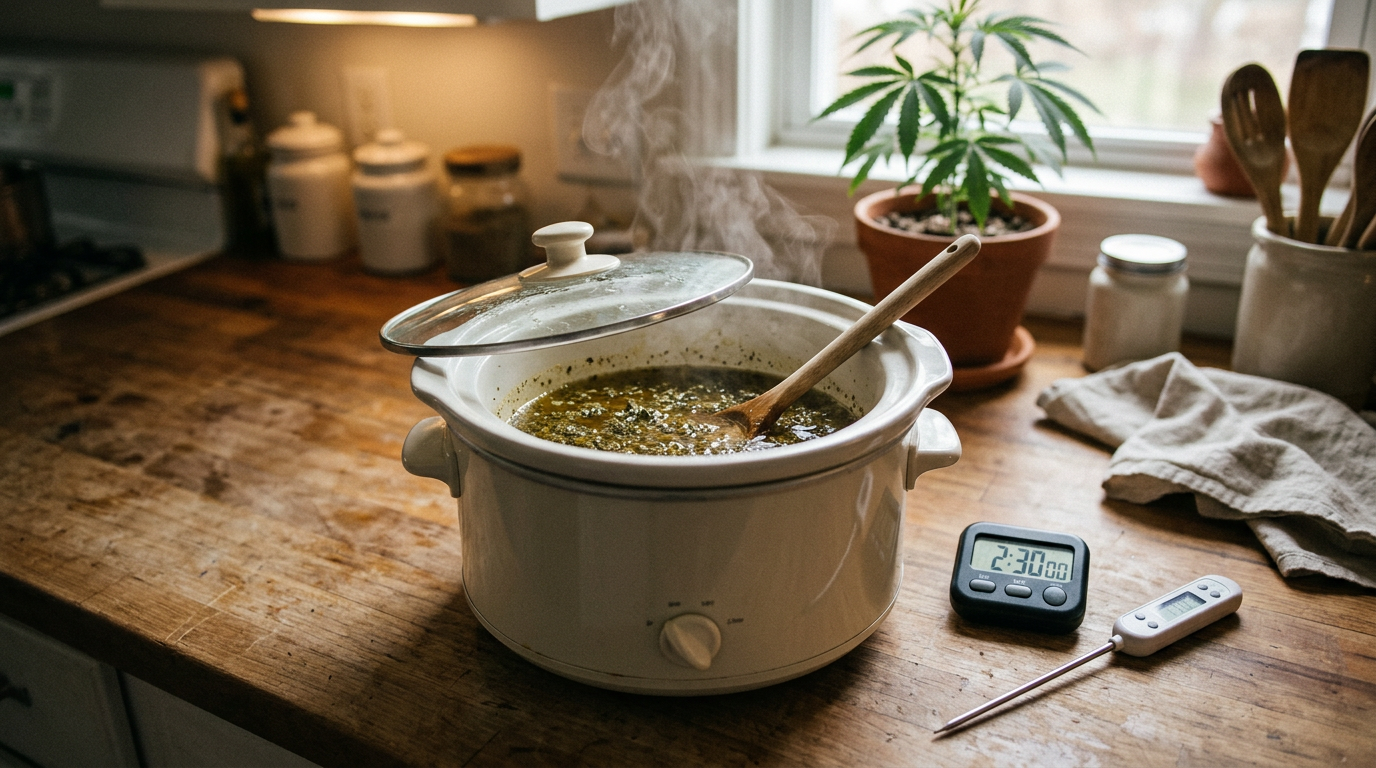
The process is essentially the same as the stovetop method, melt your butter in the slow cooker, add your decarbed cannabis (some people like to wrap the cannabis in a cheesecloth sachet before adding it, which makes straining significantly easier), and let it run on low. You can add a small amount of water here as well for the same temperature-buffering benefits. When your infusion time is up, strain through cheesecloth just as you would with the stovetop method, refrigerate, and remove the solidified butter block from any water that has separated out. The extended infusion time of the slow cooker method can produce a more thoroughly extracted cannabutter, though both methods are considered effective by cannabis culinary experts including those at Weedmaps and Epicurious.
Troubleshooting: Common Cannabutter Mistakes and How to Fix Them
Even with a good recipe in hand, things can go sideways, and I’ve made every single one of these mistakes personally, so consider this section hard-won wisdom rather than theory. The most common issue beginners encounter is weak potency, and nine times out of ten, the culprit is skipping or rushing the decarboxylation step. If your cannabutter isn’t doing much, that’s almost certainly why. The second most common issue is burnt or dark butter with a bitter, harsh flavor, which comes from cooking at too high a temperature. Your infusion should never be bubbling aggressively, if it is, pull it off the heat immediately and let it cool before continuing.
A grassy, intensely “weedy” flavor in the finished butter is something a lot of beginners find off-putting, and there are a few ways to minimize it. Adding water during infusion (as described above) helps pull out some of the chlorophyll. Some experienced infusers also recommend clarifying your butter before infusing, essentially making ghee by slowly cooking off the milk solids, which produces a cleaner base that absorbs cannabinoids efficiently and results in a less vegetal flavor profile. It also has a higher smoke point, which means it’s more stable at slightly higher temperatures.
If your finished cannabutter is inconsistent in potency, some portions hitting harder than others, that’s usually a mixing and distribution issue. Stirring thoroughly during infusion and again after straining (before it fully solidifies) helps distribute the cannabinoids more evenly throughout the fat. And if you’re finding the whole process too aromatic for your living situation, the mason jar decarb method mentioned earlier, combined with a slow cooker with a sealed lid, can significantly reduce the smell.
Storage, Shelf Life, and Keeping Your Cannabutter Fresh
Finished cannabutter should be stored in an airtight container in the refrigerator, where it will keep for approximately two to four weeks. For longer storage, it freezes beautifully, wrap portions tightly in plastic wrap, place them in a freezer-safe bag, and your cannabutter will stay good for up to six months in the freezer. I like to portion mine into tablespoon-sized amounts using an ice cube tray before freezing, which makes it incredibly easy to grab exactly what I need for a recipe without having to thaw and re-freeze a large block.

Always label your cannabutter clearly, especially if you have non-consuming people in your household. In states like California, Colorado, Oregon, Washington, and other adult-use markets, responsible storage of cannabis-infused products is not just good practice, it’s a legal and ethical responsibility, particularly in homes with children or pets. Keep it clearly labeled, stored separately from regular butter, and out of reach. This isn’t just etiquette; in many US states, improper storage of cannabis products can have legal implications.
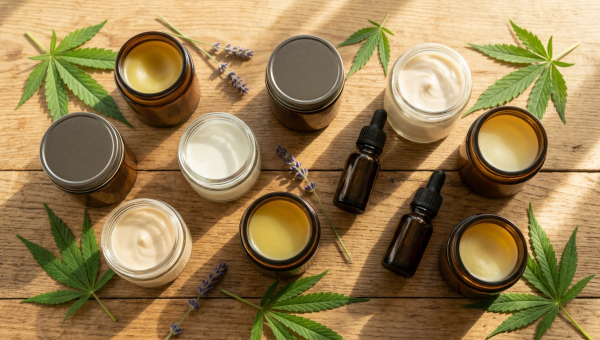
How to Use Cannabutter: Recipes, Pairings, and Dosing Ideas
Once you have a beautiful batch of cannabutter on hand, the culinary world opens up in the most delightful way. My favorite application is classic brown butter shortbread, the nutty, caramelized notes of browned cannabutter pair so well with the buttery richness of the cookie that the cannabis flavor becomes part of the experience rather than something you’re trying to mask. Cannabutter also works beautifully as a finishing butter on savory dishes: tossed with pasta, melted over roasted vegetables, or stirred into mashed potatoes for a dinner party that your guests will definitely remember.
For baking, the standard rule of thumb is to substitute cannabutter for regular butter in a 1:1 ratio in any recipe. However, I always recommend starting with a partial substitution, using half cannabutter and half regular butter, until you’ve calibrated the potency of your batch. This is especially important if you’re making something for guests who may have varying tolerances. A single brownie made with full-strength cannabutter can be a very different experience from one made with a 50/50 blend, and knowing the difference matters.
If you’re interested in expanding your infused pantry beyond butter, What Is THC Syrup and How Do You Make It? is a great next project, and What is Kief – How to Collect And Use It opens up a whole world of potency-boosting possibilities for your infusions. You can also explore more cannabis lifestyle content throughout our cannabis blog.
Frequently Asked Questions About Making Cannabutter
How do you make cannabutter for beginners?
The simplest beginner approach is to decarboxylate your cannabis first by baking it at 245°F for 50 minutes on a parchment-lined sheet, then melt unsalted butter with a cup of water in a saucepan on the lowest heat setting, add your ground decarbed cannabis, and let it simmer gently for about three hours. Strain through cheesecloth into a container, refrigerate until solid, and remove the butter block from any separated water. That’s the whole process, decarb, infuse, strain, chill. The most important things to get right are the decarboxylation step and keeping your heat consistently low throughout the infusion.
What is the ratio of cannabis to butter when making cannabutter?
There are several commonly used ratios depending on your desired potency. A popular beginner-friendly ratio is one pound of unsalted butter to seven grams of decarboxylated cannabis, which produces a mild, manageable result. A 1:1 ratio by volume, one cup of cannabis to one cup of butter, is another widely cited approach that produces a more potent result. For a large batch, one ounce of flower to six sticks of butter (three cups) is a traditional ratio that yields approximately four sticks of finished cannabutter. Choose based on your tolerance and intended use.
Can you make cannabutter without decarboxylation?
Technically you can, but you shouldn’t expect meaningful psychoactive effects. Raw cannabis contains THCA, not THC, the decarboxylation process (applying heat) converts THCA into the active THC that your body absorbs. Without decarbing, your cannabutter will contain mostly inactive cannabinoids, and you’ll be left wondering why your edibles aren’t doing anything. Decarboxylation is not optional if potency is your goal. The slow cooker method does apply some heat during infusion, but it is not a reliable substitute for a dedicated decarb step.
Can I make cannabutter with salted butter?
You can, but most culinary sources and experienced infusers recommend unsalted butter for a few reasons. Unsalted butter gives you better control over the final flavor of your recipes, salt levels in salted butter vary by brand, and when you’re baking something precise, that variability matters. Unsalted butter also tends to have a cleaner, fresher flavor profile that lets the terpenes and natural flavors of your cannabis come through more clearly. That said, if salted is all you have on hand, it will still work for the infusion process itself.
What is the best decarboxylation temperature and time?
The two most widely used and community-validated decarboxylation parameters are 245°F for 50 minutes and 270°F for 60 minutes. Both are reported to produce effective activation of cannabinoids. The lower temperature (245°F) is generally preferred by those who want to preserve more of the delicate terpenes that contribute to flavor and the entourage effect, while the slightly higher temperature (270°F) may be more efficient for full cannabinoid conversion. Avoid going above these temperatures, as excessive heat will degrade cannabinoids and reduce the potency of your final product.
How long does cannabutter last and how should it be stored?
Properly stored cannabutter will keep in the refrigerator for approximately two to four weeks in an airtight container. For longer storage, cannabutter freezes very well, portioned into tablespoon-sized amounts and stored in a freezer-safe container, it can last up to six months without significant loss of potency. Always label your cannabutter clearly and store it separately from regular butter, especially in households with children, pets, or non-consuming adults. Responsible storage is both a safety practice and, in many US adult-use states, a legal consideration.
How do I make cannabutter without a slow cooker?
The stovetop method is a perfectly effective alternative to the slow cooker and is actually the approach many experienced home infusers prefer for its hands-on control. Simply combine your melted butter and water in a saucepan over the lowest possible heat, add your decarbed cannabis, and simmer gently for approximately three hours, stirring occasionally. The key is keeping the temperature low and consistent, never let it boil. A kitchen thermometer is helpful for monitoring this. Strain through cheesecloth when done, refrigerate, and remove the solidified butter block from any separated water.