Harvest timing is the single most important decision you’ll make in an entire grow cycle, and it’s the one most home growers get wrong. I’ve watched people pull plants two weeks early because they were impatient, and I’ve watched others wait so long that their hard-earned THC degraded into sedative CBN. Both mistakes are completely avoidable once you understand what your plant is actually telling you. Whether you’re deep in your first grow following a complete home growing guide or you’re a few cycles in and still second-guessing your window, this guide is going to give you the full picture, trichome stages, secondary indicators, pre-harvest prep, the harvest process itself, and what comes next. Let’s get into it.
- Why Harvest Timing Changes Everything About Your Final Product
- Trichome Stages: Your Primary Harvest Indicator
- Secondary Harvest Indicators: Pistils, Calyxes, and Leaf Color
- Pre-Harvest Preparation: Flushing, Darkness, and Watering
- What Happens When You Harvest Too Early
- What Happens When You Harvest Too Late
- The Step-by-Step Harvest Process
- Harvesting Autoflowers: Different Rules Apply
- Outdoor Harvest Timing: Seasonal Cues and Weather Pressure
- Harvest Timing by Effect: A Decision Framework
- Drying and Curing: The Next Critical Phase
Why Harvest Timing Changes Everything About Your Final Product
The cannabinoid and terpene profile of your cannabis is not fixed, it shifts dramatically in the final weeks of flower, and the exact moment you cut determines what ends up in your jar. Harvest at the wrong time and you’re not just leaving potency on the table; you’re fundamentally changing the effect, the flavor, and the overall quality of everything you worked months to produce.
Here’s the core chemistry you need to understand. THC (tetrahydrocannabinol) is the primary psychoactive compound, and it reaches peak concentration in mature, fully developed trichomes. As the plant continues to age past that peak, THC begins to oxidize and degrade into CBN (cannabinol). CBN is mildly psychoactive but is primarily associated with sedative, body-heavy effects. So a plant harvested early leans energetic and cerebral, sometimes uncomfortably racy, while a plant harvested late leans toward a couch-lock, sleep-inducing stone. Research published in PMC/NCBI confirms that cannabinoid profiles in cannabis are significantly influenced by maturation stage, supporting what growers have known from practical experience for decades.
Terpenes are equally time-sensitive. The volatile aromatic compounds responsible for your strain’s flavor and aroma, the ones that make Sour Diesel smell like fuel or Lemon Cherry Gelato smell like a candy shop, begin to degrade with UV exposure, heat, and age. Harvest too late and you lose not just potency but that distinctive terp profile you’ve been anticipating all season. This is why understanding the trichome clock is so critical, and why I treat it as a non-negotiable part of every harvest decision I make.
Trichome Stages: Your Primary Harvest Indicator
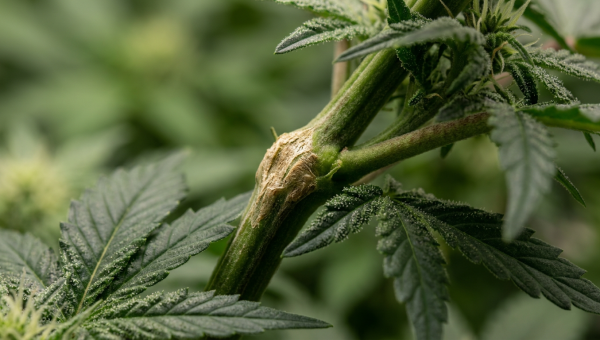
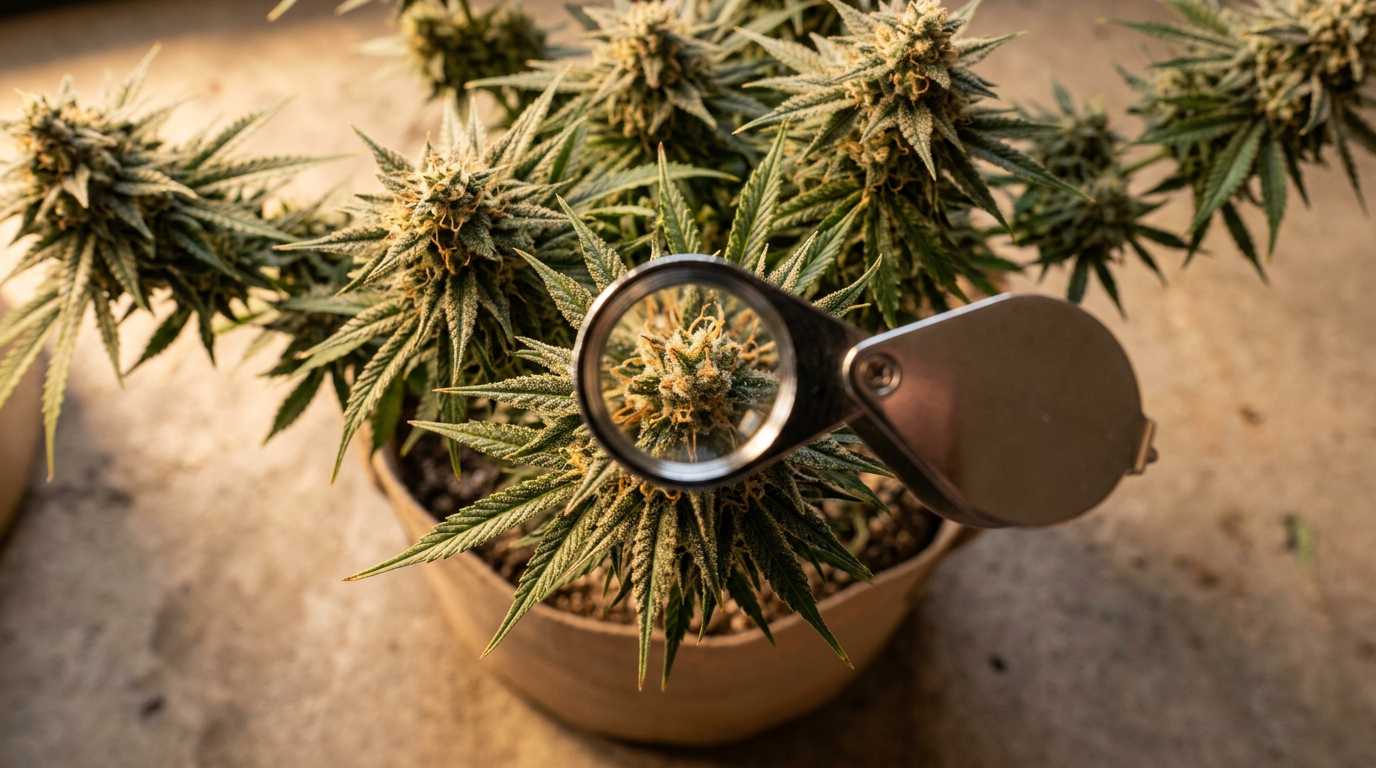
Trichome color is the most reliable, most direct indicator of harvest readiness, nothing else comes close. Trichomes are the tiny, mushroom-shaped resin glands covering your buds and sugar leaves, and they change color in a predictable progression that tells you exactly where you are in the ripening window.
You need magnification to read them properly. A 30x–60x jeweler’s loupe will work in a pinch, but I strongly recommend a digital USB microscope or a quality handheld scope with at least 60x magnification. You’re looking at the trichome heads, the round, bulbous caps, not the stalks. Here’s what each stage means for your harvest decision:
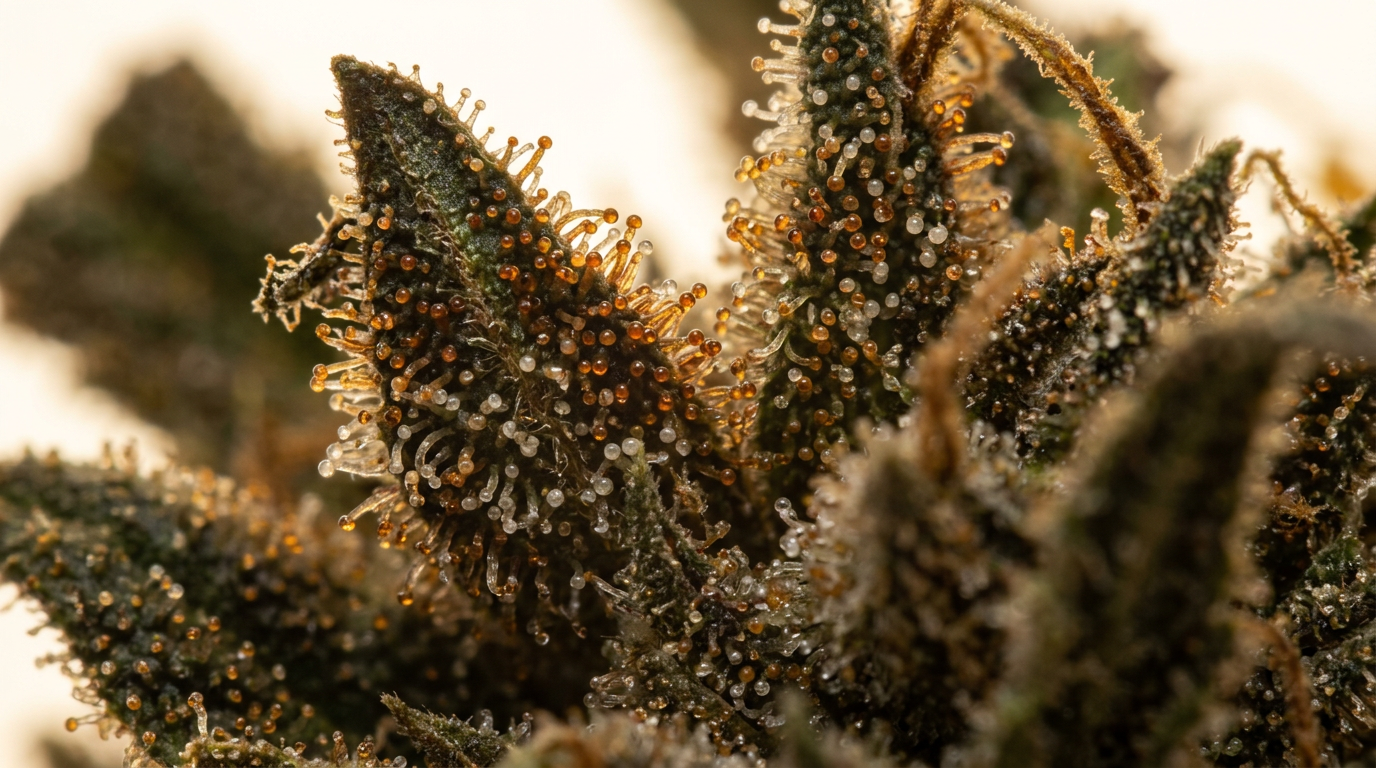
Clear/Translucent Trichomes: These are immature trichomes still in the process of producing cannabinoids. The resin glands look glassy and see-through under magnification. Harvesting at this stage means low THC, underdeveloped effects, and a harsh, green-tasting smoke. This is too early, full stop. I’ve never seen a reason to harvest at this stage intentionally.
Milky/Cloudy White Trichomes: This is where THC concentration is at or near its peak. The trichome heads look opaque and white, like tiny pearls. The high from cloudy-dominant trichomes tends to be more cerebral, energetic, and uplifting, the classic “head high.” For sativa-leaning strains like Amnesia Haze or Jack Herer, this is often the sweet spot. If you’re after maximum psychoactive potency and a clear-headed effect, harvest when the majority of trichomes are milky with only a small percentage turning amber.
Amber Trichomes: As THC oxidizes into CBN, trichome heads shift from milky white to a golden amber color. More amber means a heavier, more sedative, body-dominant effect. For indica-dominant strains like Northern Lights, Granddaddy Purple, or Ice Cream Cake, waiting for 20–30% amber is often exactly what you want, it enhances the relaxation and sleep-inducing qualities those genetics are bred for. Beyond 40–50% amber, you’re losing significant potency and the product starts to feel more narcotic than recreational.
The practical approach I use is an effect-based target, not a one-size-fits-all percentage. Ask yourself what experience you’re trying to create, then use the trichome window to dial it in.
| Trichome Color | Cannabinoid State | Effect Profile | Best For |
|---|---|---|---|
| Clear / Translucent | THC still forming, immature | Underdeveloped, harsh, anxious | Never harvest here |
| Mostly Cloudy / Milky | Peak THC concentration | Cerebral, energetic, uplifting, clear-headed | Sativas, daytime use, creative effects |
| Mixed Cloudy + 10–20% Amber | THC at peak, slight CBN forming | Balanced, euphoric with body relaxation | Balanced hybrids, social use, all-purpose harvest |
| Mixed Cloudy + 20–30% Amber | THC declining, significant CBN | Heavy body, relaxing, mildly sedative | Indicas, evening use, pain relief, sleep |
| Mostly Amber (40%+) | Heavy CBN dominance | Narcotic, couch-lock, heavy sedation | Medical sleep use only, potency loss significant |
One critical mistake I see constantly: growers checking trichomes on the sugar leaves instead of the bud itself. Leaf trichomes mature faster than the bud trichomes, so if you’re reading leaves, you’ll think you’re further along than you actually are. Always check the calyxes, the small, teardrop-shaped structures that make up the bud, for the most accurate read.
Secondary Harvest Indicators: Pistils, Calyxes, and Leaf Color
Secondary indicators support your trichome assessment, they don’t replace it, but they’re useful cross-checks and are especially helpful for growers who don’t yet have a quality loupe or scope. Think of them as the supporting cast to trichomes’ leading role.
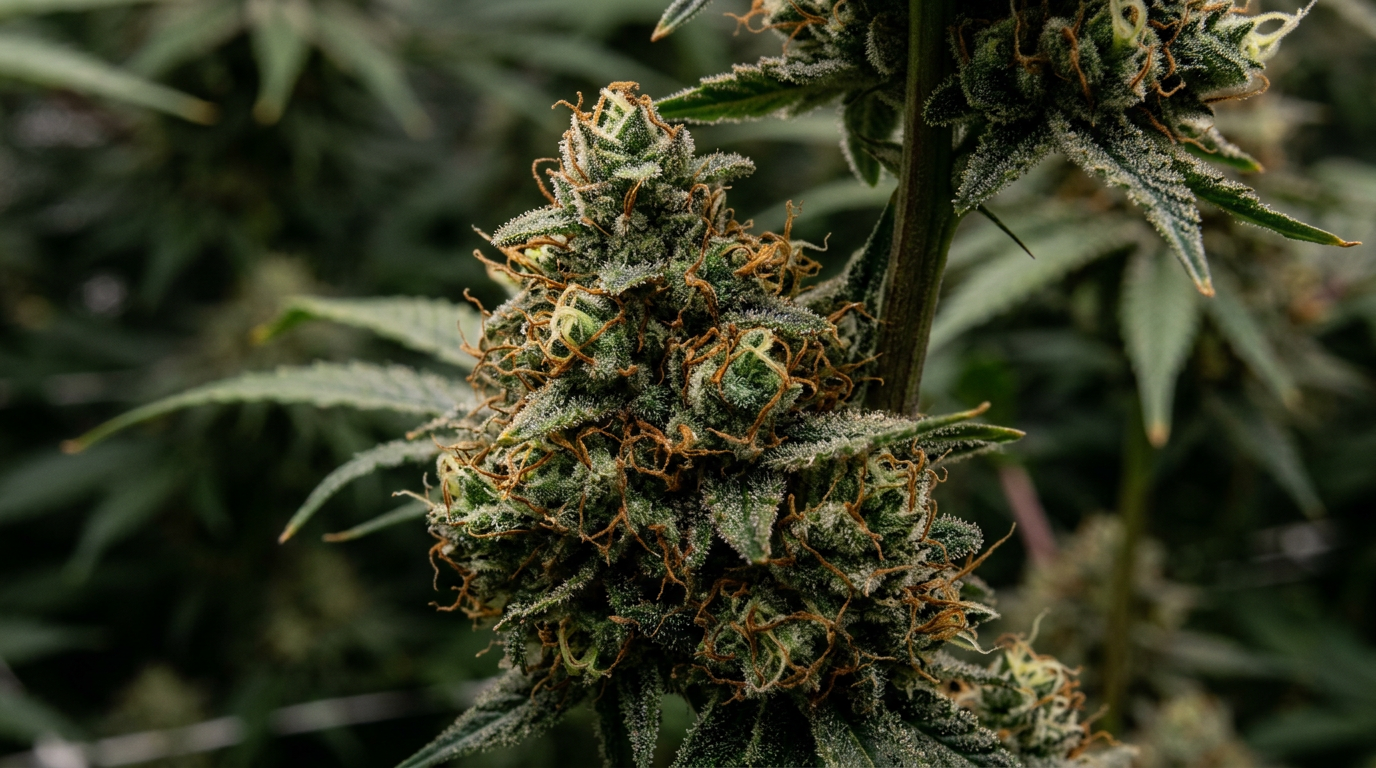
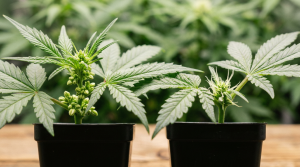
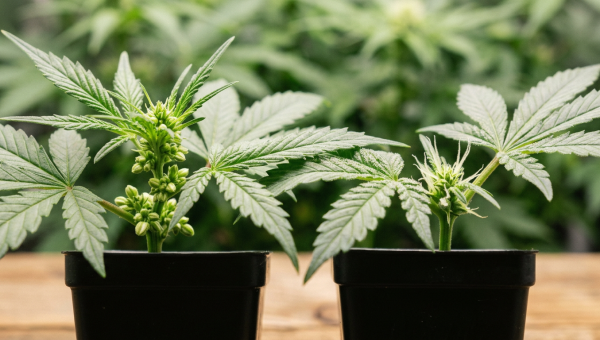
Pistil Color Change: Pistils are the hair-like structures on your buds that start out white and gradually darken to orange, red, or brown as the plant matures. A commonly cited guideline is that harvest is approaching when 70–90% of pistils have darkened. This is a reasonable rough indicator, but it’s strain-dependent, some phenos turn their pistils early without being fully ripe, and others stay mostly white until very late. I use pistil color as a “time to start checking trichomes closely” signal rather than a harvest trigger itself.
Swollen Calyxes: In the final week or two before peak ripeness, the calyxes, those small pod-like structures stacking up to form your buds, swell visibly. They look fat, rounded, and dense. This swelling indicates the plant has finished putting energy into bud development and is transitioning into final ripening. Swollen calyxes combined with milky trichomes is a strong two-indicator confirmation that you’re in the harvest window.
Leaf Yellowing: Natural senescence, the plant’s programmed aging process, causes fan leaves to yellow and drop in the final weeks. This is normal and expected, especially if you’ve eased off nitrogen in late flower as you should be. Don’t panic when the big fan leaves go yellow; it’s often a sign the plant is right on schedule. That said, if yellowing is happening too fast or affecting bud leaves heavily, cross-reference with your trichomes to make sure you’re not pushing the plant past its window.
If you’re troubleshooting unusual leaf symptoms alongside ripening signs, the cannabis leaf diagnosis guide is an excellent resource for separating normal senescence from actual deficiencies.
Pre-Harvest Preparation: Flushing, Darkness, and Watering
What you do in the final one to two weeks before harvest has a real impact on your final product, this is the pre-harvest prep phase, and it’s worth doing right.

The Flushing Debate: Flushing, running plain, pH-balanced water through your medium for one to two weeks before harvest, is one of the most debated topics in cannabis cultivation. The traditional argument is that flushing removes excess mineral salts from the medium, forcing the plant to consume its stored nutrients and resulting in a smoother, cleaner-tasting final product. The counter-argument, supported by some research, is that the plant’s internal chemistry doesn’t change significantly based on a short flush period and that the quality difference is minimal or undetectable.
My honest take after 12 years: I flush in soil, and I think it makes a difference in the smoothness of the smoke. In coco or hydro, I’m less convinced, the dynamics are different. If you’re growing in living soil, some growers skip the flush entirely and rely on the microbial ecosystem to handle salt balance naturally. Do what makes sense for your medium, but don’t stress it as much as some forums would have you believe.
The 48–72 Hour Darkness Period: You’ve probably seen this one on Reddit, the idea that putting your plant in total darkness for 48–72 hours before harvest causes a final terpene and trichome surge, dramatically boosting quality. The theory is that darkness stresses the plant into producing more resin as a UV-protection response. The honest answer is that the scientific evidence for a dramatic, measurable effect is thin. Some experienced growers swear by it; controlled studies haven’t confirmed a significant impact on cannabinoid or terpene content from a short darkness period alone.
In my own grows, I’ve done a 24-hour dark period before harvest more as a ritual than anything I can scientifically defend. If you want to try it, it certainly won’t hurt your plant. But don’t expect a miracle transformation in trichome density overnight. Focus your energy on getting the timing right, that has far more impact than any pre-harvest trick.
Watering Before Harvest: This is one I feel strongly about: do not water your plants heavily right before harvest. A slightly dry medium at harvest makes the drying process more efficient, reduces the risk of mold during drying, and makes the plant easier to handle. I typically stop watering 1–2 days before I plan to cut so the medium is on the dry side but the plant isn’t stressed. Don’t let it wilt, but don’t give it a big drink the morning of harvest day either.
What Happens When You Harvest Too Early
Harvesting too early is the most common mistake new growers make, and it costs them in every measurable way. When trichomes are still predominantly clear or just beginning to turn milky, THC production is incomplete. The buds haven’t reached their full density or weight, the calyxes haven’t swollen, and the resin glands are still developing. You’re pulling the trigger before the gun is loaded.
The effects of prematurely harvested cannabis are distinctive and unpleasant for most users: an anxious, racy, head-spinning high that lacks depth or body. The terp profile is underdeveloped, often tasting sharp, green, or harsh. Yield is lower because the buds haven’t bulked to their final weight. And the worst part? You can’t fix it after the fact. Once you cut, that’s what you’ve got.
I’ve made this mistake exactly once, back in my third grow, growing a Blue Dream pheno that I was convinced was ready because the pistils had mostly darkened. I hadn’t invested in a proper loupe yet. The result was harsh, racy smoke that gave me a headache. That was the last time I harvested without checking trichomes under magnification. Don’t be me in year three, get a decent scope before you even start flowering.
The impatience factor is real and understandable. You’ve been tending these plants for months. You’re excited. But the final two weeks of flower are when a significant portion of total cannabinoid and terpene production happens. Patience at the end pays dividends that patience anywhere else in the grow simply can’t match.
What Happens When You Harvest Too Late
Over-harvesting is less common but equally damaging in its own way. When trichomes are predominantly amber, say, 50% or more, you’ve moved well past peak THC and into heavy CBN territory. The plant is degrading its own cannabinoid content through oxidation. Terpenes have also had more time to volatilize and degrade, which means your flavor and aroma are diminished.
The effect profile of over-ripe cannabis tends to be heavy, foggy, and sedating in a way that many users find unpleasant rather than therapeutic. It’s not the clean relaxation of a well-timed indica harvest, it’s more of a narcotic, “stuck on the couch and can’t think straight” feeling. Medical patients who specifically need CBN for sleep may find value in this window, but for recreational use, it’s generally a downgrade.
Can you fix over-ripe cannabis? Not really, no. You can optimize your drying and curing to preserve what’s left of the cannabinoid and terpene content, but you can’t reverse THC degradation. The lesson here is that the harvest window is real but finite, especially for high-THC cultivars. Once you see trichomes passing 30–40% amber, move quickly.
Outdoor growers in particular need to watch for this, since weather, pests, and mold can force your hand before you’re ready. Travis Cole has covered the outdoor timing challenges in depth, and his perspective on environmental pressures during the late-season window is worth reading if you’re growing outside.
The Step-by-Step Harvest Process
When your trichomes are in the target window, your pistils are mostly darkened, and your calyxes are swollen, it’s time to execute. Here’s how I do it.

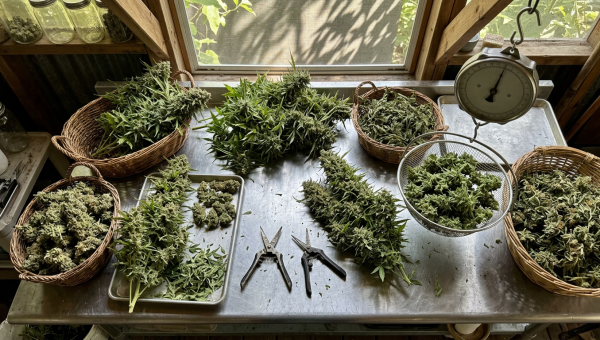
Tools You Need: A quality jeweler’s loupe or digital microscope (60x minimum), sharp trimming scissors (I like spring-loaded shears for the hand fatigue reduction), nitrile gloves to protect trichomes from your skin oils, a clean flat surface or trimming tray, a hanging drying rack or wire, and rubbing alcohol for cleaning your scissors as resin builds up.
Wet Trim vs. Dry Trim: This is a legitimate choice with real trade-offs. Wet trimming, removing fan leaves and sugar leaves immediately after cutting, while the plant is still fresh, is faster, easier, and produces a cleaner-looking bud. The leaves are stiff and easy to cut, and you don’t have to deal with them later. The downside is that wet-trimmed buds dry faster, which can mean a harsher cure if your drying environment isn’t dialed in.
Dry trimming, hanging the whole branch and trimming after the buds have dried, is slower and stickier work, but it allows the remaining leaves to act as a natural humidity buffer during drying, slowing the process down. Slower drying generally means better-preserved terpenes and a smoother final product. In my Denver setup, where the dry Colorado air can pull moisture out of buds surprisingly fast, I often do a hybrid approach: remove the large fan leaves wet, then hang whole branches and do the detail trim after drying.
Cutting Technique: Start by removing large fan leaves by hand or with scissors, these don’t have significant trichome coverage and just add bulk to your drying space. Then cut branches at manageable lengths (12–18 inches works well for most drying setups). Work from the bottom of the plant up. For large plants, I’ll do a staggered harvest, cutting the top colas first, then giving the lower branches another week under the lights to finish up. Lower branches are often less mature than the tops, and this technique can meaningfully improve the quality of your lower-tier buds.
Harvesting Autoflowers: Different Rules Apply
Autoflowering strains operate on their own timeline, and the harvest window is both shorter and less forgiving than photoperiod plants. Autos don’t respond to light schedule changes, they flower based on age, and the entire life cycle from seed to harvest typically runs 70–90 days depending on the genetics. The practical implication is that you have less time to course-correct if you’re late.
The trichome assessment process is identical for autos, you’re still looking for that milky-to-amber transition. But because autos can mature faster, I check trichomes more frequently in the final two weeks, every two to three days rather than weekly. Breeders’ stated harvest times are useful rough guides, but individual plants and growing conditions vary enough that trichome inspection is non-negotiable regardless of what the seed description says.
One thing I’ve noticed with autos specifically: the lower bud sites can lag significantly behind the tops. With photoperiod plants, I sometimes do that staggered harvest I mentioned earlier. With autos, the window is tighter and I typically harvest the whole plant at once, accepting that the lowers may be slightly less mature. If you want to maximize an auto’s potential, training techniques that open up the canopy early, like LST, help even out light distribution and bring the whole plant to ripeness more uniformly. The yield optimization guide covers canopy management techniques that apply equally well to autos.
Outdoor Harvest Timing: Seasonal Cues and Weather Pressure
Outdoor growing adds a layer of environmental complexity that indoor growers never have to deal with. In most of the continental US, photoperiod outdoor plants finish between late September and early November, with the exact timing depending on your latitude, strain genetics, and local weather patterns. Growers in Northern California, Oregon, and Washington typically see harvest season peak in October. Southern states can push into November for some strains.
The seasonal pressure that matters most is the threat of mold, specifically Botrytis cinerea (bud rot) and powdery mildew. Cool, wet fall weather creates ideal conditions for both, and a mold infection can destroy a mature crop in days. If you’re tracking your trichomes and watching weather forecasts simultaneously, sometimes you have to make a judgment call: harvest slightly early at 90% milky trichomes to beat an incoming rain system, or risk losing the whole plant to mold waiting for that last 10% of ripening.
I’ve made both calls over the years. Early harvest to beat weather is a legitimate tactical decision, not a failure. A slightly early harvest on a healthy plant is infinitely better than a mold-compromised harvest at perfect ripeness. Monitor your local extended forecast starting about three weeks before your expected harvest window, and have your drying setup ready to go at a moment’s notice.
Temperature also matters for outdoor terpene preservation. Harvesting in the early morning hours, when temperatures are cooler, is a practice many outdoor growers swear by. The reasoning is that terpenes are volatile and more stable in cooler conditions. I think there’s logic to it, and it costs nothing to harvest at 6 AM instead of noon, so I generally do it.
Harvest Timing by Effect: A Decision Framework
Most harvest guides tell you to harvest when trichomes are “mostly cloudy with some amber.” That’s fine as a starting point, but it ignores the most important variable: what do you actually want from this cannabis? I think about harvest timing as an effect dial, and I want growers to use it intentionally.
If you’re growing a high-energy sativa like Purple Haze or Ak 47 and you want to preserve that uplifting, cerebral, creative effect those genetics are known for, harvest on the earlier side of the window, predominantly milky trichomes with minimal amber, maybe 5–10% at most. The energetic character of these strains is tied to THC at peak concentration, and letting it degrade into CBN defeats the purpose of growing them.
If you’re growing a balanced hybrid like Gorilla Glue or Wedding Cake and you want that classic euphoric-with-body-relaxation profile, aim for a mixed window, mostly milky with 15–20% amber. This gives you the best of both worlds: peak THC potency with just enough CBN development to add weight and body to the experience.
If you’re growing a heavy indica like Do Si Dos or Slurricane specifically for relaxation, sleep, or pain management, let it run longer. 25–35% amber trichomes will enhance the sedative, body-dominant qualities that make those genetics valuable for those purposes. Maya Chen has written about the science behind cannabinoid ratios and their interaction with the endocannabinoid system, which is worth reading alongside this practical framework, understanding why the chemistry works the way it does makes these harvest decisions feel a lot more intentional.
Drying and Curing: The Next Critical Phase
Harvest is the beginning of a multi-week post-processing journey, not the finish line. How you dry and cure your cannabis has an enormous impact on the final quality, arguably as much as the genetics or growing conditions themselves. I see this as one of the most underappreciated aspects of home cultivation.

The short version: dry slowly in a cool, dark space with controlled humidity (around 60% RH, 60–65°F is my target), then cure in sealed glass jars, burping daily for the first two weeks. The slow dry preserves terpenes; the cure allows chlorophyll to break down and the remaining moisture to equalize throughout the bud, producing that smooth, complex smoke that separates home-grown done right from home-grown done fast.
I’m going to keep this section brief because a full deep-dive on drying and curing deserves its own dedicated article, and we have one coming that covers the full process in the detail it deserves. For now, know that everything you did to harvest at the right moment can be undone by a rushed dry or skipped cure. Protect your investment with the same patience you applied to harvest timing. For context on how your finished product holds up over time once it’s cured and stored, the cannabis shelf life guide has solid practical information on storage best practices.
For the complete growing context, from the very beginning of your setup through to harvest, our cannabis blog covers every stage of cultivation with the same hands-on approach. And if you’re still dialing in your indoor environment before you even think about harvest, the indoor cannabis growing setup guide is the place to start.
Frequently Asked Questions
How do I know when to harvest cannabis without a microscope?
Trichome inspection with magnification is the most reliable harvest indicator, but you can make a reasonable assessment using secondary signs if you don’t yet have a loupe or scope. Look for 70–90% of pistils having darkened from white to orange or brown, visibly swollen and rounded calyxes, and natural yellowing of fan leaves indicating the plant is entering senescence. These signs together suggest you’re in or near the harvest window. That said, a basic 30x–60x jeweler’s loupe costs under $15 and is one of the best investments you can make as a grower, I’d strongly encourage getting one before your next cycle.
What happens if you harvest cannabis too early?
Harvesting too early means cutting before trichomes have reached peak THC concentration and before buds have achieved their full density and weight. The practical result is lower potency, reduced yield, underdeveloped terpene profiles, and an effect that tends to be racy, anxious, and lacking in depth or body. There’s no way to recover potency after an early harvest, once the plant is cut, cannabinoid development stops. The most common cause is checking pistil color instead of trichomes, or simply running out of patience in the final two weeks of flower.
Should I do a darkness period before harvesting cannabis?
The 48–72 hour total darkness period before harvest is a widely discussed technique, with proponents claiming it triggers a final terpene and resin surge as the plant responds to light deprivation. The honest assessment is that scientific evidence for a dramatic, measurable improvement in cannabinoid or terpene content from a short pre-harvest darkness period is limited. Some experienced growers report subjective quality improvements; controlled studies haven’t confirmed a significant effect. A 24-hour dark period before harvest is unlikely to hurt anything, but it shouldn’t be prioritized over getting your harvest timing right in the first place, that decision has far more impact on quality than any pre-harvest technique.
What do trichomes look like when it’s time to harvest?
The ideal trichome appearance at harvest depends on your target effect, but the general benchmark is a majority of trichome heads appearing milky white and opaque under magnification, with a percentage of amber heads that reflects your desired effect profile. For energetic, cerebral effects, harvest at 90–95% milky with minimal amber. For balanced effects, target 75–85% milky with 15–25% amber. For sedative, body-heavy effects, let amber development reach 30–40%. Always assess trichomes on the bud calyxes themselves, not the sugar leaves, which mature faster and will skew your reading toward appearing more ready than the plant actually is.
When should I harvest autoflowers?
Autoflowering strains should be harvested using the same trichome assessment process as photoperiod plants, trichome color is the primary indicator regardless of seed type. Breeder-stated harvest times (typically 70–90 days from seed) are useful rough guides, but individual plants vary based on genetics, environment, and growing conditions. Because autos move through their life cycle faster and the harvest window can be shorter, I recommend checking trichomes every two to three days in the final two weeks rather than weekly. Don’t rely solely on the calendar, always confirm with magnification.
Should I water my plants right before harvest?
No, avoid heavy watering in the 24–48 hours before harvest. A slightly dry medium at harvest time is preferable because it reduces the moisture content in plant tissue, which in turn speeds up and improves the drying process and lowers the risk of mold developing during the dry. The plant should not be wilting or severely stressed from drought, but letting the medium dry out somewhat before cutting is a simple, effective practice. Think of it as giving your drying phase a head start.
Can you harvest cannabis in stages?
Yes, and for many plants, especially larger photoperiod strains, a staggered harvest is actually the best approach. The top colas, which receive the most direct light, typically mature first. Lower branches and interior bud sites often lag behind by one to two weeks. By harvesting the tops first and leaving the lowers under the lights for additional time, you allow the less-mature sites to reach their full potential rather than pulling everything at the same time and accepting that some buds are underdeveloped. Check trichomes on each section of the plant independently and harvest each when it hits your target window.