Growing your own cannabis is one of the most rewarding things you can do as a plant person. I’m not just saying that because it’s my job, I’m saying it because after 12 years of running grow rooms in Colorado, I still get that same buzz of excitement every time I crack open a fresh seed and watch it push its first cotyledons toward the light. Whether you’re a complete beginner who just got their first legal home-grow allowance in a state like Colorado, Michigan, or California, or you’re a hobbyist looking to level up your technique, this guide is the one resource I wish I’d had when I started out.
Home cultivation is legal for adults in many US states, typically allowing anywhere from 3 to 6 plants per household, but the rules vary significantly by state and locality. Before you pop a single seed, it’s your responsibility to check your state’s current statutes. What’s legal in Oregon may be completely different from what’s allowed in Illinois or New Mexico. That legal foundation matters, and we’ll touch on it throughout this guide. Now, let’s get into the actual growing.
- Understanding the Full Cannabis Lifecycle Before You Touch a Seed
- Legal Compliance First: Know Your State’s Home Grow Rules
- Indoor vs. Outdoor Growing: Choosing Your Path
- Setting Up Your Grow Space: The Gear You Actually Need
- Grow Medium Choices: Soil, Coco, or Hydro?
- Choosing the Right Seeds: Feminized, Autoflower, or Regular?
- Germination: Getting Your Seeds Off to the Right Start
- The Vegetative Stage: Building Your Plant’s Foundation
- Environment Specs: The Numbers That Drive Your Grow
- The Flowering Stage: Where Your Patience Gets Tested
- Knowing When to Harvest: Reading Trichomes Like a Pro
- The Complete Grow Timeline: Week by Week
- Drying and Curing: The Stage That Makes or Breaks Your Final Product
- Common Mistakes New Growers Make (And How to Avoid Them)
- Space-Optimization Tips for Apartment Growers
- Strain-Specific Growing Tips: Matching Genetics to Your Setup
- Troubleshooting: Diagnosing and Fixing Common Problems
- Post-Harvest: Storage and What to Do With Your Harvest
Understanding the Full Cannabis Lifecycle Before You Touch a Seed
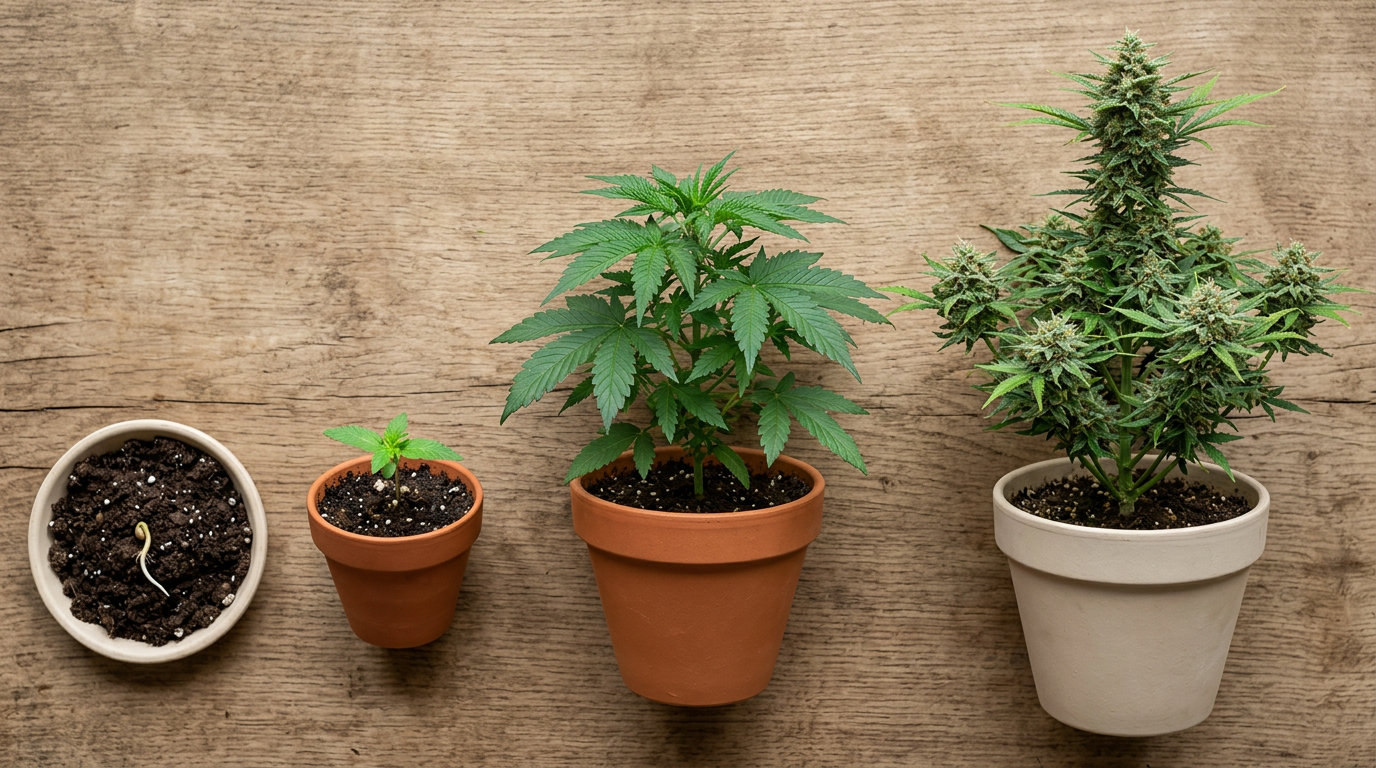
Every successful grow starts with understanding what the plant actually wants to do. Cannabis is an annual flowering plant that progresses through four primary life stages: germination, seedling, vegetative, and flowering. Each stage has its own environmental demands, nutrient requirements, and time windows. Rush any one of them and you’ll feel it in your final yield and terp profile. Respect them and the plant rewards you generously.
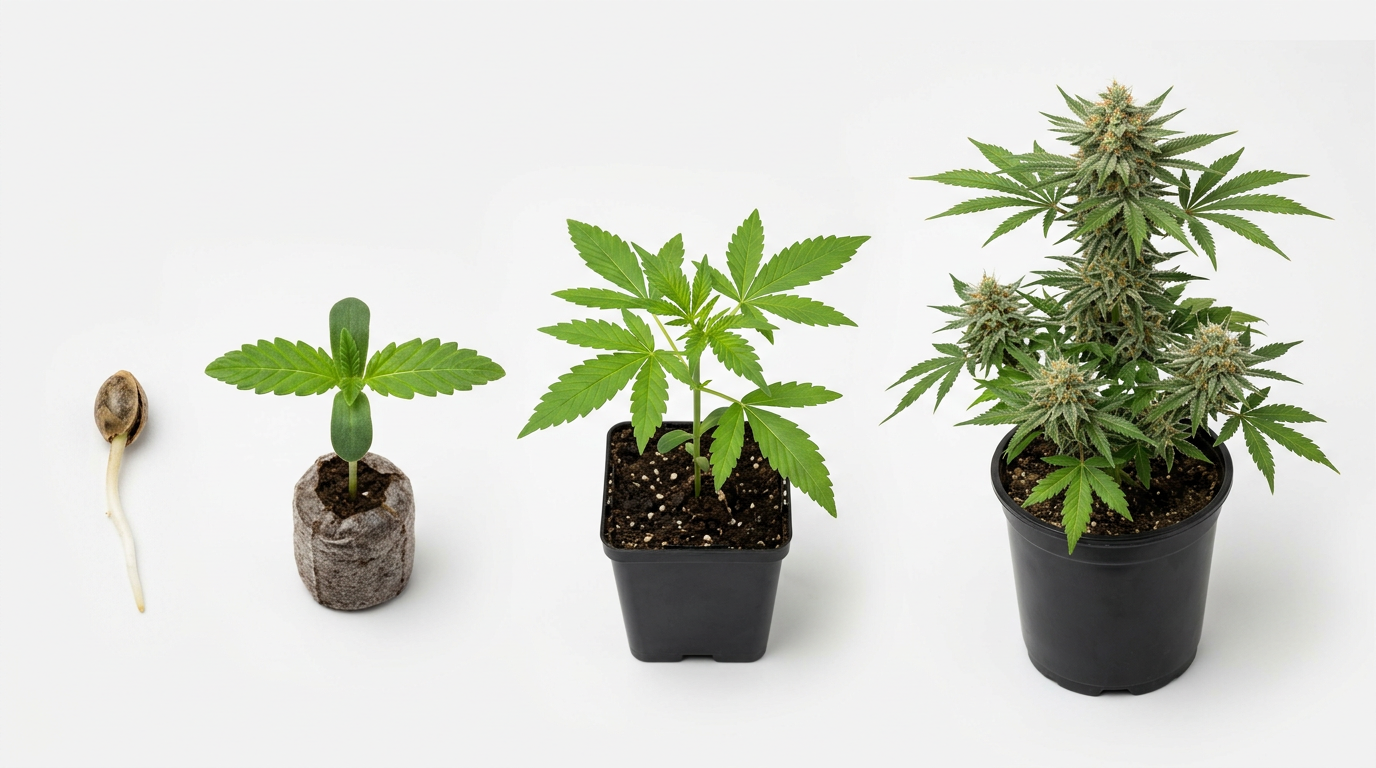
Germination is where it all begins, a viable seed absorbs moisture, the embryo activates, and a taproot emerges. This typically takes 24 to 120 hours depending on seed age, genetics, and your germination method. The seedling stage follows, lasting roughly 2 to 3 weeks, during which the plant establishes its first true fan leaves and root system. The vegetative stage is when the plant focuses entirely on structural growth, building the canopy, the root mass, and the internal architecture that will support your flowers. Indoors, you control this stage by keeping lights on an 18/6 schedule. The flowering stage is triggered by shifting to a 12/12 light cycle (or, in the case of autoflowering genetics, it happens automatically based on age). This is where the magic happens, trichome development, terp expression, and bud formation over roughly 8 to 11 weeks depending on the strain.
Understanding this lifecycle isn’t just academic. When you know what stage your plant is in, you know exactly what it needs, and more importantly, what it doesn’t need. Overfeeding a seedling with heavy nutrients is one of the most common ways new growers torch their first crop, and it happens precisely because they don’t respect the stage they’re in.
Legal Compliance First: Know Your State’s Home Grow Rules
I can’t stress this enough, legal compliance isn’t a footnote, it’s the foundation. As of 2026, recreational home cultivation is permitted in states including Colorado, California, Oregon, Washington, Michigan, Illinois, Massachusetts, Nevada, Maine, Vermont, New Mexico, Montana, Arizona, Connecticut, New Jersey, and others. Medical home grow is permitted in additional states, often with a patient card requirement. States like Texas, Florida, and Georgia still prohibit home cultivation entirely, and federal law still classifies cannabis as a Schedule I substance, meaning interstate transport of seeds or plants remains illegal regardless of state law.
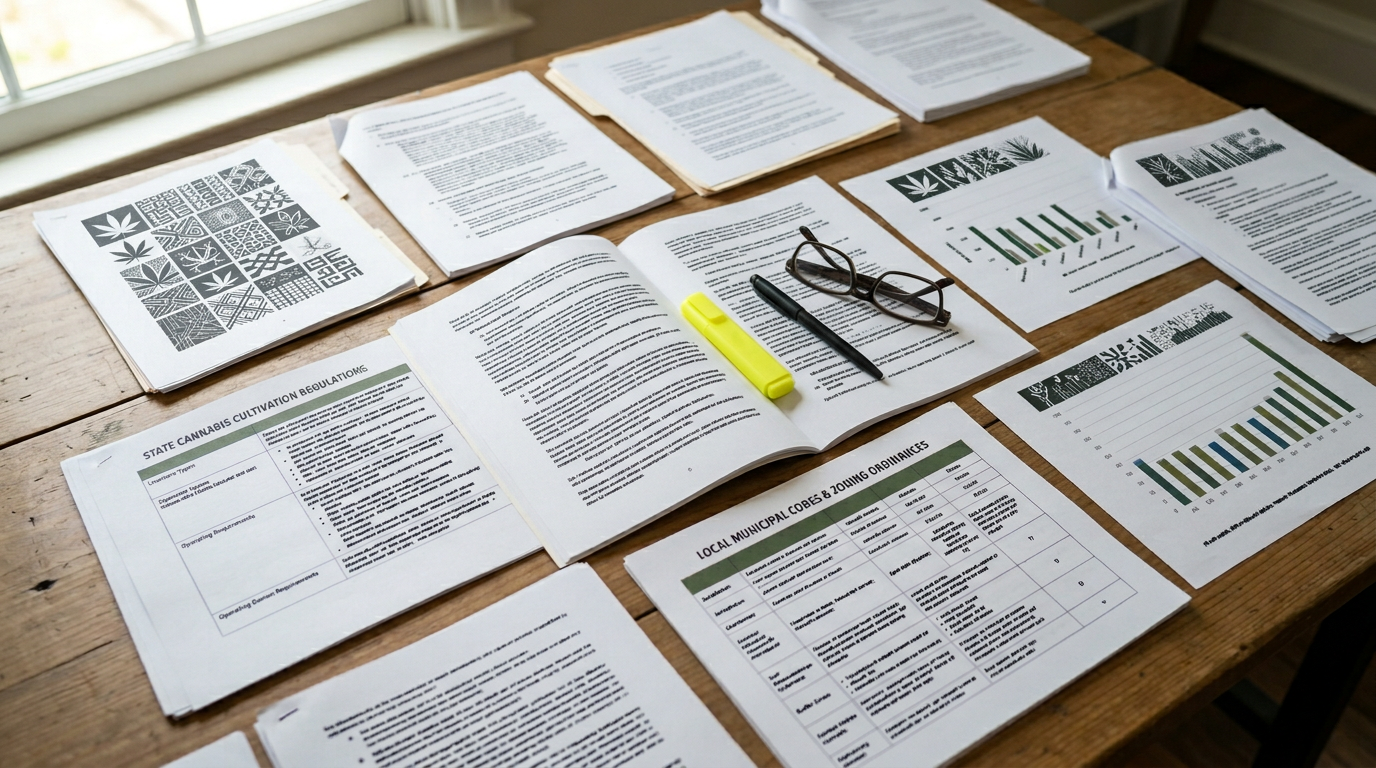
Most legal home-grow states cap adults at 3 to 6 plants per person, with household maximums typically between 6 and 12 plants. Some states, like Colorado, allow up to 6 plants per adult with no more than 3 in flower at any given time. Others, like California, allow 6 plants per person but leave local jurisdictions the authority to impose stricter limits. Always check both your state statute AND your local municipal code before setting up your grow. Some cities and counties have outright banned home cultivation even in legal states.
Plant count matters for your grow planning too. If you’re limited to 3 or 4 plants, you’ll want to focus on training techniques and strain selection that maximize yield per plant rather than running a sea of small plants.
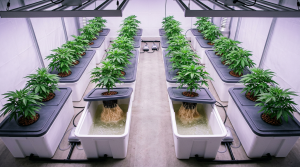
Indoor vs. Outdoor Growing: Choosing Your Path
One of the first real decisions you’ll make is whether to grow indoors or outdoors. Both approaches work beautifully, they just require different investments, skills, and trade-offs. I’ve done both extensively, and honestly, I think every serious grower should try outdoor at least once. There’s something humbling about working with the sun instead of replicating it.
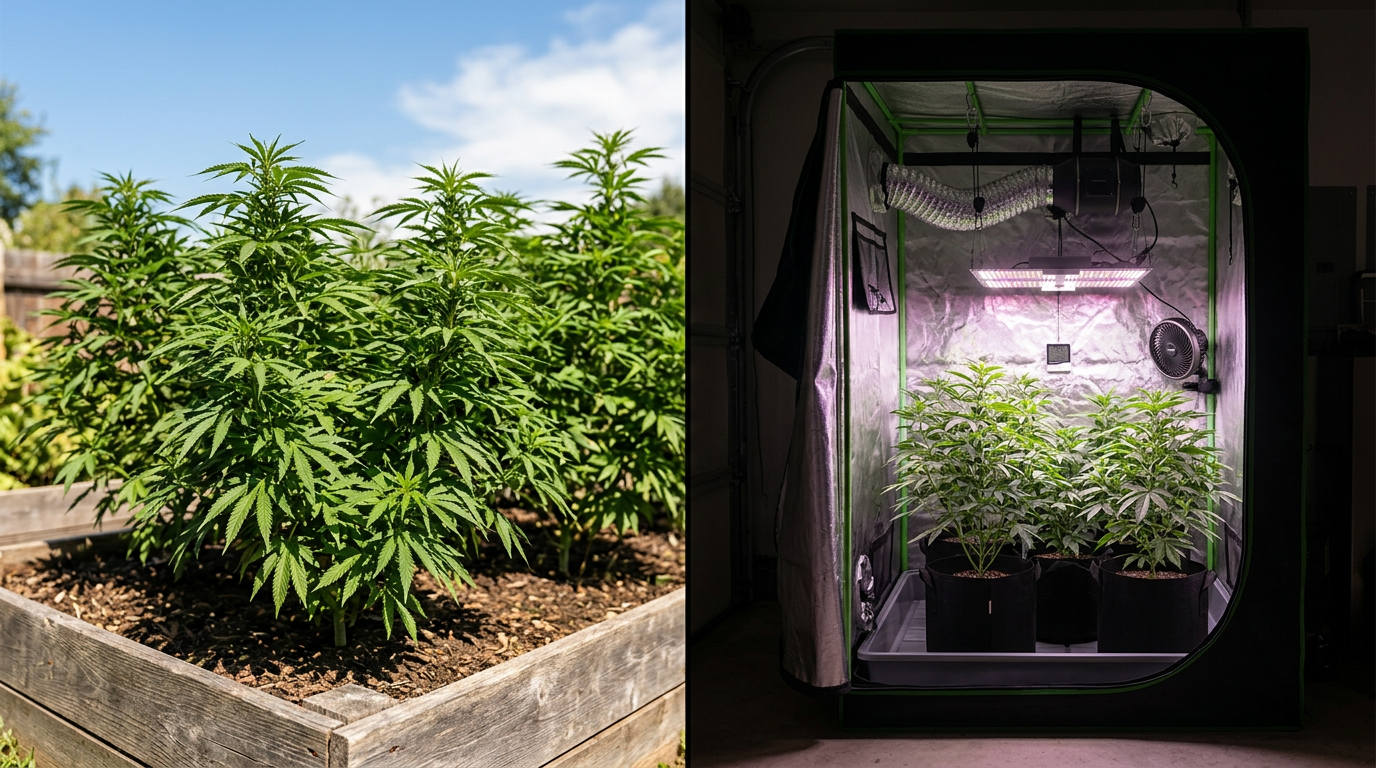
Indoor growing gives you complete environmental control. You set the temperature, humidity, light schedule, and CO2 levels. You can run multiple cycles per year, protect your plants from pests and weather, and dial in the exact conditions each strain wants. The trade-off is cost, lights, fans, dehumidifiers, and the electricity to run them all add up. A basic indoor setup for a beginner might run $300 to $600, while a more serious tent setup with quality LED lighting can easily hit $1,000 to $2,000 before you factor in ongoing electricity costs.
Outdoor growing is dramatically cheaper to get started with, and the sun produces a quality of light that no artificial source has fully replicated. In states with long, warm summers, California, Oregon, Colorado, Arizona, outdoor plants can grow to enormous size and produce substantial yields. The downsides are real though: you’re at the mercy of weather, pest pressure is higher, and you’re locked into one harvest cycle per year tied to natural photoperiod. Travis Cole covers outdoor-specific techniques in depth, and if you’re leaning toward a garden grow, his content is worth diving into alongside this guide.
For most beginners in apartment-friendly legal states, indoor growing in a 2×4 or 4×4 tent is the most practical starting point. It’s controllable, discreet, and scalable as your skills grow.
Setting Up Your Grow Space: The Gear You Actually Need
When I set up my first grow room back in 2013, I bought way too much stuff I didn’t need and skimped on the things that actually mattered. Let me save you that mistake. The non-negotiables for an indoor grow are: a grow tent or dedicated space, a quality light, a ventilation system with carbon filter, a thermometer/hygrometer, pH and EC meters, pots, growing medium, and nutrients. That’s your core kit.
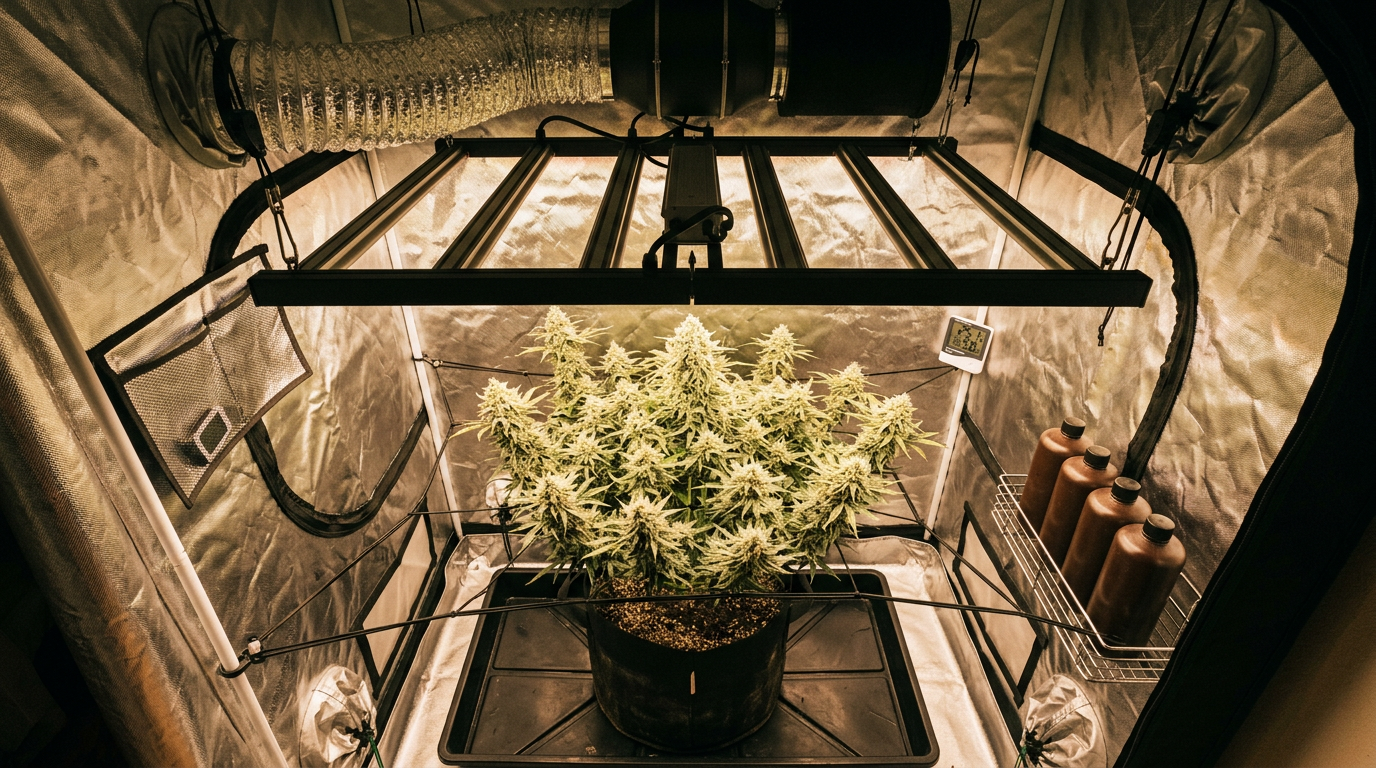
Grow tents come in standard sizes, 2×2, 2×4, 4×4, 4×8, and 5×5 being the most common. A 4×4 tent is the sweet spot for most home growers: big enough to run 4 to 6 plants comfortably, small enough to manage solo. For a 4×4, you want roughly 400 to 600 watts of actual LED draw from a quality fixture. I’ve been running quantum board-style LEDs for the past several years and the efficiency improvement over older HID technology is genuinely significant, lower heat output, lower electricity bills, and excellent canopy penetration.
Ventilation is non-negotiable. You need an inline fan sized for your tent volume (aim for a full air exchange every 1 to 3 minutes), ducting, and a carbon filter to scrub odors. Cannabis in flower smells, there’s no polite way to put it, and in an apartment building or shared living situation, a properly sized carbon filter is the difference between a discreet hobby and a very awkward conversation with your landlord.
Your pH meter is arguably the most important tool in your kit. Cannabis in soil prefers a root zone pH of 6.0 to 7.0, with the sweet spot around 6.2 to 6.8. In hydroponic systems, you’re targeting 5.5 to 6.5. Get outside those ranges and your plant locks out nutrients regardless of how much you’re feeding it. I’ve seen growers chase deficiency symptoms for weeks when the only problem was pH drift. A decent pH pen runs $30 to $80 and pays for itself on your first grow.
Grow Medium Choices: Soil, Coco, or Hydro?
The medium you grow in fundamentally shapes your nutrient management approach, your watering frequency, and your learning curve. Each has legitimate strengths, and the “best” choice depends on your experience level, your available time, and what you enjoy doing in the grow room.
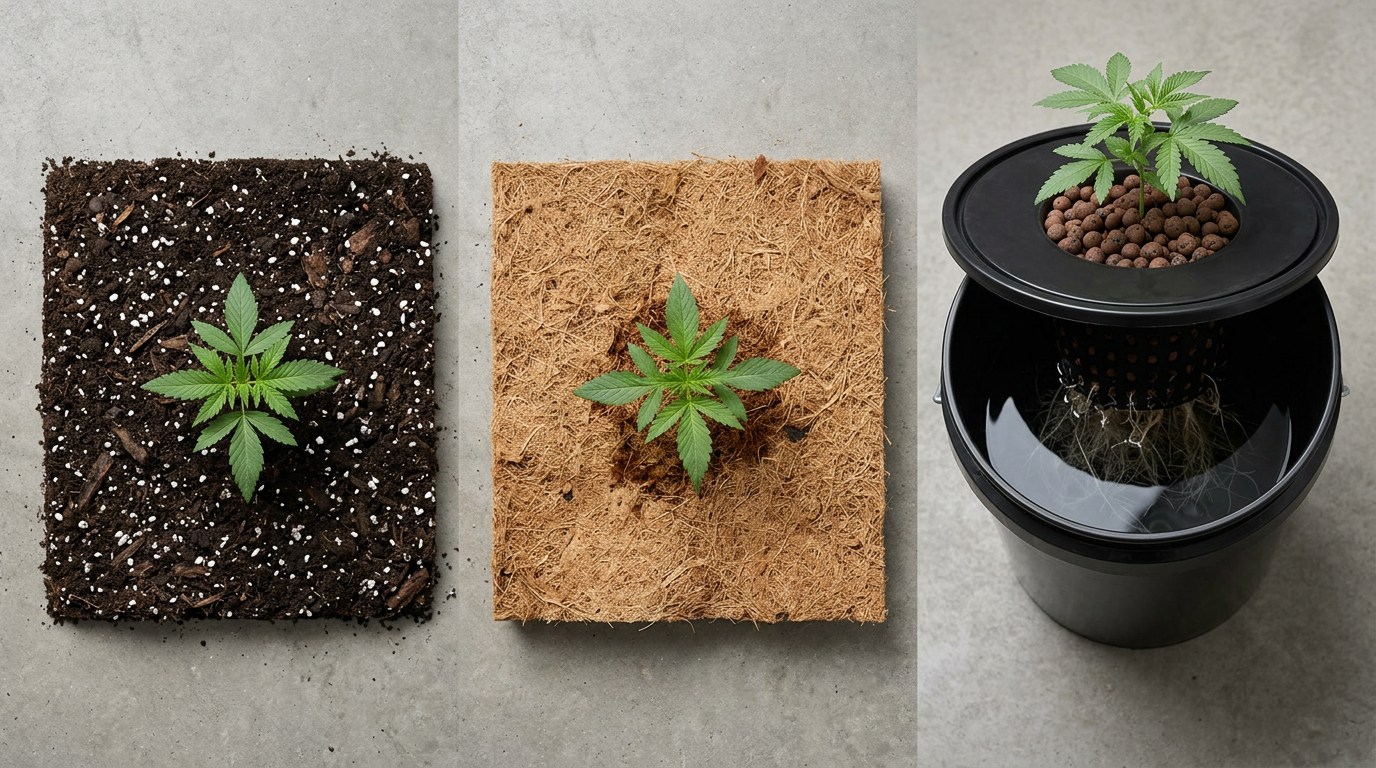
Soil is where I recommend every beginner starts. A quality amended soil, something like a well-crafted organic mix with perlite for drainage, acts as a buffer. The microbial life in good living soil helps break down nutrients and maintain pH stability, giving you a forgiving margin for error. A soil grow is more intuitive: you water when the pot feels light, you feed when the plant shows it’s hungry, and the medium does a lot of the heavy lifting. Strains like Northern Lights and Blue Dream are particularly well-suited to soil grows because of their forgiving nature and robust root systems.
Coco coir is essentially an inert medium made from coconut husks. It has no native nutrients, so you’re in complete control of what goes into the root zone, but that also means you’re responsible for every element the plant needs. Coco grows faster than soil in my experience, and the plants respond quickly to feeding adjustments. The trade-off is that you need to water more frequently (often daily in late veg and flower) and maintain precise EC and pH. It’s a great intermediate step between soil and full hydro.
Hydroponic systems, Deep Water Culture (DWC), NFT, ebb and flow, remove the medium almost entirely and deliver nutrients directly to the roots via water. The growth rates can be genuinely impressive, and I’ve seen DWC plants in veg put on size at a pace that soil plants simply can’t match. But hydro is unforgiving. A pump failure, a pH swing, or a reservoir temperature issue can stress or kill your plants in hours. I’d recommend having at least one successful soil grow under your belt before going full hydro.
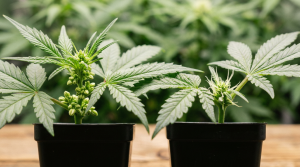
Choosing the Right Seeds: Feminized, Autoflower, or Regular?
Seed selection is where a lot of beginners get overwhelmed, and honestly, I get it, the options are staggering. But the choice comes down to three fundamental seed types, and once you understand what each one does, the decision gets a lot clearer. Our feminized vs autoflower vs regular breakdown covers this topic exhaustively, but here’s the practical summary.
Feminized seeds are bred to produce only female plants, the ones that develop the resinous buds you’re after. For most home growers, feminized photoperiod seeds are the gold standard. You control the vegetative period by keeping lights at 18/6, then flip to 12/12 when you’re ready to flower. This gives you full control over plant size and timing. Great beginner-friendly feminized strains include White Widow, Northern Lights, and Blue Dream, all of which are forgiving, well-documented, and widely available.
Autoflowering seeds flower based on age rather than light cycle, typically transitioning to flower automatically around 3 to 5 weeks from germination regardless of your light schedule. This makes them excellent for beginners and for apartment growers who want a faster turnaround, most autos complete seed to harvest in 70 to 90 days. The trade-off is that you can’t extend the vegetative period to recover from stress or mistakes, and yields per plant are generally smaller than photoperiod feminized plants. Strains like Gorilla Glue in auto form are popular entry points.
Regular seeds produce roughly 50% male and 50% female plants, which means you need to sex your plants and remove males before they pollinate your females. Unless you’re interested in breeding your own genetics, regular seeds add complexity without much benefit for the home grower. They’re a tool for breeders and experienced cultivators chasing specific phenotypes.
For strain selection beyond seed type, think about your grow space, experience level, and what you actually want to consume. A compact indica-dominant strain like Ice Cream Cake is ideal for a small tent where height management matters. A sativa-leaning strain like Sour Diesel or Jack Herer can stretch dramatically in flower and may require significant canopy management in a 4×4. If terp complexity is your priority, strains like Lemon Cherry Gelato and MAC Cannabis Strain reward patient, experienced growers with extraordinary pheno expression.
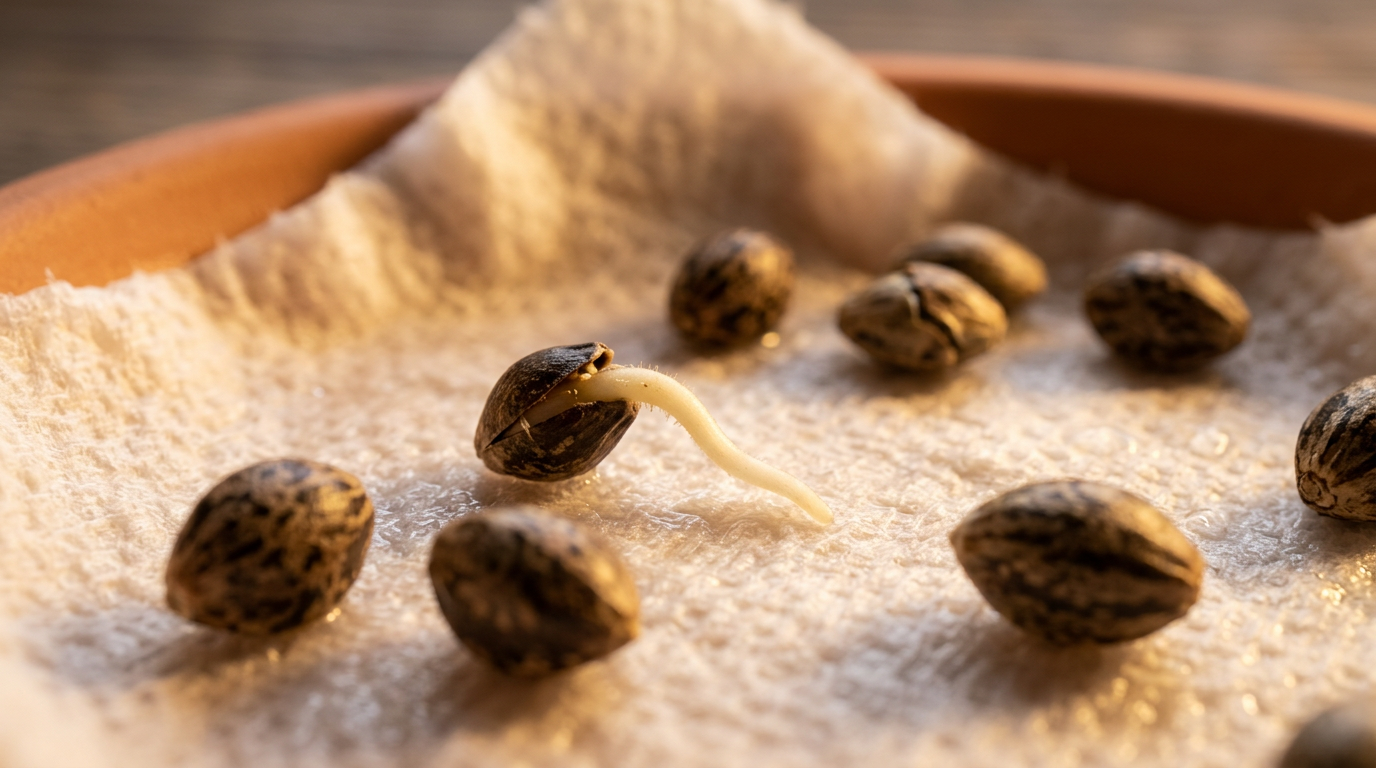
Germination: Getting Your Seeds Off to the Right Start
Germination is the most straightforward stage of the grow, but there are still ways to mess it up. The goal is simple: introduce moisture and warmth to activate the seed’s embryo and coax out the taproot. I’ve used several methods over the years and settled on the paper towel method as my go-to for reliability and visibility.
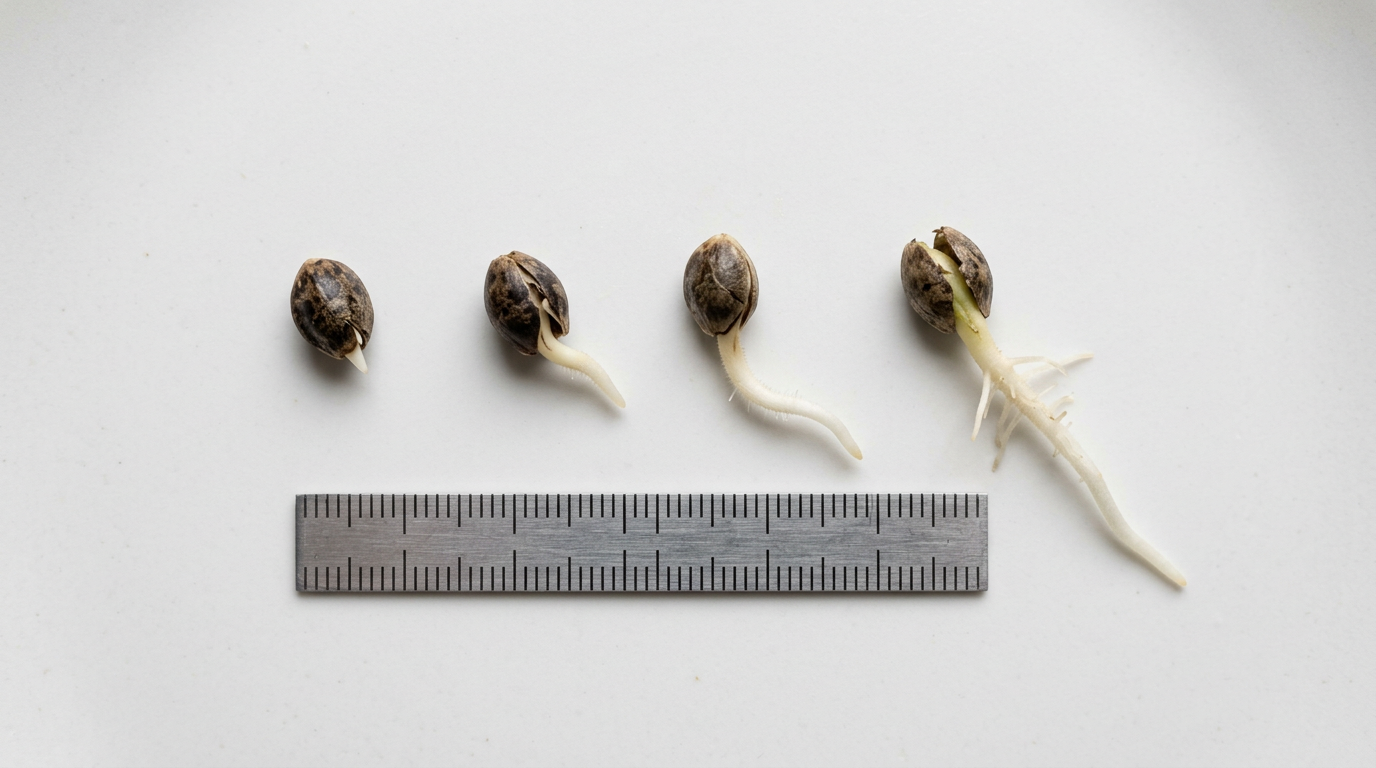
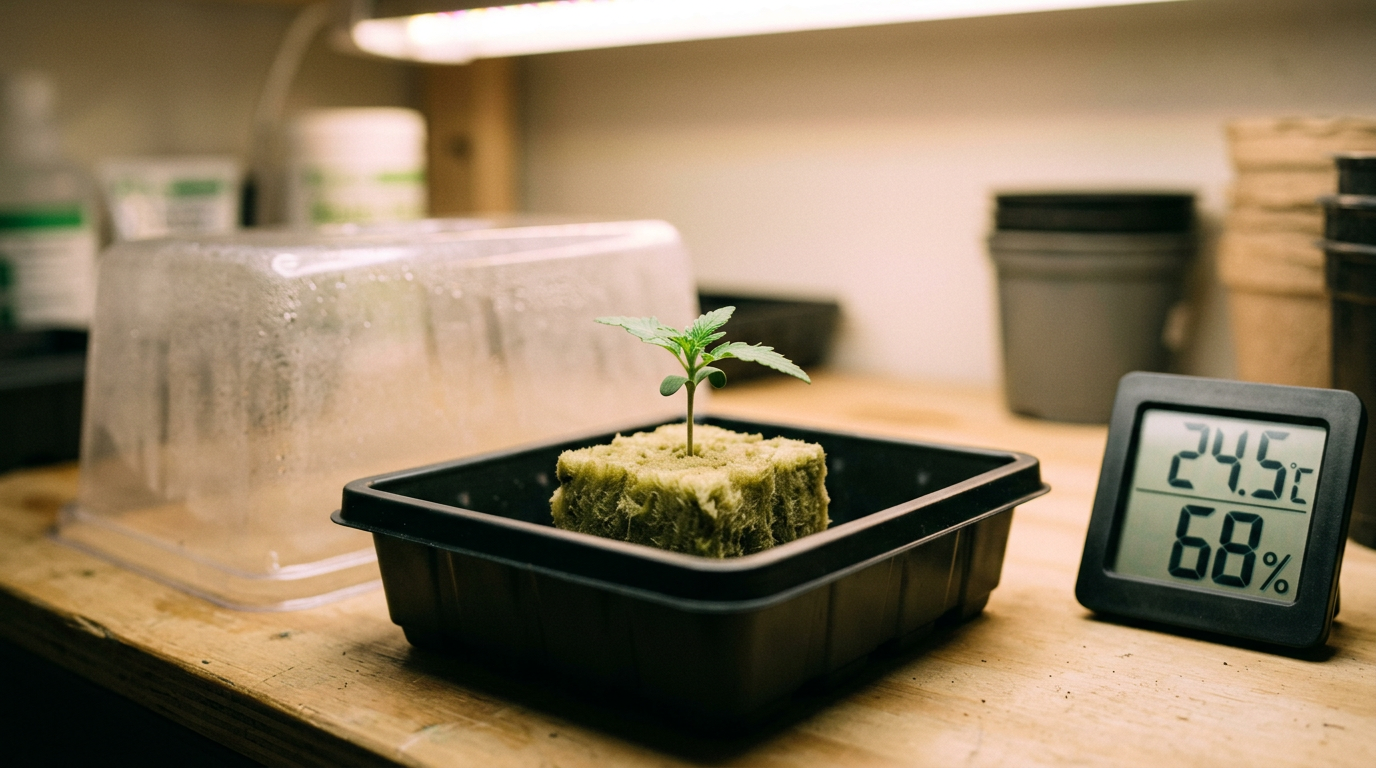
Place your seeds between two damp (not soaking) paper towels on a plate, cover with another plate to retain moisture, and keep them somewhere warm, around 70 to 77°F is ideal. Check every 12 hours. Most healthy seeds will show a taproot within 24 to 72 hours. Once the taproot is roughly 0.5 to 1 inch long, transfer the seed (taproot down) into a small starter pot with moist growing medium, about 0.5 inches deep. Keep your seedling environment warm and humid, a humidity dome helps tremendously in the first week.
You can also germinate directly in your growing medium by planting seeds 0.5 inches deep in pre-moistened soil or coco and keeping conditions warm and humid. This is gentler on the taproot since you’re not handling it, but you lose the visual confirmation of germination that the paper towel method provides.
One thing I always tell new growers: don’t overwater your seedlings. The most common seedling killer is overwatering, which compresses the root zone, reduces oxygen availability, and invites damping off, a fungal condition that collapses the stem at the soil line. Water lightly around the base of the seedling and let the medium partially dry between waterings. The seedling’s tiny root system doesn’t need much water yet, and the dry/wet cycle encourages roots to spread in search of moisture.
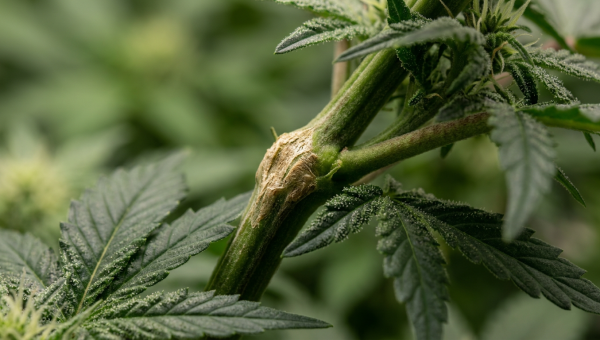
The Vegetative Stage: Building Your Plant’s Foundation
Vegetative growth is where you’re building the architecture that will support your flowers. More canopy area means more light interception, which means more sites for bud development. This is the stage where training techniques pay their biggest dividends, and it’s also where you establish your nutrient program.
During veg, cannabis is hungry for nitrogen. Your base nutrient solution should be nitrogen-forward, with moderate phosphorus and potassium. If you’re in amended organic soil, the medium itself may supply most of what the plant needs for the first several weeks, watch the plant, not the calendar, for signs of hunger. Healthy veg growth is characterized by deep green color, vigorous internodal spacing, and firm stems. Pale yellow-green color often indicates nitrogen deficiency; dark purple stems on a young plant can indicate phosphorus lockout, often tied to root zone temperature or pH issues.
Training during veg is one of the most impactful things you can do for your yield. Low Stress Training (LST) involves gently bending and tying branches to create a flat, even canopy that receives uniform light distribution. Topping, removing the apical meristem (main growing tip), causes the plant to develop two main colas instead of one, and can be repeated to create four, eight, or more main colas. Screen of Green (SCROG) uses a physical screen to weave branches horizontally, maximizing canopy coverage in a fixed footprint. These techniques are part of a broader yield optimization hierarchy that can dramatically increase what your plants produce.
How long you veg depends on your space, plant count, and goals. In a 4×4 tent with 4 plants, I typically veg for 4 to 6 weeks from transplant, training throughout, until the canopy fills roughly 60 to 70% of the available space. Remember: plants roughly double in size during the first 2 to 3 weeks of flower (the “stretch”), so don’t veg until you’ve hit your tent’s ceiling.
Environment Specs: The Numbers That Drive Your Grow
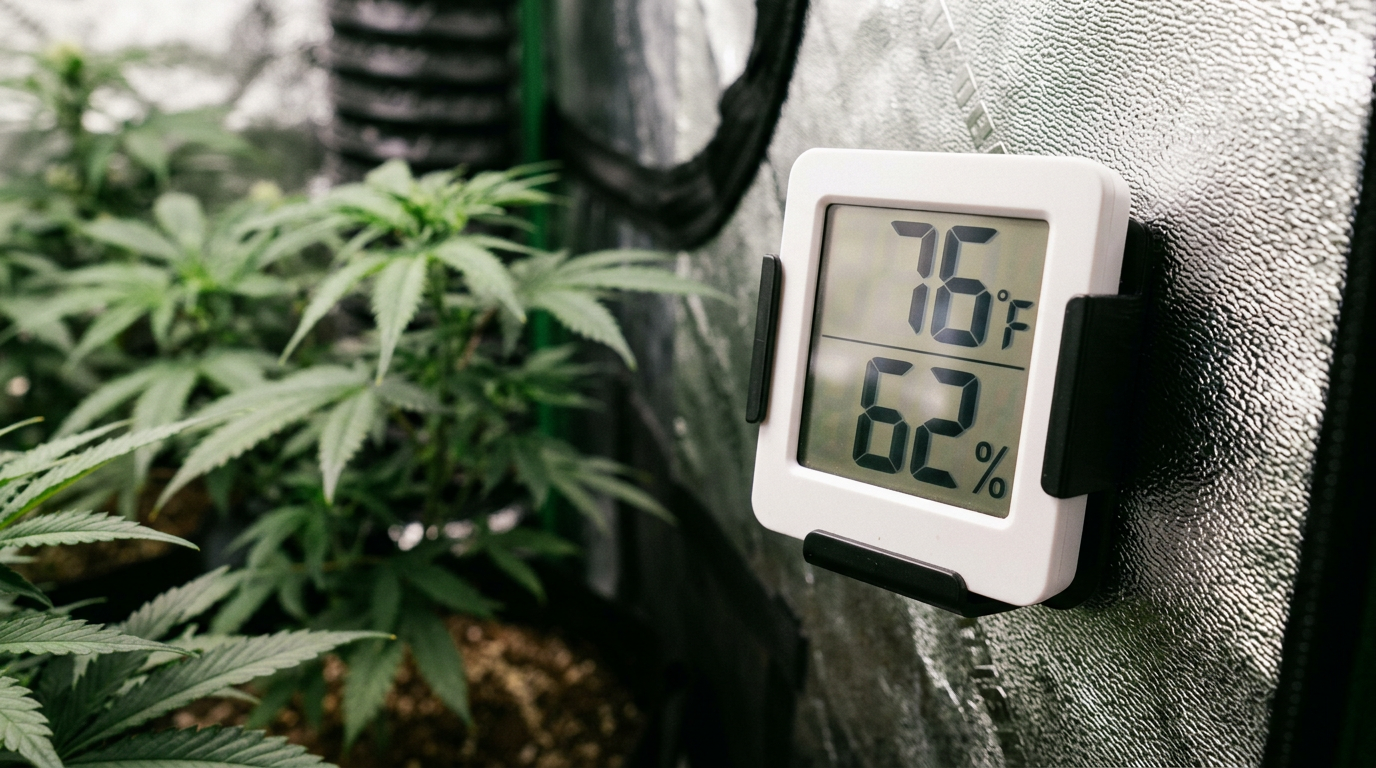
Getting your environmental parameters dialed in is what separates growers who consistently produce quality from those who are always chasing problems. VPD, Vapor Pressure Deficit, is the metric that ties temperature and humidity together into a single number that tells you how efficiently your plants are transpiring. Too high VPD and plants close their stomata to prevent water loss, slowing growth and gas exchange. Too low and you risk mold and mildew. Most growers target a leaf-surface VPD of 0.8 to 1.2 kPa in veg and 1.0 to 1.5 kPa in flower.
75-80°F
65-75°F
50-70%
16-18 hours on
72-78°F
62-72°F
40-50%
12 hours on / 12 hours off
6.0-7.0
5.5-6.5
CO2 levels in a sealed or semi-sealed grow room also matter. Ambient CO2 is roughly 400 to 420 ppm. Cannabis can utilize elevated CO2 up to around 1,500 ppm when paired with sufficient light intensity, but CO2 supplementation only makes sense once your other environmental factors are fully dialed in. For most home growers, ensuring good fresh air exchange is more impactful than investing in CO2 supplementation.
The Flowering Stage: Where Your Patience Gets Tested
Flipping to flower is one of my favorite moments in any grow cycle. You’ve built the plant, trained the canopy, dialed in the environment, now you step back and let the genetics do their thing. But the flowering stage isn’t passive. It demands consistent attention to environment, nutrition, and pest management all the way to harvest.
The first two weeks after the flip are the transition period. The plant is still stretching, still establishing its pre-flower structure. Week 3 is when you start seeing real bud sites forming, and by week 4 to 5 you should have visible, stacking calyxes with white pistils everywhere. This is also when the nutrient program shifts, you want to dial back nitrogen and ramp up phosphorus and potassium to support flower development and resin production.
Weeks 5 through 8 (or longer for some strains) are the bulk of bud development. Trichome coverage increases, terps start expressing, and the weight starts building. This is also when environmental control becomes most critical, high humidity in late flower is a direct path to botrytis (bud rot), which can wipe out entire colas seemingly overnight. Keep your late-flower humidity at 40% or below, ideally 30 to 40%, with good airflow through the canopy.
A strain like Slurricane or Biscotti will push dense, resinous structures that are particularly susceptible to mold in humid conditions. Know your strain’s characteristics going in. Maya Chen has done excellent work breaking down the science of trichome development and cannabinoid synthesis if you want to go deep on the chemistry side of what’s happening in those final weeks.
Flushing, running plain pH-adjusted water through your medium for the final 1 to 2 weeks before harvest, is a debated practice. Some growers swear by it for improving the smoothness of the final smoke; others, particularly those using organic living soil, argue the microbial ecosystem makes it unnecessary. My approach has always been to do a light flush in coco and hydro grows, and skip it in well-amended organic soil. Do what makes sense for your medium and nutrient program.
Knowing When to Harvest: Reading Trichomes Like a Pro
Harvest timing is where a lot of otherwise solid grows fall short. Harvest too early and you leave potency on the table, cannabinoids haven’t fully synthesized and the terp profile is underdeveloped. Harvest too late and THC degrades to CBN, shifting the effect profile toward sedation and reducing overall potency. The only reliable way to nail harvest timing is to look at your trichomes under magnification.

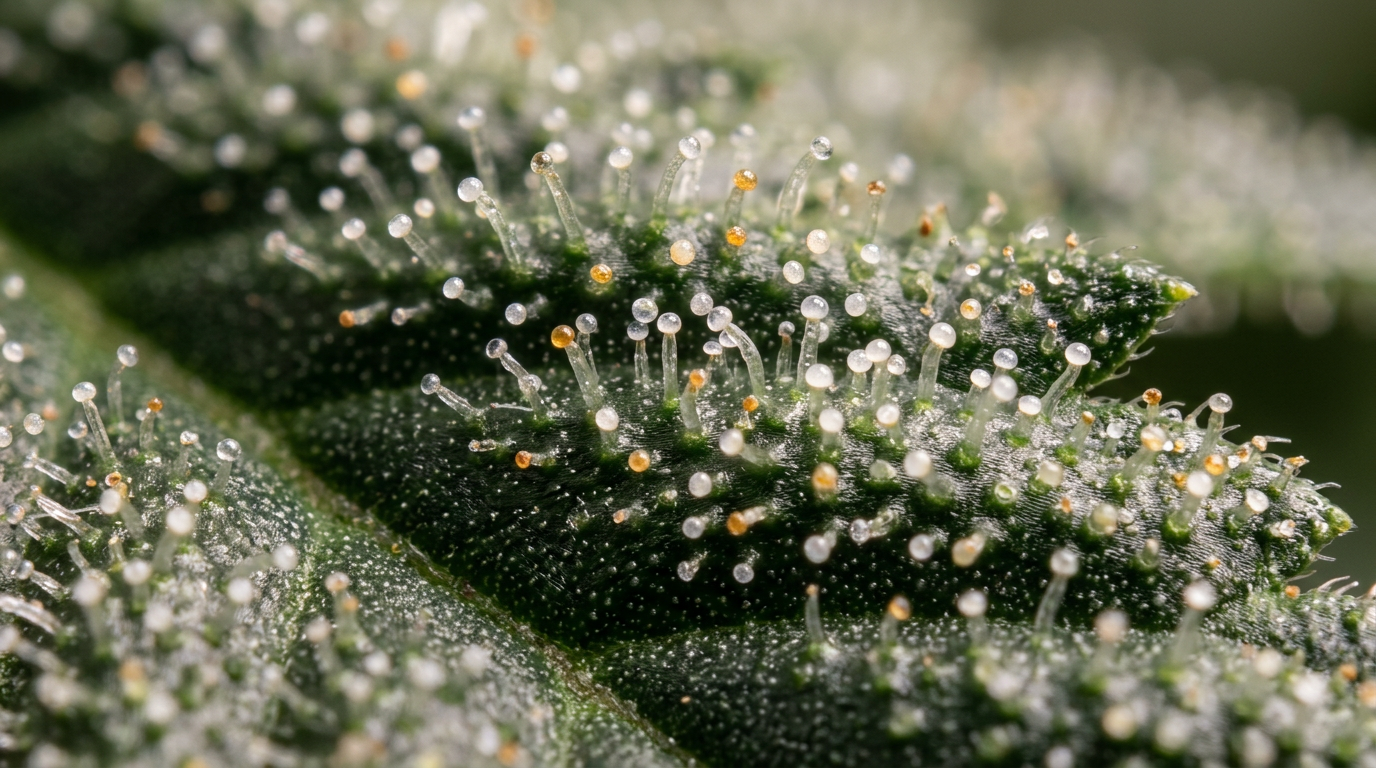
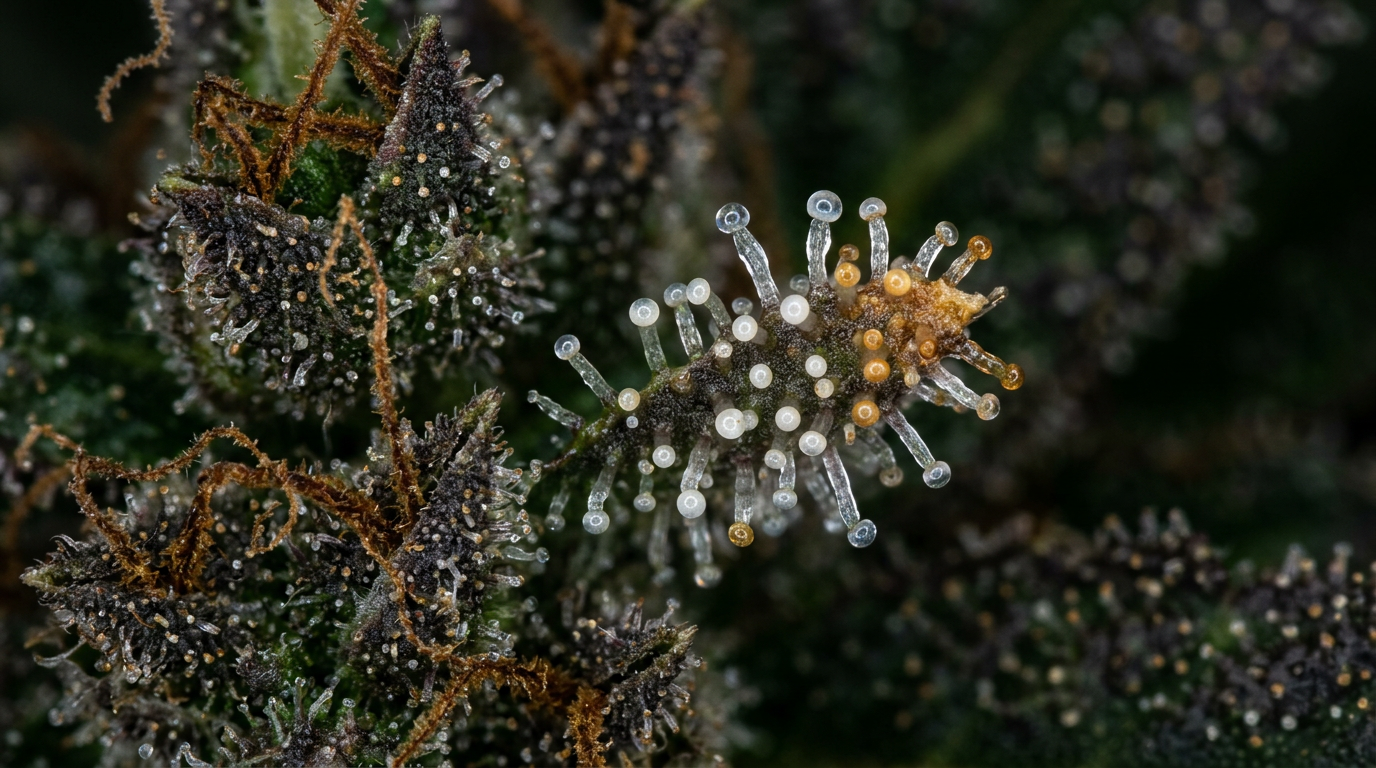
A jeweler’s loupe at 30x to 60x or a digital microscope (I prefer the latter for the clarity) lets you examine the trichome heads on your buds and sugar leaves. Early harvest trichomes are clear and glassy, the plant isn’t done. As they mature, they shift to milky/cloudy white, indicating peak THC synthesis. As they continue to ripen, they amber up as THC converts to CBN. Most growers target a mix of mostly cloudy with 10 to 30% amber for a balanced, potent effect. If you want a more sedating, body-heavy effect, particularly relevant for strains like Granddaddy Purple or OG Kush, let the amber percentage run higher.
Pistil color is a secondary indicator. When 70 to 90% of white hairs have darkened and curled inward, you’re in the harvest window. But pistils alone aren’t definitive, always confirm with trichome inspection. I’ve had plants where pistils looked done but trichomes were still 80% clear. Trust the trichomes.
The Complete Grow Timeline: Week by Week
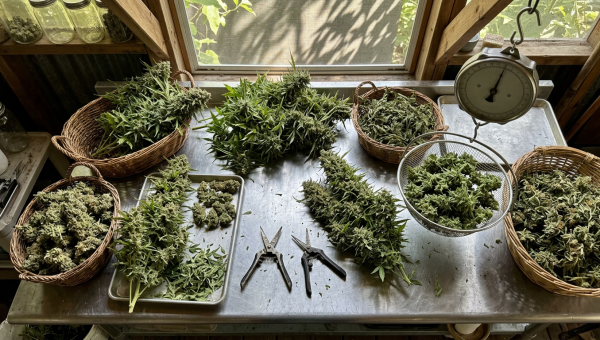
Drying and Curing: The Stage That Makes or Breaks Your Final Product
I’ve seen growers put in 16 weeks of genuinely excellent cultivation work and then ruin it in the dry room. Drying and curing are not afterthoughts, they are where the quality of your final product is determined as much as anything that happened in the grow room. This is the stage that most beginner guides gloss over, and it’s one of the biggest differentiators between homegrown that smells and smokes like top-shelf and homegrown that tastes like hay.
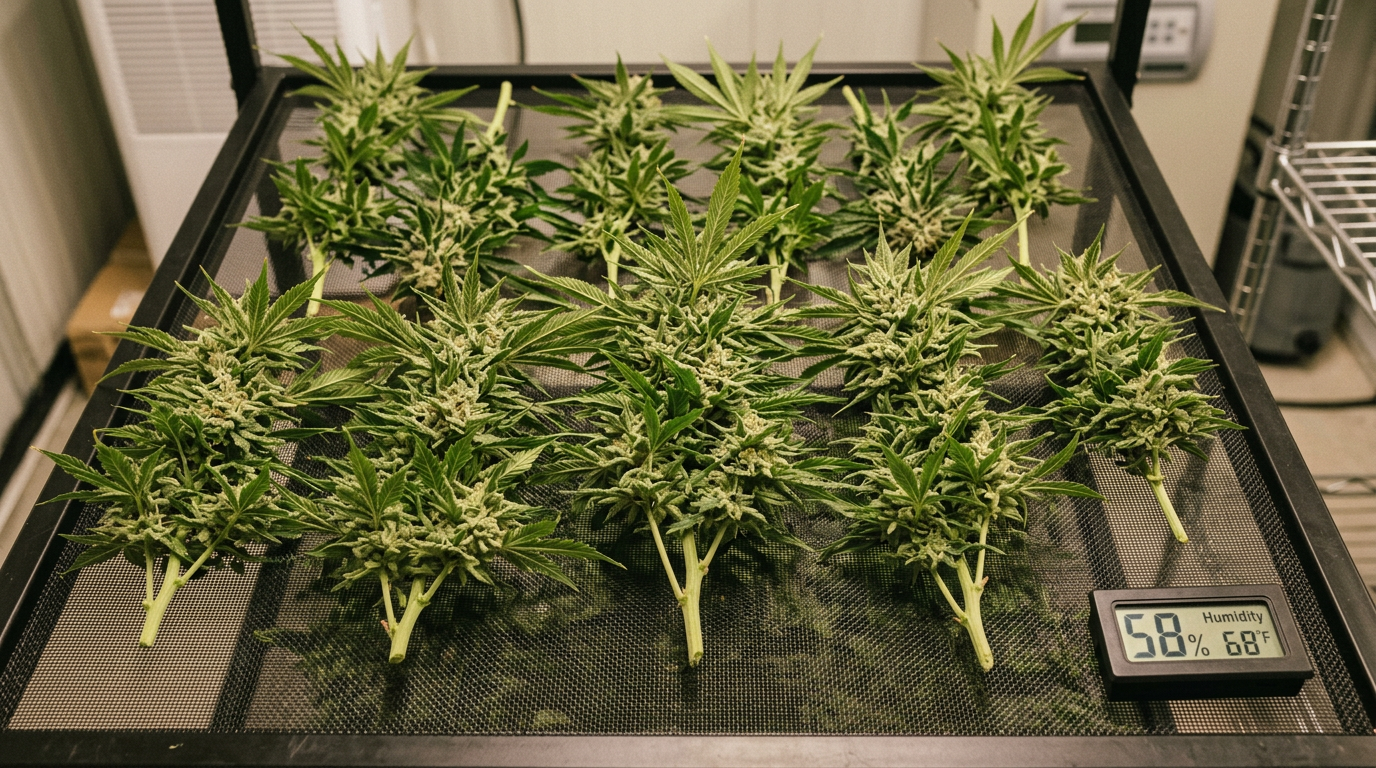
After harvest, you want to dry your cannabis slowly in a dark environment at 60 to 65°F with 55 to 60% relative humidity. The darkness matters because UV light degrades cannabinoids and terps. The slow dry matters because a rapid dry, anything under 7 days, doesn’t allow the chlorophyll to fully break down, which is what gives improperly dried cannabis that harsh, grassy taste. Whole-branch drying (leaving the buds on the branches rather than bucking immediately) slows the process further and generally produces better results.
You’ll know the dry is complete when the smaller stems snap cleanly rather than bending. At that point, trim your buds and move them into glass mason jars. This is the start of the cure. For the first two weeks, open your jars once or twice a day for 10 to 15 minutes, this is called “burping” and it allows moisture and off-gasses (including residual chlorophyll breakdown products) to escape. Use Boveda or Integra Boost 62% humidity packs to maintain the ideal storage humidity of 58 to 62%. After two weeks of daily burping, you can drop to weekly burps. The minimum meaningful cure is two weeks; four to eight weeks produces noticeably smoother, more complex-tasting flower. I’ve cured some batches for three months and the terp expression at that point is genuinely stunning.
If you ever open a jar and smell ammonia, that’s a sign your bud was jarred too wet. Leave the lid off for several hours and then resume normal burping with increased frequency. If you see visible mold, fuzzy white or gray growth, that jar is compromised and needs to be discarded or separated immediately.
Once your flower is properly cured, you’ve got options beyond just smoking it. The Complete Beginner’s Guide to Cannabis Butter: Decarb, Infuse, and Dose Like a Pro is an excellent resource if you want to put your harvest to work in the kitchen.
Common Mistakes New Growers Make (And How to Avoid Them)
After more than a decade in grow rooms, I’ve made most of these mistakes myself at some point, and I’ve watched others make them too. The good news is that cannabis is a resilient plant, and most problems are recoverable if you catch them early.
Overwatering is the number one killer of beginner grows. Cannabis roots need oxygen as much as they need water, and a constantly saturated medium starves the root zone of air. The rule I follow: water when the top inch of soil is dry and the pot feels noticeably lighter than when fully watered. Lift your pots regularly to develop a feel for the weight difference, it becomes second nature quickly.
Nutrient burn is a close second. New growers tend to overfeed, especially when they see a deficiency and try to correct it aggressively. Start at half the manufacturer’s recommended dose and work up based on the plant’s response. Tip burn (brown, crispy leaf tips) is the classic sign of nutrient burn, back off immediately and flush with plain water if it’s severe.
Ignoring pH is probably the most insidious mistake because the plant can look healthy for a while before the lockout cascades into visible symptoms. Test your pH every single watering, especially in coco and hydro. In soil, pH your water going in and periodically test your runoff to monitor root zone pH drift.
Light burn and light stress are common in small tents where the light is physically close to the canopy. Most LED manufacturers publish a minimum hanging distance, follow it and use a PAR meter or PPFD chart if you can. Symptoms of light stress include bleaching of the uppermost leaves and upward leaf curling (taco-ing).
Neglecting pest management until there’s a visible infestation is another classic error. Spider mites, fungus gnats, aphids, and thrips can establish quickly in a warm indoor environment. Implement an integrated pest management (IPM) routine from day one: yellow sticky traps for monitoring, beneficial insects like predatory mites for prevention, and regular visual inspection of the undersides of leaves. Catching a pest issue when it’s two mites is infinitely easier than dealing with a full colony in week 6 of flower.
Space-Optimization Tips for Apartment Growers
Growing in an apartment presents specific challenges: limited space, noise concerns (fans and inline fans are audible), odor management, and the need for discretion. But it’s absolutely doable, and millions of home growers across legal states do it successfully every day.
A 2×4 tent in a closet or spare bedroom is the ideal apartment setup. You can run 2 to 4 plants comfortably, and the footprint is manageable. For height-constrained spaces, autoflowering genetics or heavily trained photoperiod plants are your best options. Strains that stay compact, indica-dominant varieties like OG Kush, Ice Cream Cake, or Zkittlez, are better choices than tall sativa-leaning genetics in a space where you’re working with 5 to 6 feet of vertical clearance.
Noise management matters in shared buildings. Quality inline fans run quieter than cheap ones, it’s worth investing in a reputable brand. Vibration isolators on fan mounting points reduce transmitted noise significantly. Running your fan on a controller at reduced speed during quiet hours (while maintaining adequate air exchange) can help keep the operation discreet.
Odor control in an apartment is non-negotiable. A properly sized carbon filter rated for your tent volume, combined with a tight seal on all ducting connections, should handle the smell effectively. Replace your carbon filter every 12 to 18 months, they lose effectiveness over time, especially in humid environments. Some growers add an ozone generator as a secondary odor control measure, but be cautious with ozone around plants and people.
Electricity consumption is a real consideration too. A 4×4 tent with a 400-watt LED, a 6-inch inline fan, and small circulation fans might add $30 to $60 per month to your electric bill depending on your local rates. That’s a very manageable cost for the quality and quantity of cannabis a well-run 4×4 can produce.
Strain-Specific Growing Tips: Matching Genetics to Your Setup
Not all strains grow the same way, and choosing a strain that matches your setup and skill level makes everything easier. I’ve run probably 60 or 70 different strains over my career, and the ones that gave me the most grief were almost always cases of mismatched expectations, running a finicky, high-maintenance pheno in a setup that wasn’t dialed in enough to support it.
For true beginners, I consistently recommend starting with genetics that have a reputation for resilience and forgiveness. Northern Lights is the classic recommendation for a reason, it’s compact, mold-resistant, finishes in around 8 weeks of flower, and produces quality results even when the grower makes some mistakes. White Widow is another excellent beginner strain: vigorous, adaptable to both soil and coco, and the trichome coverage in late flower is genuinely motivating for a new grower to witness.
Blue Dream is a fantastic intermediate strain, slightly taller and more sativa-leaning, so it needs some height management, but it’s forgiving with nutrients and produces excellent yields. If you’re in a state with a 6-plant limit and want to maximize your legal allowance, Blue Dream in a SCROG setup is a satisfying project.
For growers with a few grows under their belt who want to chase premium terps and complex effects, strains like Lemon Cherry Gelato, Biscotti, and Permanent Marker are worth the extra attention they demand. These strains reward dialed-in VPD, precise late-flower nutrition, and a slow, careful cure. The terp expression when you get it right is extraordinary, but they’re not forgiving of environmental swings or pH neglect the way a Northern Lights or White Widow would be.
If you’re interested in understanding what drives the aromatic complexity in strains like these, cannabis terpenes and aromatic science becomes essential knowledge. The terpene profile of a strain is as much a product of your growing environment as it is of the genetics themselves, temperature, light spectrum, and late-flower stress all influence final terp expression.
Troubleshooting: Diagnosing and Fixing Common Problems
Even experienced growers deal with problems. The skill isn’t avoiding every issue, it’s recognizing problems early and responding appropriately. Here’s a practical rundown of the most common issues and what to do about them.
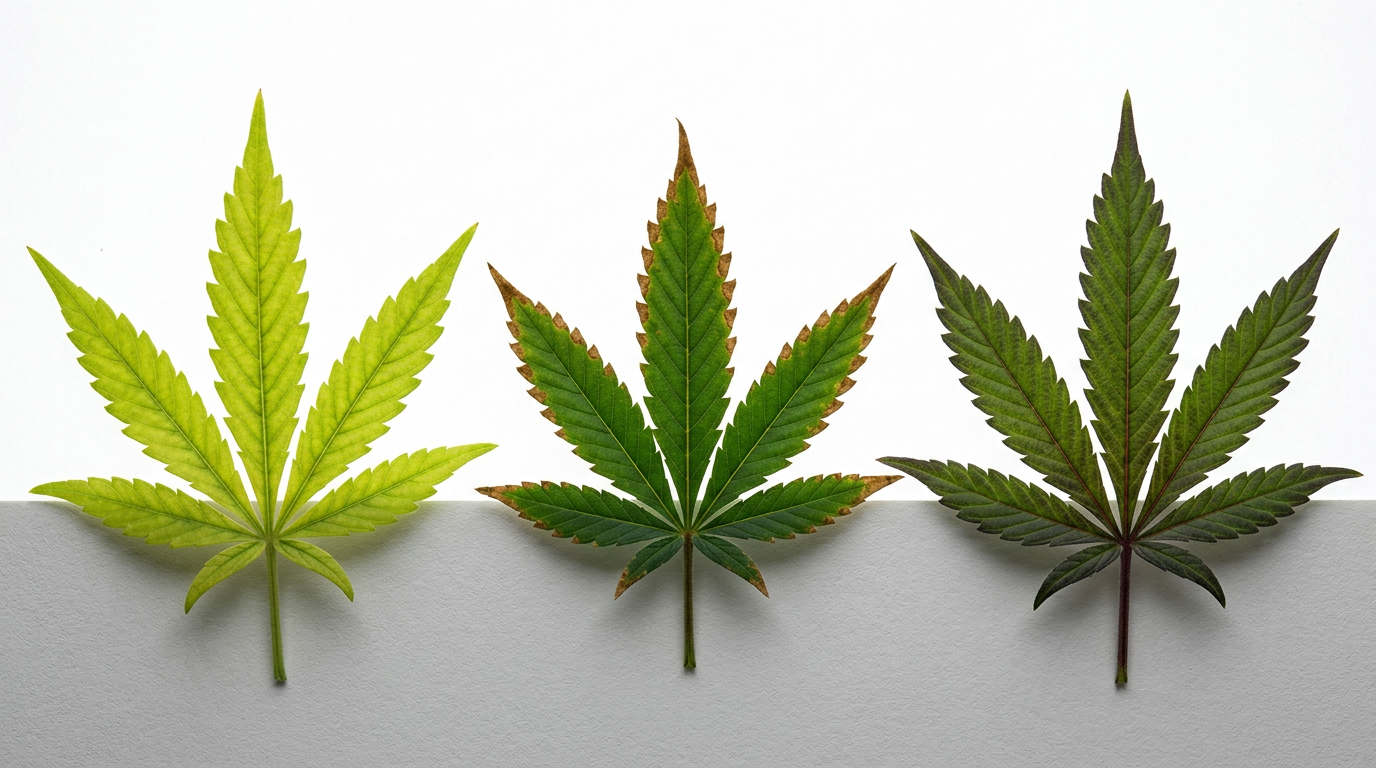
Yellow leaves starting from the bottom of the plant and moving upward usually indicate nitrogen deficiency, especially in late veg. In flower, some yellowing of lower fan leaves is normal as the plant remobilizes nitrogen upward. If it’s aggressive or moving into the mid-canopy, add a nitrogen-containing feed. If you’re in late flower (week 6+), some yellowing is actually desirable and indicates the plant is properly finishing.
Purple or reddish stems on young plants, combined with slow growth, often point to phosphorus deficiency or, more commonly, cold root zone temperatures. Check your medium temperature, cannabis roots prefer 65 to 72°F. Cold nights in an uninsulated space can chill your root zone significantly. A seedling heat mat under small pots can resolve this quickly.
Interveinal chlorosis, yellowing between the leaf veins while veins stay green, is a classic iron or magnesium deficiency symptom, and it’s almost always caused by pH being out of range rather than an actual nutrient shortage. Check and correct your pH before adding supplements.
White powdery coating on leaves is powdery mildew (PM), a fungal pathogen that thrives in conditions of high humidity and poor airflow. Increase air circulation, drop humidity, and treat with a diluted hydrogen peroxide spray or a potassium bicarbonate solution. Catch it early and it’s manageable; let it progress and it can spread through an entire crop quickly.
Stretchy, pale, elongated seedlings reaching toward the light are light-starved. Move your light closer (within manufacturer guidelines) or increase intensity. Conversely, if your plant’s top leaves are bleaching to white or light yellow and the light is close, you likely have light burn, raise the fixture.
For a comprehensive look at maximizing what your plants produce and troubleshooting yield-related issues, the guide at How to Increase Cannabis Yield: The Complete Optimization Hierarchy for Bigger, Denser Harvests covers the full optimization stack from genetics to harvest technique. Check out our cannabis blog for additional deep-dive articles on specific cultivation topics as well.
Post-Harvest: Storage and What to Do With Your Harvest
You’ve grown it, dried it, cured it, now you need to store it properly to preserve the quality you worked so hard to achieve. The enemies of cured cannabis are heat, light, oxygen, and humidity. Store your cured flower in glass mason jars with humidity packs at 58 to 62% RH, in a cool, dark location. A drawer, cabinet, or dedicated storage box away from heat sources works perfectly. Properly stored cannabis can maintain its quality for 12 months or more.
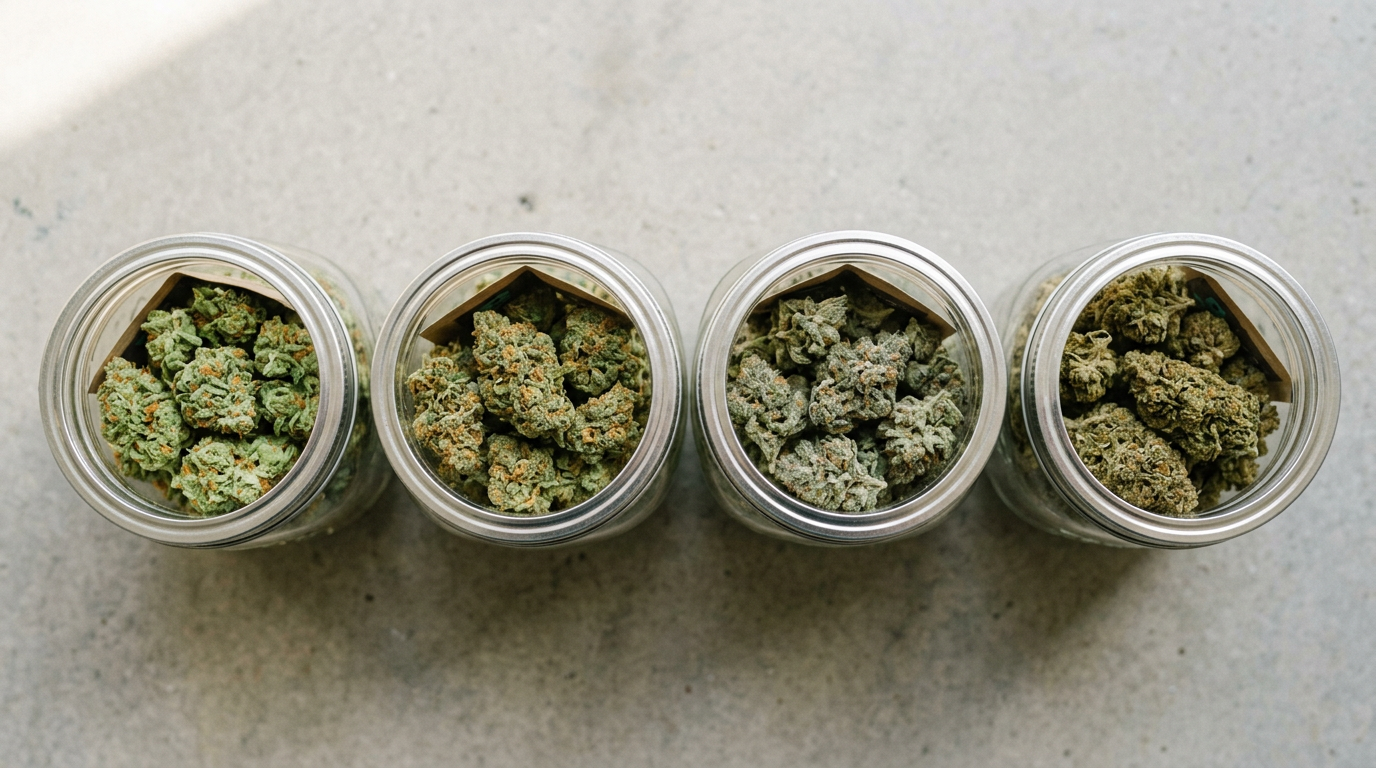
Avoid plastic bags for long-term storage, they allow moisture and oxygen exchange and can generate static that strips trichomes from buds. Avoid the refrigerator (temperature fluctuations and humidity issues) and the freezer for flower you’re actively using (freezing is fine for long-term storage of large quantities if done correctly with proper humidity control).
Beyond smoking your harvest, home-grown cannabis opens the door to a range of preparations. Making your own edibles starts with decarboxylation, heating your cannabis to convert THCA to THC, and then infusing into butter or oil. The science and technique behind this is covered thoroughly in The Complete Beginner’s Guide to Cannabis Butter: Decarb, Infuse, and Dose Like a Pro, which is a natural next step once you’ve got flower in hand.
Frequently Asked Questions
How long does it take to grow weed from seed to harvest?
The full seed-to-harvest timeline for a photoperiod feminized strain grown indoors typically runs 17 to 22 weeks, depending on how long you veg and your strain’s flowering time. That breaks down roughly as: 1 week germination, 2 to 3 weeks seedling, 4 to 8 weeks vegetative, and 8 to 11 weeks flowering. Autoflowering strains compress this significantly, often completing the full grow cycle in 10 to 13 weeks from seed. Add 1 to 2 weeks of drying and a minimum 2-week cure on top of that for harvest-ready flower.
How many plants can I legally grow at home?
This varies significantly by state. Most US states that permit recreational home cultivation allow 3 to 6 plants per adult, with household maximums typically capped at 6 to 12 plants. Colorado allows 6 plants per adult (no more than 3 in flower at a time), California allows 6 plants per person, and Oregon allows 4 plants per household. Some states only permit home cultivation for registered medical patients. Local municipal ordinances can impose stricter limits even in legal states, so always verify both state and local law before starting your grow.
What’s the easiest cannabis strain to grow for beginners?
Northern Lights is widely considered the most beginner-friendly photoperiod strain, it’s compact, mold-resistant, finishes in around 8 weeks of flower, and tolerates minor environmental fluctuations without throwing a fit. White Widow is another excellent beginner choice, known for its vigorous growth and adaptability to different growing mediums. For beginners who want the simplest possible grow, autoflowering genetics remove the need to manage light cycles entirely, making strains like autoflowering Gorilla Glue a very approachable starting point.
Do I need expensive equipment to grow cannabis at home?
Not at all, but quality in a few key areas pays dividends. The items worth investing in are: a reliable LED grow light (cheap lights often underperform their stated wattage), a pH meter (pH accuracy is critical), and a proper carbon filter for odor control. You can start a functional beginner indoor setup for $300 to $600 using a quality tent kit, a decent LED, and basic nutrients. The biggest mistake new growers make is buying cheap lights and then wondering why their yields are disappointing, light is the engine of your grow, and it’s worth spending on.
What’s the difference between growing in soil versus hydroponics?
Soil is more forgiving for beginners because the medium buffers pH and nutrient availability, giving you more margin for error. A quality amended organic soil can feed your plants for weeks without any additional nutrients. Hydroponic systems (DWC, coco, NFT) deliver nutrients directly to the roots and can produce faster growth rates and larger yields in experienced hands, but they’re less forgiving, pH swings and equipment failures can cause rapid plant stress. I recommend soil for your first two or three grows, then experiment with coco or hydro once you understand how your plants respond to different inputs.
When is the right time to harvest cannabis?
Harvest timing is best determined by examining trichomes under magnification (30x to 60x jeweler’s loupe or a digital microscope). Clear trichomes indicate the plant isn’t ready. Milky/cloudy trichomes signal peak THC content. Amber trichomes indicate THC is converting to CBN, shifting the effect toward sedation. Most growers harvest when trichomes are mostly milky with 10 to 30% amber for a balanced effect profile. Pistil color (darkening and curling) is a secondary indicator, when 70 to 90% of white hairs have darkened, you’re in the harvest window. Always confirm with trichome inspection.
How do I prevent mold during the drying and curing process?
Slow, controlled drying is your primary defense against mold. Target 60 to 65°F and 55 to 60% relative humidity in your drying space, with gentle air circulation (not blowing directly on buds). Avoid drying in a space that exceeds 65% RH. During curing, use hygrometers inside your jars and maintain 58 to 62% RH with Boveda or Integra Boost packs. Burp jars daily for the first two weeks to release moisture and off-gases. If you detect an ammonia smell when opening jars, your bud was jarred too wet, leave the lid off for several hours and increase burping frequency. Visible fuzzy mold growth means that jar is compromised.