The process of growing cannabis doesn’t end with collecting the buds. The next step is properly drying and curing the fresh cannabis to prevent mold growth. These procedures also help enhance the terpene profile, which is responsible for the taste and potency of the buds.
As a brief description of the drying and curing process, it is done slowly in a controlled environment with the use of some easily accessible items, like mason jars, drying racks, hygrometers, and others.
Before we provide you with a guide on the drying process as well as some reviews of good cannabis dryers, let’s talk about why you need to dry and cure cannabis in the first place.
Why is it important to dry weed?
Drying your cannabis flowers serves an important function because it can enhance the quality and shelf-life of the end product. But first, let’s quickly define the two processes involved, which are drying and curing.
As the name implies, drying means to dry fresh buds in order to reduce their moisture content. That way, they can be smoked properly. Meanwhile, curing entails storing the buds in closed containers over a period of at least two weeks.
So now, here are the three important reasons to dry weed:
It can increase potency.
Cannabis plants produce tetrahydrocannabinolic acid (THCA) and other cannabinoids during a process called biosynthesis. It involves certain compounds that are converted into other new compounds. For example, THCA is converted to THC.
If you don’t dry the marijuana properly, it can ultimately lower the level of THC and other compounds, such as cannabinoids. For best results, once you cut down your cannabis, make sure it’s kept in temperatures of around 60 to 70 degrees Fahrenheit.
Also, it’s necessary to regulate the correct humidity level. By doing so, you will help to promote the biosynthesis process while ensuring that the crop is rich in THC.
It can prolong the weed’s shelf-life.
If you wish to store your cannabis for a long time, drying and curing are necessary. When these two processes are done correctly, you can store your marijuana in an airtight container for up to two years without affecting the potency. But if you skip these procedures, your buds will lose their essential compounds and become more susceptible to mold and mildew.
It can enhance the flavor and quality of your smoke.
If you don’t know already, the unique and pleasant flavor and fragrance of your cannabis are due to the terpene content. However, these volatile compounds are at risk of evaporating and degrading even when exposed to low temperatures.
If the marijuana is not dried and cured correctly, it creates an ideal environment for enzymes and bacteria to break down into unwanted materials. It could also lead to unhealthy sugars that form when chlorophyll decomposes. These sugars are the main reason why you experience an unpleasant throat burn when smoking.
So for better quality buds, you must subject them to a slow drying and curing process to preserve the terpene content.
How do you dry marijuana perfectly?
A relatively slow drying process is best. It doesn’t have to take forever, but if you choose to “speed dry” your freshly harvested buds, it may affect the overall quality of the buds.
If you use heat to hasten the drying process, such as in a microwave or oven, the buds will have an unpleasant taste.
Now, let’s discuss the step-by-step procedure for drying marijuana. This method will work for you even if you’re just a beginner and have never dried weed before.
But first, you’ll need a drying rack. Though you can use a clothes hanger, a drying rack is recommended if you have lots of buds to be dried in a confined area.
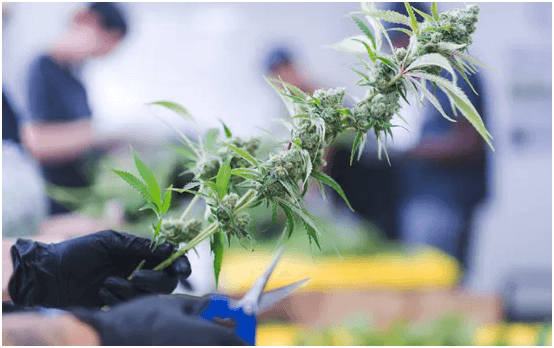
Step 1: Trim down your plant.
Some growers cut the plant down at the main stem, then hang the whole plant upside down to dry. Others cut off entire branches and hang them to dry. Still, some will cut off individual buds so that they can be laid out and dried on a rack or mesh screen.
Basically, it’s up to you. You can harvest your plant a piece at a time or trim your buds while they’re still on the plant so that you can hang the whole plant to dry.
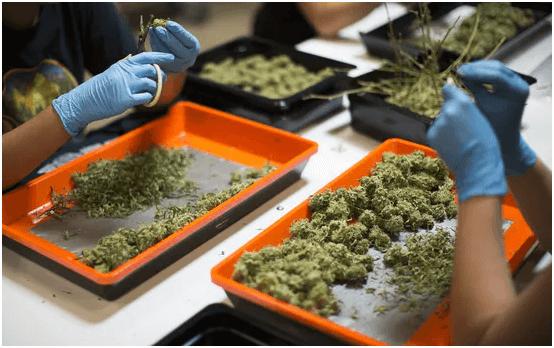
Step 2: Get rid of the extra fan leaves.
Before drying the buds, most growers will trim away the extraneous leaves. Not only should the big fan leaves be eliminated, but also the little leaves that grow on the buds. Doing so improves the appearance of the buds, but it will also result in a smoother smoking experience.
The amount of leaves you need to trim off depends on your preference. However, if you live in a humid area, you want to cut off as much as you can to speed up the drying process. In a very humid place, you should also consider removing the buds from the branches completely before drying.
If the humidity level is
- Under 30% RH: Consider leaving more leaves on the plant while cutting down the buds to slow down the drying process. The more leaves are left behind, the risk of overdrying is lower. For instance, you can trim the buds but don’t remove the extra fan leaves. Or, you can even not trim at all until after drying.
- Average humidity: If the humidity in your area is on the normal side, all you have to do is hang your cannabis upside down to dry.
- Over 60% Humidity: If it’s very humid in the area where you reside, separate the buds from the branches and spread them on a drying rack or mesh. This will help them dry in high humidity without attracting mold.
Step 3: Begin the slow drying process.
Why is it necessary to dry your cannabis slowly? Well, drying the buds is actually the first part of the curing process. Curing technically starts as soon as you cut down the plant, but you need to master the process of drying, too. If the results are poor, the end product will be disappointing.
When you speed up the drying process, you are skipping the most important part of curing. Buds that are quick-dried using a dehydrator, dry ice, a stove, or a microwave usually taste terrible. The smell is unpleasant, too, and the weed can even give you a migraine and paranoia.
Furthermore, drying the buds quickly in hot temperatures can burn off valuable compounds like terpene and certain cannabinoids. Therefore, it’s necessary to dry your buds slowly over a couple of days to several weeks.
There are two ways of drying marijuana buds:
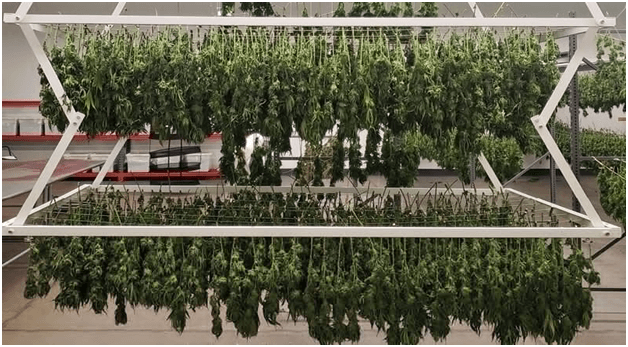
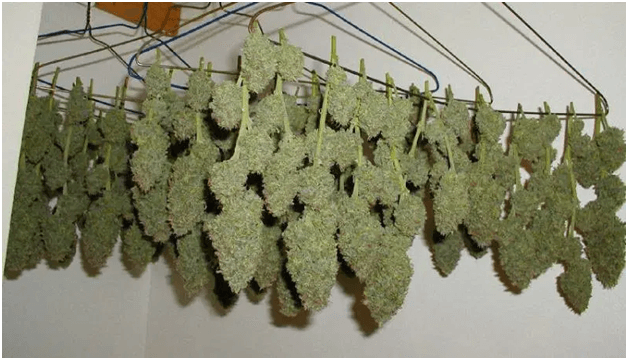
Hanging the buds
Hanging the bud upside down is the best way to dry cannabis. However, it’s crucial that your storage room is at the right temperature and humidity level. Keep the room between 60 and 70 degrees Fahrenheit and maintain the humidity at around 45 to 55%. You can also use a small fan, but don’t point it directly at the cannabis.
If you’re having problems controlling the temperature and humidity levels, you’ll have to purchase a humidifier or an air conditioning unit.
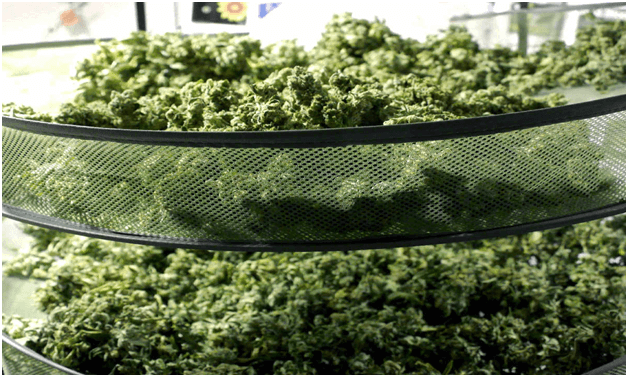
Using a drying rack
A drying rack can dry the buds faster than other methods since you’ll have to remove most of the stems from the buds. If you live in a humid area or if you’re drying lots of buds in a small area, this is the preferred method.
You can leave as many or as few leaves as you want. The more plant matter you leave, the slower the flowers will dry. If you don’t have a budget for a drying rack, you can also dry buds in paper bags or lay them out on a piece of cardboard.
The most important aspect of the drying process is to take it slow while checking regularly. So, don’t dry your cannabis in the back of your closet. You need to be able to access the buds every day.
Step 4: Continue drying until you feel the twigs snap or the buds feel dry to the touch.
The buds are finished drying when you can snap off the smallest buds with your fingers without leaving a string of plant matter behind. Stringiness means there’s still too much moisture inside.
If the buds are dry sooner than three to four days, it might mean that you’ve dried them too fast. That’s okay, and it’s not the end of the world. Getting things exactly right every time is challenging because of the size and density of the buds, besides the environmental differences.
If you accidentally get rid of too much moisture from the buds, the curing process slows down. They will still cure, though it may take a little longer.
Once you’re satisfied that your cannabis is dry enough, it’s time to proceed with the curing process. If you’re using the method of hanging your weed upside down, your buds can already be placed in jars when the outside of all the buds are dry to the touch. The bigger stems may still be bendy, while the smaller stems will snap when you pull the buds down. Usually, if one bud pops off, you’re good to go.
Just be careful when pressing marijuana into the jars. If you’re too forceful, the trichomes may burst, reducing the quality of your weed.
Which are the best cannabis bud dryers?
You can dry your weed in a shed or storage room, but you’ll have to control the environment strictly. A drying box or cabinet will make your life much easier, and the results will be much better. Here are the best weed dryers available in the market today:
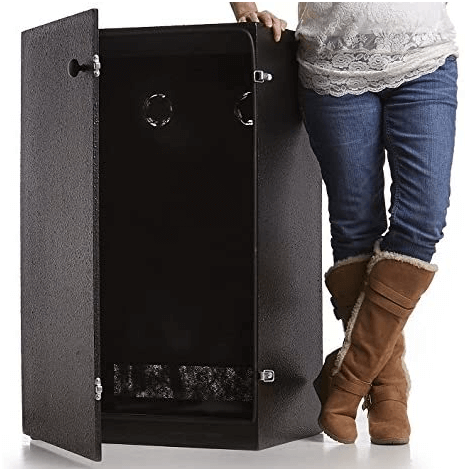
Magic Herb Dryer Plant Drying Box
Estimated Price: $395 to $400
Product Dimension: 20 x 16.5 x 36 inches
This herb dryer will help to dry your cannabis buds easily and efficiently. After harvesting, simply hang the colas in the drying box and leave them. The internal environment of this drying box is controlled, providing even and complete drying. It can dry your cannabis within ten days, and you end up with perfectly dried weed without any fuss.
As for the size, it can be placed anywhere that’s convenient for you. This magic drying box comes with two small fans, as well as an intake and exhaust system that can quickly adjust the indoor environment. It can also protect the buds from pests while allowing a faster rate of air exchange. Moreover, it features lockable latches so that your herbs will be secure.
Pros:
- It features an odor elimination system.
- It’s big enough to hold several plants.
- It comes with two fans for faster drying.
- The manufacturer offers a lifetime warranty.
Cons:
- Some users complained that it doesn’t sit properly on the ground.
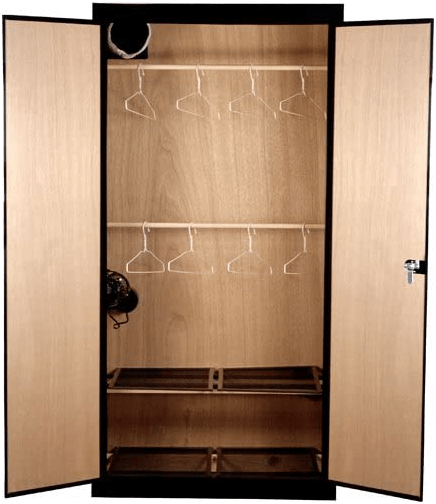
SuperCloset Deluxe Herb Dryer
Estimate Price: $250 to $255
Product Dimension: 72 x 36 x 24 inches
Because of its vertical design, this drying box can be placed in any area of your office or home. This herb dryer can house up to 24 plants at once, but we recommend that you leave enough space for proper ventilation. It can take around five to eight days for your weed to be completely dried in this dryer.
This box has a maximum weight capacity of 100 pounds. It also saves energy since it only works on 50 watts. If you’re into energy-saving devices, then you’ll surely love this product.
What’s more, it comes with a thermometer and hygrometer already, so you can monitor the moisture level and temperature inside it. It has steel blade fans to support the exhaust system, thus preventing the growth of mold and mildew by controlling the humidity.
Pros:
- It’s energy efficient.
- It can hold up to 24 plants.
- It has a vertical design, allowing you to dry plants in a vertical position.
Cons:
- It’s quite bulky.
More Cannabis Drying Tips
The first thing to know when drying cannabis is that it’s best to dry your weed hanging upside down. This technique allows the leftover water and nutrients to flow down.
The second thing to consider is the drying time. If you try to dry your weed very quickly, it will lead to the flowers becoming dehydrated and crisp while the inside parts are still damp and moist. There needs to be a balance.
However, drying your weed too slowly is also not advisable since it will be prone to mold and mildew, especially if the humidity is too high.
Looking for the best cannabis dryer can be daunting, especially if you’re new to the growing and drying processes. But no worries – the two dryers mentioned above can help you.
FAQs
How do you air dry cannabis?
A simple technique for drying weed is air drying. Just follow these tips:
- Spread the weed on the rack or baking tray lined with a cheesecloth, then place the tray in a warm area away from direct sunlight.
- Turn the plants every 10 to 12 hours. Stick to this method, and your buds will be dried in about two to three days.
Can you use an herb drying rack?
Using an herb drying rack is simple. Just separate your weed into single sprigs or stems and space them out on the drying rack. Place the drying rack in an area that’s well-ventilated and not in direct sunlight. This will prevent them from overdrying and losing their flavor.
Should you wash your buds before drying?
You can wash your crop after harvesting to get a clean and fresh product. Wash with cool water and gently shake to remove any excess water, loose leaves, or insects before moving on with the drying process.
Some people prefer to eat their buds or use them in food and beverages, so it’s usually better to wash them before drying.
Final Thoughts
Drying weed can be time-consuming, but if you’re patient, you’ll get the results that you want in the end. Though the drying and curing process usually takes up to a month or two, it shouldn’t be overlooked. It’s so important that some growers even prolong it for up to six months to get better results.
Listed above is the detailed guide on how to dry weed, along with reviews of the best drying boxes to ensure that you end up with high-quality buds. These drying boxes will make your task so much easier, and they can keep your weed safe from pests, mold, and mildew.